background image

The sprayer is designed with quality components. If you experience any issue, we 
recommend first following the trouble shooting document and film available on our 

website: www.kreaswiss.com. In most cases a part has been forgotten or the product 
needs  a  thorough  cleaning.  If  your  issue  persists,  please  contact  your  reseller  for 
additional  support.  Please  always  include  the  article  number  (page  13)  in  any 

correspondence. 

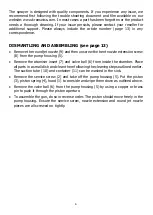
DISMANTLING AND ASSEMBLING (see page 13) 

Remove the round jet nozzle (9) and then unscrew the bent nozzle extension screw

(8) from the pump housing (5).

Remove the atomiser insert (7) and valve ball (6) from inside the chamber. Place
all parts in a small dish and clean them following the cleaning steps outlined earlier.

The suction tube (10) and container (11) can be washed in the sink.

Remove the service screw (2) and take off the pump housing (5). Put the piston
(3), piston spring (4), hood (1) to one side and wipe them down as outlined above.

Remove the valve ball (6) from the pump housing (5) by using a copper or brass
pin to push it through the piston aperture.

To assemble the gun, do so in reverse order. The piston should move freely in the
pump housing. Ensure the service screw, nozzle extension and round jet nozzle

pieces are all screwed on tightly.

Summary of Contents for oilSPRAY

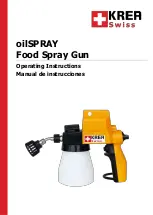
Page 1: ...oilSPRAY Food Spray Gun Operating Instructions Manual de instrucciones...

Page 2: ......

Page 3: ...thout supervision If the supply cord is damaged it must be replaced by the manufacturer its service agent or similarly qualified persons in order to avoid a hazard At no time should the electrical com...

Page 4: ...ECIFICATIONS Nominal Output 30 W Delivery Rate 80 140 g min Viscosity rate 18 36 DIN sec Container Capacity 550 ml Weight approx 1 2 kg Sound level 75 dB Based on thin to medium viscosity oils Average...

Page 5: ...at the turning point The supplied R4 round nozzle is the most suitable for working with thin materials like vegetable oil but the R6 and R8 can also be used for a wider distribution For higher viscosi...

Page 6: ...ension screw 8 from the pump housing 5 Remove the atomiser insert 7 and valve ball 6 from inside the chamber Place all parts in a small dish and clean them following the cleaning steps outlined earlie...

Page 7: ...warranty Only original spare parts may be used in the event of repairs The spray gun must be serviced and cleaned as described in the operating instructions The guarantee starts upon customer receipt...

Page 8: ...mantenimiento del producto no deben efectuarlas ni os sin la supervisi n de un adulto responsable En caso de da os en la conducci n de corriente sta deber ser sustituida para evitar situaciones peligr...

Page 9: ...ase 550 ml Peso medio ca 1 2 kg Nivel de ruido 75 dB Con aceite de viscosidad media Con una distancia media de 2 metros de distancia 3 PRIMEROS PASOS Consejos Para El Uso ANTES DE EMPEZAR asegurarse q...

Page 10: ...m s sencilla de hacer esta operaci n es tener la carcasa de la bomba con la mano izquierda y con la derecha girar el prolongador de la boquilla en la direcci n deseada 4 LIMPIEZA IMPORTANTE Antes de...

Page 11: ...lavabo Quitar el tornillo de servicio 2 y quitar la carcasa de la bomba 5 Poner el pist n 3 el muelle del pist n 4 el cap 1 a lado y limpiarlos con un trapo Sacar la v lvula de bola 6 de la carcasa d...

Page 12: ...que ser mantenida limpia como se describe en las instrucciones y modo de empleo La fecha de compra del consumidor final determina el comienzo del periodo de garant a La garant a no cubre las aver as d...

Page 13: ...12 004 013 Piston spring Muelle del pist n 5 12 004 005 Pump housing Carcaja de la bomba 6 12 005 003 Adapter Adaptador 7 12 507 010 Atomiser unit Inserci n pulverizadora 8 12 508 220 Nozzle extension...

Page 14: ...14 Notes Notas...

Page 15: ......

Page 16: ...KREA Swiss AG Hauptstrasse 137C 8274 T gerwilen Switzerland Web www kreaswiss com Email info kreaswiss com Tel 41 0 71 686 60 40 Fax 41 0 71 686 60 43...

Reviews: