background image

1

Contents

Components checklist

Assembling your VTX-C

Installing the VTX-C in your pool

11 

Fine-tuning your VTX-C

12 

Authorised Kreepy Krauly Accessories

13 Troubleshooting

18 

Looking after your VTX-C

19 

What should I expect from my VTX-C?

20 

Warranty information

Summary of Contents for VTX-C

Page 1: ...P R OUDLY AUST R A L I A N D E S I G N ED A ND MAD E VTX C OWNER S MANUAL Exclusively for...

Page 2: ...Don t worry it doesn t take long and this guide will walk you through assembly and installation step by step This booklet should answer all your questions However if you need a little extra help feel...

Page 3: ...4 Assembling your VTX C 6 Installing the VTX C in your pool 11 Fine tuning your VTX C 12 Authorised Kreepy Krauly Accessories 13 Troubleshooting 18 Looking after your VTX C 19 What should I expect fro...

Page 4: ...de this box Components checklist Male male hose x1 Male female hose x9 Hose weights x2 Hose protector sleeve Smart Skim Smart Skim adaptors used with most vacuum plates used with Polyplastics 190 210...

Page 5: ...3 Swivel head assembly Weighted bumper strap Main body Compact Scrubbing seal Sole Serial number VTX C cleaner unit Floatation assembly Side leaf scoop...

Page 6: ...s able to rotate freely Attach the Slip Rings and Sole Fit the slip rings and sole to the base of the main body Ensure the sole is fitted all the way around Assembling your VTX C STEP 1 STEP 2 4 TIP...

Page 7: ...arms into the grey housing until they click STEP 3 5 STEP 4 Attach the Bumper Strap Insert the bent end of the bumper into the back of the main body near the bottom of the cleaner Insert the other end...

Page 8: ...et started a First clean the skimmer and pump basket b Check the water level c Brush down the sides of your pool d Next make sure the return jets are facing downwards e Then backwash or clean your car...

Page 9: ...on your vacuum plate you may have to use a different skim adaptor we ve included three to choose from You know you re using the right one when there s a tight fit See our website for help used with m...

Page 10: ...r corner of your pool plus around 1 5 metres extra this will optimise the coverage of your VTX C Attach the Hose Weight Pull apart the second and third hose sections slide on the weight then reconnect...

Page 11: ...onnect the Hose to the VTX C Submerge the VTX C in your pool to expel all air rotate to help remove trapped air Now connect the weighted end of the submerged hose to the swivel head assembly of the VT...

Page 12: ...edge or skimmer box door STEP 7 10 Option 1 Hose through the skimmer box door Option 2 improves surface skimming Hose through the top of the skimmer box with the cover removed STEP 8 Turn on the Pump...

Page 13: ...cleaner is lifting greater than 45 move the hose weight towards the cleaner To test if it is sitting correctly turn off the pump tow the VTX C into 1 2 metres of water and observe how it sits when it...

Page 14: ...e cleaner Ask your local pool professional for setup advice for your pool Auto Skim Upgrade Provides premium surface skimming and vacuum regulation The combined Vacuum Plate Auto Skim Valve and Anti V...

Page 15: ...the vacuum plate submerge the valve in water opening and closing until it moves freely Check Smart Skim spring is correctly attached Check for a blockage in the main body of your VTX C see page 19 VT...

Page 16: ...ose is damaged and replace damaged section with a new length of sectional hose Some damage can be visually inspected or a hissing sound can be heard coming from the hose when raised out of the water a...

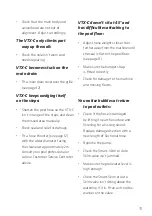
Page 17: ...ll our Customer Service Centre for advice VTX C doesn t sit at 45 and has difficulties attaching to the pool floor Adjust hose weights closer to or further away from the machine until the seal is flat...

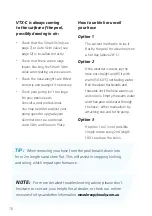
Page 18: ...by the pool for a few hours on a hot day above 28 C Option 2 If the weather is cooler lay the hose out straight and fill it with warm 50 60 C not boiling water Roll the water backwards and forwards un...

Page 19: ...valve and baffle plate Ensure prongs on baffle plate are not damaged or missing Replace if required Refit the seal slip rings and sole flow valve Beware of the pool blanket effect Pool blankets preven...

Page 20: ...water Periodically check the suction seal scrubbing sole and bumper for wear and tear If they need replacing see your pool shop Looking after your VTX C 18 TIPS TO PROTECT YOUR HOSE Never stretch or l...

Page 21: ...it Cleans Your VTX C will clean your pool daily with your normal filter cycle by gently Skimming Scrubbing and Vortex Vacuuming your pool surface Its side scoop in combination with Smart Skim will rem...

Page 22: ...recommend removing the cleaner from the pool when shocking your pool The use of non genuine parts and over chlorinating your pool may void your warranty impair your VTX C s performance or result in c...

Page 23: ......

Page 24: ...Service Department on 1800 777 255 Monday to Friday 9am 5pm in your local area Alternatively contact your local Clark Rubber pool shop professional www kreepykrauly com au We reserve the right to rev...

Reviews: