Rev. Date: 3/8/17
Page 12
MODEL #4000-G-A
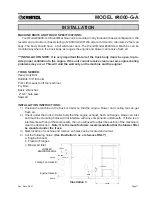
5) Place the machine in the truck or trailer and line it up with the holes.
6) Drill 5/8" holes on all four corners of the base using the machine hold downs as guides.
7) Fasten machine down on all four corners using 1/2” bolts, washers, lock washers and nuts.
(See illustration 4)
Note: Hardware is not included and length of bolts may vary due to
thickness of floor.
8) Run exhaust out of the truck or trailer using the supplied flexible exhaust (See illustration 4)
Note: Make sure the exhaust is routed away from the blower, engine air intake and cool-
ing fan intake.
9) Attach muffler to flexible exhaust and mount underneath truck or trailer using supplied mounting
bracket. (See Illustration 4)
Note: Secure mounting bracket with two 5/16" lag bolts.
10) Attach the supplied 8” hose to the back guard and fresh air flanges. Secure with hose clamps.
Do not cover the air inlet with any type of panel that may restrict airflow (louvered panel. expanded
metal, mesh screen, filter, ect). It is imperative that the cooling fan has the necessary volume of
air to keep the engine and other components from overheating.
WARNING: Engines give off carbon monoxide, an odorless, colorless, poison gas. Breath-
ing carbon monoxide can cause nausea, fainting or death. Do not start or run engine
when exhaust is not properly ran outside.
11) Mount fuel tank in a convenient ventilated location and run fuel lines from gas tank to engine fuel
filter. (See illustration 5)
WARNING: For any gas or diesel equipment that is not installed in a truck or trailer by
Krendl Machine, warranty will be voided if not installed to the exact instructions of this
manual. (See installation section).
Fuel Filter
Illustration 4
Illustration 5


