BIC · Edition 09.22
EN-10
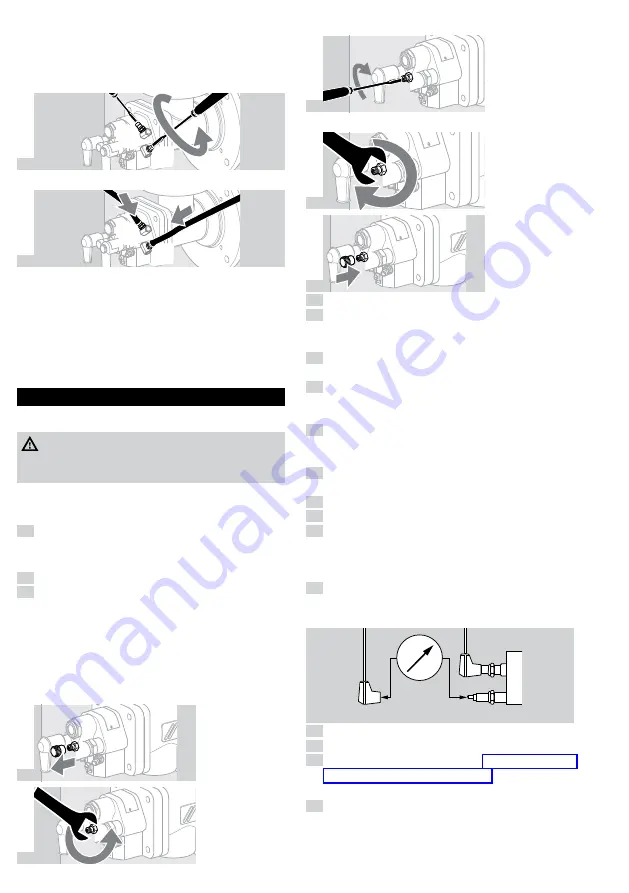
5.13 Integrated pilot on the BIC..L
➔
Air pressure test nipple
l
, outside dia. = 9 mm
(0.35").
➔
Gas pressure test nipple
g
, outside dia. = 9 mm
(0.35").
1
g
l
➔
Loosen the screws 2 turns.
2
g
l
➔
Pilot:
p
gas
= 30–50 mbar,
p
air
= 30–50 mbar.
➔
Check flame stability and ionization current.
➔
The gas and air pressure of the integrated pilot
must be higher than the gas and air pressure of
the main burner.
6 CoMMIssIonInG
6.1 Igniting and adjusting the burner
WARnInG
– Ensure adequate ventilation of the furnace
chamber before each burner start!
➔
The burner body will become hot during operation
with preheated combustion air. Provide protection
against accidental contact as required.
1
All valves of the installation must be checked for
tightness before ignition.
6.2 setting the low-fire rate
1
Set the valves to ignition position.
2
Limit the maximum gas volume.
➔
Should an adjustable gas restrictor be installed
upstream of the burner, open the restrictor by ap-
prox. a quarter.
➔
on burners with integrated gas flow adjust-
ment ( BIC 65–140):
on delivery, the flow rate
restrictor is 100% open. Close the flow rate rate
restrictor with approx. 10 turns:
3
4
➔
Loosen the lock nut only.
5
Q-
➔
Set flow rate
Q
.
6
7
8
Gaszufuhr öffnen.
9
Ignite the burner.
➔
The safety time of the automatic burner control unit
starts to elapse.
10
If no flame forms, check and adjust the gas and air
pressures of the start gas adjustment.
11
In the case of operation with bypass (e.g. when
using an air/gas ratio control): check the bypass
nozzle and adjust if required.
12
In the case of operation without bypass (e.g. when
using an air/gas ratio control without bypass): in-
crease the low-fire rate setting.
13
Check the basic setting or bypass of the air control
valve.
14
Check the position of the restrictor in the air line.
15
Check the fan.
16
Reset the automatic burner control unit and re-ig-
nite the burner.
➔
The burner ignites and proceeds to normal op-
eration.
17
Check flame stability and ionization current at low-
fire rate. Switch-off threshold – see automatic
burner control unit operating instructions.
+
μ
A
–
Z
I
18
Monitor flame formation.
19
Adjust the low-fire rate settings if required.
20
If no flame is detected – see page 14 (8 Assis-
tance in the event of malfunction).
6.3 setting the high-fire rate
1
Set the air and gas circuit of the burner to high fire
while continuously monitoring the flame.
➔
Avoid CO formation – always operate the burner
with excess air when starting up!


