III - 9
Operation
3.7.5 Sharpening the cutters
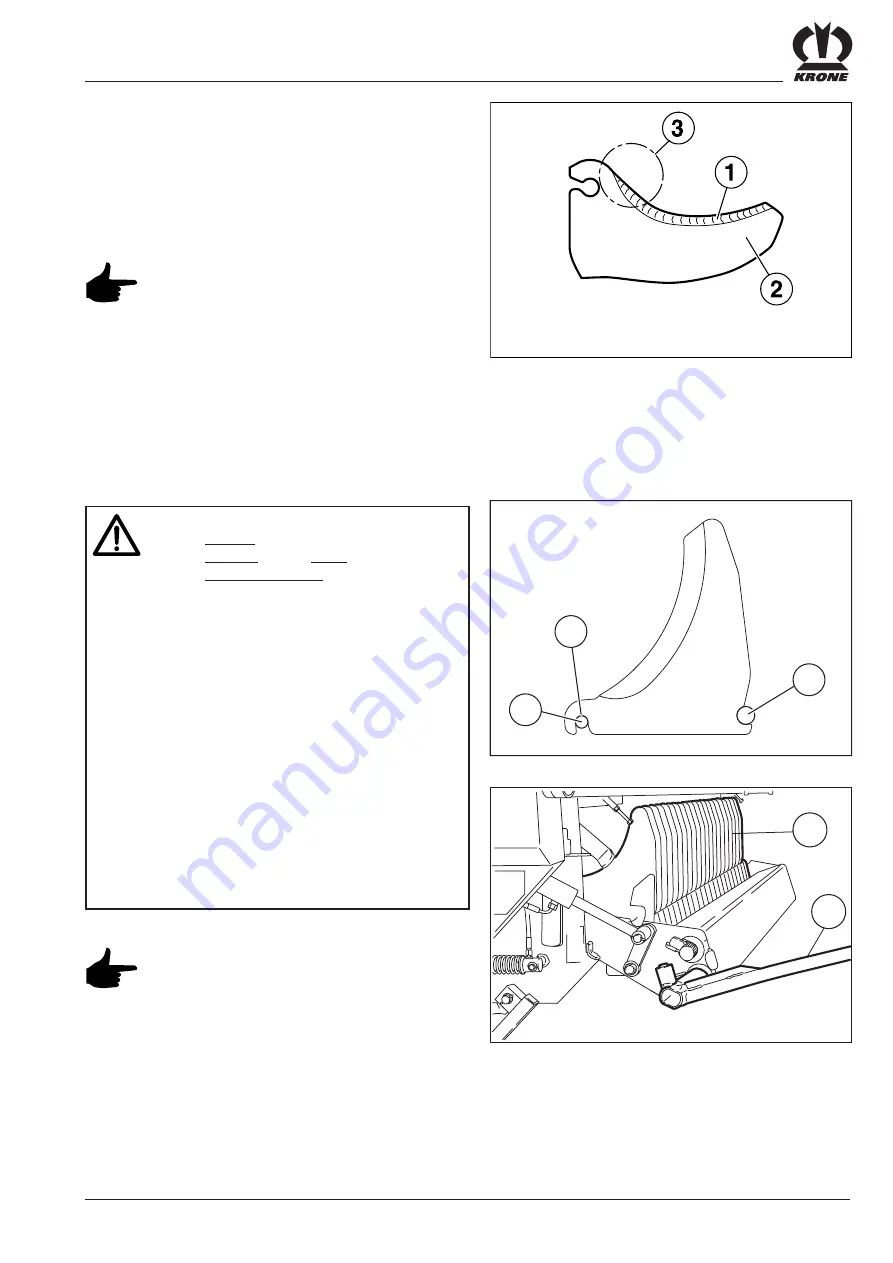
Check the cutters (2) for sharpness every day. When
necessary, sharpen the cutters which have been removed
by working from the back of the cutting edge (1). Only
sharpen from the side which is not fluted. When
sharpening be sure that no notch is produced in area (3).
If possible, use the KRONE sharpener for
sharpening.
ET Part no. for the KRONE cutter-sharpener
cutter holder 940 003-0.
KRS-1-06
3.7.6 Installing the cutters
Installation is carried out in the reverse order.
Make sure that:
•
the cutters are correctly located on
the pins (1) on the pivot and in
the safety rollers (2) .
•
Possible sticky contaminants must be
removed from area (3) of the cutters.
•
The safety rollers (2) must be able to
turn easily while tensioning the safety
levers using the multi purpose key (4).
This ensures,
•
that only minimum effort is required to
turn the multi purpose key (4).
•
that the response shaft of the single
cutter safety system operates correctly.
(See chapter 6.11 Checking the safety
rollers of the single cutter safety
system).
•
Before the cutter unit has been
retracted, a check must be carried out
to make sure that all cutters (5) are in
alignment and are correctly installed.
4
5
KDW05144
KDW05145
2
1
3
Summary of Contents for 4XL-RGD
Page 4: ...Foreword ...
Page 10: ...I 4 General information ...
Page 15: ...II 5 Safety ...
Page 22: ...II 12 Safety ...
Page 64: ...VI 18 Maintenance ...
Page 66: ...VII 2 Overwintering ...
Page 68: ...VIII 2 Recommissioning ...
Page 70: ...IX 2 Faults causes and removal ...
Page 80: ...A 10 Appendix Operator friendlyoperation A2 Electrical circuit diagram ...
Page 81: ...A 11 Appendix ...
Page 82: ...A 12 Appendix ...
Page 83: ...A 13 Appendix ...


