background image

I - 1

General information

1

General information

1.1 Use

The short-cut feeder wagon is a feeder wagon with
metering rollers. It is designed for the collection,
transport and putting down of agricultural stalk material.
The variable cutter theoretically provides for cutting
lengths up to 40mm.

1.2 Information on the product

1.2.1 General information

These operating instruction apply to short-stalk loading
wagon Models  XXL-RGD and 4XL-RGD from Machine
no. 515 000

1.2.2 Manufacturer’s address

Maschinenfabrik Bernard Krone GmbH
Heinrich-Krone-Strasse 10
D-48480 Spelle (Germany)
Telephone: 0 59 77/935-0
Facsimile 0 59 77/935-339
E-mail: info.ldm@krone.de

1.2.3 Certification

Declaration of conformance (requirements of EC
Directive 89/392/EEC; 3 and Directive amendment of
22.07.93 are complied with)
See inside title page

1.2.4 Identification label

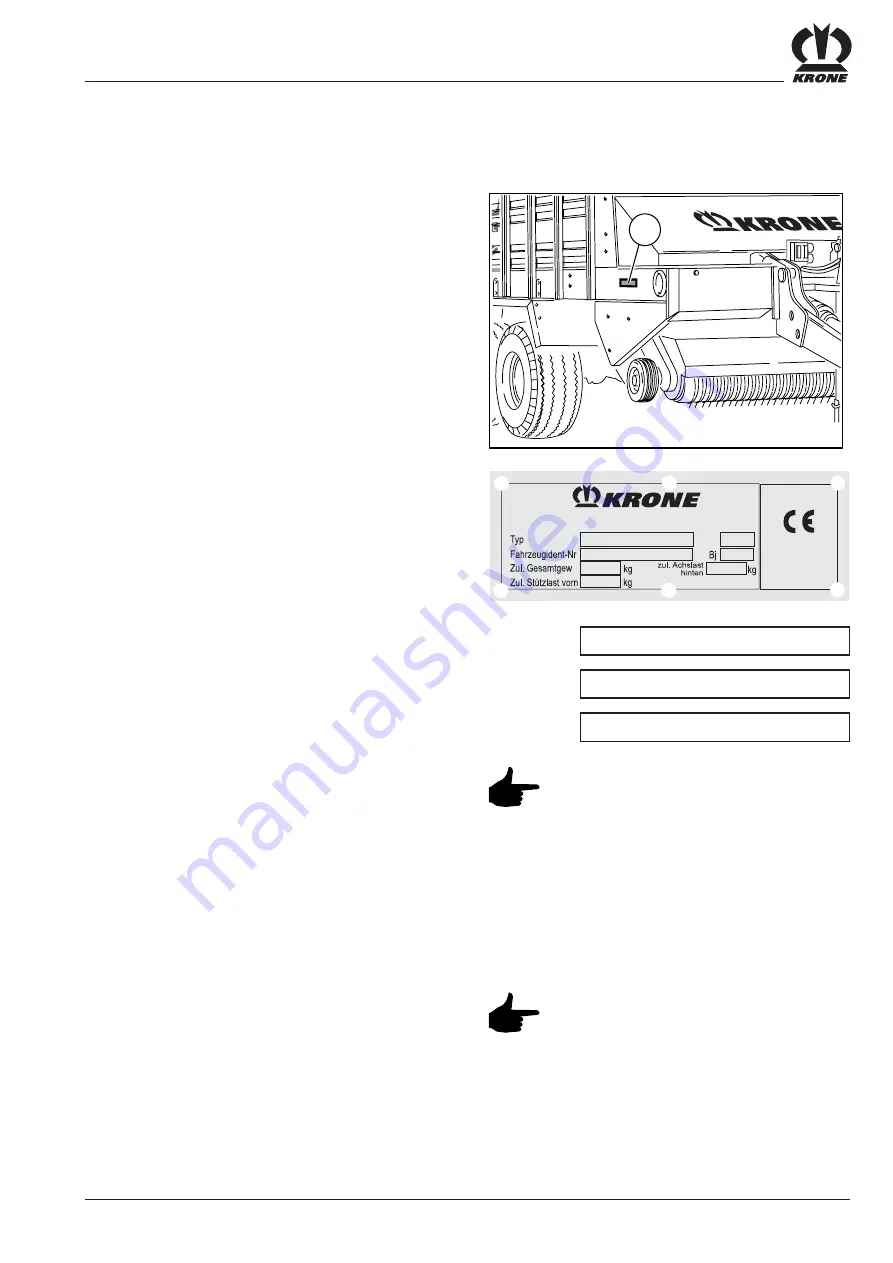
M a s c h i n e n f a b r i k   B e r n a r d   K r o n e   G m b H

Heinrich-Krone-Str. 10 D-48480 Spelle

M a d e   i n

G e r m a n y

Model

Year of
manufacture

Vehicle-
ident-no.

The whole identification label has
documentation value and must not be
altered or made unrecognisable

1.2.5 Information for enquiries and

orders

When ordering spare parts, the model number, vehicle
identification number and the year of manufacture of
the corresponding machine must be quoted.

Spare parts form other manufacturers
may only be used after consultation
with the manufacturer of this
equipment. In the interest of safety,
only genuine parts and  accessories
authorised by the manufacturer should
be used. No liability can be accepted
for  consequences resulting from the
use of other parts.

KDW00050

1

Summary of Contents for 4XL-RGD

Page 1: ...Operating instructions No 4045 4 GB Short cut feeder wagon XXL RGD 4XL RGD from Machine no 515 000 ...

Page 2: ...verleaf Spelle 01 10 02 Dr Ing Josef Horstmann General Manager pp Dr Ing Klaus Martensen Manager of Construction and Development Wolfgang Ungruh Manager of Quality Assurance We are solely responsible for the product to which this declaration refers complying with the relevant fundamental safety and health requirements of EC Directive 89 392 EEC 3 and DirectiveAmendment of 22 07 93 EC Declaration o...

Page 3: ...hort cut feeder wagon and to maintain the value of your investment Please note the following Always store these operating instructions ready to hand in the container provided for them These instructions are a component of your machine Only operate your machine in accordance with these instructions It is vitally important that you follow the safety instructions Likewise follow the relevant accident...

Page 4: ...Foreword ...

Page 5: ...he machine II 10 3 Operation III 1 3 1 General information III 1 3 2 Special safety instructions III 1 3 3 Hitching up to the tractor III 2 3 4 Connections III 3 3 5 Pick up III 6 3 5 1 Special safety instructions III 6 3 5 2 Normal position adjusting the working height III 6 3 5 3 Pick up drive overload safety device III 6 3 5 4 Pick up roller feelers rear on special request III 6 3 6 Baffle plat...

Page 6: ...ing the oil VI 7 6 9 Chain tension VI 9 6 10 Scrapers VI 10 6 11 Checking the safety rollers of the single cutter safety system VI 11 6 12 Lubrication VI 12 6 13 Brake system VI 15 6 14 Care after daily use VI 17 7 Overwintering VII 1 7 1 Special safety instructions VII 1 7 2 General information VII 1 8 Recommissioning VIII 1 8 1 Special safety instructions VIII 1 8 2 General information VIII 1 9 ...

Page 7: ...ance requirements of EC Directive 89 392 EEC 3 and Directive amendment of 22 07 93 are complied with See inside title page 1 2 4 Identification label Maschinenfabrik Bernard Krone GmbH Heinrich Krone Str 10 D 48480 Spelle Made in Germany Model Year of manufacture Vehicle ident no The whole identification label has documentation value and must not be altered or made unrecognisable 1 2 5 Information...

Page 8: ...borne solely by the user Proper use includes following the operating maintenance and service instructions stipulated by the manufacturer Permitted loads agricultural storks such as hay straw and grass silage The collection and loading of other materials is only permitted after agreementwiththemanufacturer In any case the basic requirement is that the load material is laid in swathes and picked up ...

Page 9: ...tion Individual cutter protection Cutting length for 20 cutters approx mm 80 80 39 cutters approx mm 40 40 Pick up working width DIN11200 mm 1800 1800 Powerconsumption approx kW HP 95 130 105 143 Permittedladenweight kg 16 000 19 500 19 500 Loadingtime approx min 6 9 7 10 Unloadingtime approx min 4 5 5 5 Ground clearance of the hydraulic articulated tow bar approx mm 750 750 Single or double actin...

Page 10: ...I 4 General information ...

Page 11: ...The owner must also ensure that the contents of the operating instructions are fully understood by the personnel Maintenance work which is not described in these operation instructions must only be carried out by authorised specialist workshops 2 3 Dangers involved in not following the safety instructions Not following the safety instruction will put at risk personnel the environment and the machi...

Page 12: ...he purpose 13 Abide by the permitted axle loads laden weight and transport dimensions 14 Check and attach transport equipment such as lights warning devices and any possible safety devices 15 Ancillary equipment ropes chains and rods etc and remotely operated devices must be positioned so that they do not cause any unintentional movement in all transport and working positions 16 See that equipment...

Page 13: ...main inside the area of the rotating power take off shaft or articulated shaft 12 Always shut down the power take off shaft when the bend is unnecessarily too great 13 Caution After shutting down the power take off shaft there is a danger that parts which are subject to inertia will continue running Do not approach the machine during this time Work must not be carried out on the machine until it i...

Page 14: ... the electrical system 7 Protective devices subject to wear must be checked regularly and replaced at the proper time 8 When carrying out electric welding work on the tractor and attached equipment disconnect the cable from the generator and the battery 9 Spare parts must at least comply with the technical requirements laid down by the equipment manufacturer This is only guaranteed by using genuin...

Page 15: ...II 5 Safety ...

Page 16: ...II 6 Safety KDW01170 3 3 7 6 4 9 10 KDW01160 1 7 8 5 4 8 9 6 8 2 Position of safety labels on the machine Left side of the wagon Right side of the wagon ...

Page 17: ...ft Theoperating pressure of the hydraulic unit must not exceed 200 bar 939 101 4 MAX 1000 min MAX 200 bar Part no 939 101 4 1 x 7 Part no 942 196 1 2 x Neverattempttoaccessthe crushing or danger zone while the parts are still able to move 3 Part no 939 407 1 2 x Neverattempttoaccessthe pick up area while the tractor engine is switched on and the powertake offshaftis running 6 Part no 939 412 2 2 x...

Page 18: ...II 8 Safety KDW01170 3 3 7 6 4 9 10 KDW01160 1 7 8 5 4 8 9 6 8 2 Left side of the wagon Right side of the wagon ...

Page 19: ... accumulator is subject to gas and oil pressure Disassemble and repair in strict accordance with the instructions in the technical handbook only with hydr Deichselfederung 9 Part no 942 200 1 2x Keepsufficientdistanceto rotatingmachineparts ...

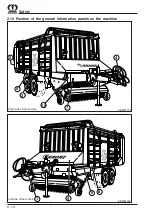
Page 20: ...II 10 Safety 2 14 Position of the general information panels on the machine Left side of the machine Right side of the machine KDW01170 4 7 3 5 2 10 KDW01160 1 9 8 6 ...

Page 21: ... 0 bar 25 939 573 0 1 2 3 939 218 1 1x 25 km 939 145 1 1x 40 km 942 364 0 1x 65 km 942 134 0 1x 939 478 3 1x 4 939299 1 1x 6 5 7 9 939 573 0 1x Nur bei Druckluft 333 700 0 1x 333679 5 1x sieheReifentabelle 2x 8 333 265 1 1x 333 265 1 Aus Ein 50h 50h 17 19 50h 50h 50h 50h KDW10230 50h KDW05030 50h KDW04050 50h 100h BEI Z RPENDEL nur Hitch 50h KDW05040 50h 50h 50h bei Lenkachse bei Lenkachse 100h 25...

Page 22: ...II 12 Safety ...

Page 23: ... and short cut feeder wagon from rolling away During operation keep to an adequate safety distance from all moving parts on the short cut feeder wagon This especially applies to the pick up device for the pressed material Only remove blockages from this device when the power take off shaft is switched off and the engine is shut down No one must remain within the discharge area or the area where th...

Page 24: ...for the purpose only applies to compressed air brakes Towing height see Page A 2 3 3 Hitching up to the tractor No persons are permitted inside the dangerarea The short cut feeder wagon must be adjusted to the tractor currently being used see Appendix A Inital hitch up 3 3 1 Couple the towing eye of the trailer to the tractor hitch When hitching up the wagon proceed as follows Connect the electric...

Page 25: ...double acting tractor valve with pressurelessreturn or a single acting connection with pressurelessreturnconnection Follow the colour coding on the tractor hydraulicsystem Fortractorswithload sensing hydraulic systems see Section Hydraulicunit 3 4 2 Electrical connection in general for standard and operator friendly units Connect the 7 core cable connection 3 for the lights to the 7 way plug conne...

Page 26: ...tor friendly control unit to the 3 way power socket on the tractor 3 4 3 Compressed air connections for air brakes Plug the coloured couplings of the compressed air hoses 1 into the couplings with the corresponding colours on the tractor First connect the yellow coupling and then the red coupling Disconnection is carried out in the reverse order Arrange the cable connections between the tractor an...

Page 27: ...hains 2 of the guard to the articulated shaft Always install the overload coupling on the machine wagon side see A1 Initial hitch up Connect the separate hydraulic hose from the arrester ram of the steering axle yellow protective cap to a single acting connection on the tractor hydraulic system 3 4 6 Hydraulic connection for blocking trailing steering axle special fitting Follow the tractor manufa...

Page 28: ...f the baffle plate to the situation and conditions of the crop Normalposition In principle suspend the baffle plate 1 at the top using the chain 2 Very short load material requires a lower setting For boggy ground the pick up can also be fitted with additional wheels behind to give a wider track width than the wheels of the tractor On flat surfaces with the pick up lowered the height of the rear r...

Page 29: ...gn objects Either 0 19 20 or 39 cutters can be switched in according to choice via the central cutter switch The cutters are arranged in on level Theoretically the shortest cutting length is 40 mm Longer lengths can be achieved by swinging the cutter sets away using the central adjustment see Table The cutter unit has a hydraulic cutter 0 system so that if there are any blockages the cutter can be...

Page 30: ...ical system again Hold the cutter switch at Position Lift until the red indicator lamp goes out 3 7 4 Switching cutters Lifting the articulated tow bar makes it easier to work in comfort under the vehicle Secure the raised vehicle with the supportingfoot Lower the cutter unit fully At the same time activate the Switch cutters switch set to Lower and press Quit key The red indicator lamp continues ...

Page 31: ...r Make sure that the cutters are correctly located on the pins 1 on the pivot and in the safety rollers 2 Possible sticky contaminants must be removed from area 3 of the cutters The safety rollers 2 must be able to turn easily while tensioning the safety levers using the multi purpose key 4 Thisensures that only minimum effort is required to turn the multi purpose key 4 that the response shaft of ...

Page 32: ...yor unit If there is a blockage in the intake area slightly raise the articulated tow bar and lift the pick up to full extent This enlarges the intake area of the conveyor channel and the blockage can then be more easily removed by switching on the power take off shaft 3 7 7 Retracting the cutter unit The cutter unit is locked hydraulically by retracting it against the end stop To do this retract ...

Page 33: ...ened It may also be necessary to drive a short distance forwards or backwards in a straight line While driving backwards leave the pressure on the hydraulic connection as it is While driving forwards switch the tractor valve for the steering axle to lower so that the wheels can adjust freely whengoingroundbends The steering axle must be locked when driving forwards a if the cornering stability of ...

Page 34: ...d a 3 10 2 2 Fortheelectromagneticoperator friendly control unit without automatic loader When starting the loading process switch on the hydraulic oil circulation on the tractor and arrest the switch lever Switch the pick up switch to Lower The pick up can be run in this position during the whole of the loading process so that the pick up is able to accomodate itself to the ground Switch on the p...

Page 35: ...oor advance when the loading material has reached approx 3 4 of the total height in order to prevent the pile from tipping over When the loading height has been reached the scraper floor switches on automatically until the message Wagon full appears on the display and the hooter gives a short tone 3 10 3 Finishing the loading process Make sure that the laden weight shown on the serial plate is not...

Page 36: ...d It may also be necessary to drive a short distance forwards or backwards in a straight line When passing over the bin leave the pressure on the hydraulic connection as it is Open the rear flap When the rear flap opens the cylinder for switching on the metering rollers is automaticallyactivated To ensure proper operation of the metering rollers the switch for the rear flap must be held for anothe...

Page 37: ...ally switched off After passing over the silo lower the articulated tow bar again Only run scraper floor reverse motion for a short time in order not to overload the scraper floor ScraperFloorReverse If the metering rollers get stuck switch on scraper floor reverse motion Select Scraper floor Press Reverse 3 10 6 Stop Emptying Switch off scraper floor Switch off power take off shaft ...

Page 38: ...e lock nuts on the threaded rod 8 so that the holes in the inner and outer tubes of the stabiliser foot 1 are exactly aligned Carefully lower the articulated tow bar until the stabiliser foot 1 rests on the ground Switch the hydraulic system to non pressurised Disconnect the hydraulic hoses 5 and 6 from the tractor Disconnect the compressed air hoses 3 and 4 Stow the disconnected hydraulic hoses 5...

Page 39: ...The other ram functions articulated tow bar rear flap cutter 0 circuit can be operated independently of the scraper floor and pick up functions However the electric switches for the ram functions must be returned to the neutral position after the function has been carried out When travelling on the road it is advisable to switch off the tractor hydraulic system in order to prevent the oil from cir...

Page 40: ...r When the scraper floor is switched on Scraper floor is running appears on the display When the scraper floor has been switched off automatically Wagon full appears on the display accompanied by a short tone on the horn 7 UP 0 DOWN switch for the articulated tow bar 8 UP 0 DOWN switch for the pick up 9 ON OFF push button for the floodlights 10 Display 11 Plus key 12 Quit key 13 Minus key 14 Push ...

Page 41: ...be made at each test level Switch on the display and control unit at Button 1 and operate the Quit button 12 until the following message appears on the display Carry out all sensor tests with the machine shut down 4 4 1 Test Switch Automatic loader The sensor is located on the front wall in the middle When operating the automatic loader the number behind Load a must switch to 1 XXL00002 4 4 2 Test...

Page 42: ...ering rollers The sensor 1 is on the left side of the machine on the upper metering roller drive To test the sensor turn the upper roller by hand The number after the words Metering roller in the display changes to 1 The distance between the sensor and the sprocket wheel must be a 1 5 mm 4 4 6 Test Sensor rear flap The sensor 1 is on the hinge point of the right lever arm 3 for the rear flap To te...

Page 43: ...bject to press in the valve see 1 and 2 Emergency operation of the valves for the pick up etc is carried out by screwing in the star wheel screw 5 1 1 Load sensing connection The operator friendlyhydraulicsystemhasload sensing LS capability The advantage of using this device on tractors which have been equipped for it is the lower energy demand which results from the smaller quantity of heat lost ...

Page 44: ...justment is dependent on the hydraulic system of the tractor and must be made when the system on the loading wagon is in a non pressurised state Screw out the system screw 1 to its end stop if the tractor has a standard hydraulic system pump constant the tractor has an LS pump and non activated load sensing system This adjustment is carried out by works personnel Screw in the system screw 1 to its...

Page 45: ... stop Raising the rear flap Screw in the two star wheel screws on the Raise lower articulated tow bar control valve Push in the solenoid plunger of the control valve 1 using a sharp object The articulated tow bar will raise Keep the solenoid plunger pressed in and screw out one of the two star wheel screws again to its end stop Screw out the other star wheel screw again to its end stop Aftercarryi...

Page 46: ...F DOSIERWALZEN QUERFOERDERBAND LINKS UND RECHTSLAUF SONDERAUSRUESTUNG DRUCK LEITUNG TANK LEITUNG RUECKSCHLAG VENTIL P T ANSCHLUSS SCHLEPPERHYDRAULIK HOCHDRUCK FILTER LS LASTMELDELEITUNG NUR BEI LOAD SENSING SCHLEPPERHYDRAULIK UEBER POWER BEYOND ANZUSCHLIESSEN T P POWER BEYOND TRACTOR d 1 5mm 332 014 921 122 ABSPERRHAHN d 1 4mm 920 904 334 860 A P T A B LS LS B A A B A B A B d 1 5mm 332 014 a b a b...

Page 47: ...and short cut feeder wagon against rolling away After care and maintenance work is finished re install all protective covers and protective devices in the correct manner Avoid getting oils and greases on the skin In the event of injury caused by leaking oil immediately call a doctor All other safety instructions must be followed in order to avoid accidents and injuries A Thread size Class of stren...

Page 48: ...k of injury Check the air pressure regularly When loosening and tightening wheel nuts follow the sequence shown in the figure on the right Check wheel nuts and retighten if necessary10 operating hours after installation After this check that the wheel nuts are tight every 50 operatinghours M 10 x 1 0 17 4 5 93 93 M 12 x 1 5 19 4 5 93 93 M 14 x 1 5 22 5 137 137 M 18 x 1 5 24 6 265 245 M 20 x 1 5 27...

Page 49: ...the bush in the eye 1 is a 43 mm If this value is exceeded the bush must be replaced To minimise wear clean the bush and the eye every day and lubricate with grease KDW02330 a Tyre code Tyre Ø mm Width mm Load capacity kg Air pressure bar Permissible max speed km h 600 55 22 5 12PR 1232 611 4640 2 7 40 700 45 22 5 12PR 1232 720 5050 2 7 40 555 45 17FRT 154 F TBL 10 stud fitting 940 535 3750 7 40 8...

Page 50: ...ring rollers Reduced tension on spring 1 shorter delay in switching off less force on metering rollers KDW06320 1 2 4 3 6 5 2 Switching off the scraper floor The right bearing of the lower metering roller is a moving part The motion sensor is on the underside of the bearing It registers movement of the metering roller 6 5 1 Motion sensor for metering roller drive The motion sensor is on the left s...

Page 51: ...f the rear flap on the short cut feeder wagon is monitored by a sensor It is situated on the hinge point of the right lever arm 1 for the rear flap Adjustingthesensor Open rear flap Loosen locking nuts 3 on sensor 4 Adjust position of sensors 4 to magnet 2 until display changes from 0 to 1 tighten locking nuts 3 Position of the sensor The distance between the sensor 2 and underside of frame 1 must...

Page 52: ... a vessel of sufficient capacity underneath to hold the escaping oil Slacken the filter bottom section 4 using screw wrenchSW27 Remove the filter bottom section 4 and shake out the remainingoil Clean the filter bottom section 4 Pull out the old filter element 3 Push the new filter element 3 onto the valve collar Check the O ring 2 on the filter bottom section 4 If the O ring is damaged replace it ...

Page 53: ... of the loading wagon behind the protective cladding The oil level must be checked every 50 h KLW07100 1 3 KLW07090 2 KDW06333 Oil inspection Remove check screw 1 Oil level up to bore hole 1 If necessary top up oil 2 fit check screw 1 Oil change Unscrew the oil draining screw 3 Collect the used oil in a suitable collection vessel Fit oil draining screw 3 Fill oil 2 Oil level up to bore hole 1 6 8 ...

Page 54: ...ering rollers drive a Front metering rollers drive b The rear metering rollers drive is on the left side under the cover KDW05021 2 1 KDW06332 1 2 Oil change Remove oil drain plug 2 Collect oil in a suitable vessel Replace oil drain plug 2 Fill oil 1 oil level to hole 1 Oil check Remove check screw 1 Check oil level is up to hole 1 Top up with oil if necessary Replace check screw 1 Oil change Unsc...

Page 55: ...chains Hook in the spring clamp 2 Using a nut draw the threaded spindle 1 out until the scraper floor tensioner can move freely The tension spring is under high tension Repair work on the automatic tensioning devicemustonlybecarriedoutbyspecialists using an assembly tool which is suitable for thepurpose KDW00100 2 1 3 Shorteningthescraper floorchain Remove the cotter pin 1 on the chain joint 3 Rem...

Page 56: ...cessary 6 10 1 Distance cutters to drum KDW04040 1 2 The distance between the blades and the drum is set at the factory to the correct value and must not be varied 6 9 3 Metering device The drive chain of the metering rollers is at the rear left of the wagon behind the cover Spring length under tension upper chain 2 lower chain tensioner 4 X 60 mm Spring length under tension lower chain 3 upper ch...

Page 57: ...s must turn easily while engaging tensioning the safety springs using the multi purpose key after the cutter installation If this is not the case turning will require increased force The single cutter safety system will not operate correctly increased cutter breakage The rollers 1 must therefore be removed cleaned and reinstalled with water resistant EP long term grease Part no 926 045 0 The circu...

Page 58: ...t The lubrication intervals for the articulated shaft are shown in the figure on the right For further information see the articulated shaft manufacturer s operating instruction Definition of terms Term Lubricant Point Quantity Specialfeatures Greases Multipurposegrease Lubricationnipple Remove excess grease from approx two pumps of the lubrication nipple greasegun Lubrication If no other stipulat...

Page 59: ... chart 9 50h 50h 50h 50h 10h 17 19 50h 50h 50h 50h KDW10230 50h KDW05180 KDW05030 50h KDW04050 KDW04060 KDW02280 333 679 5 50h 50h 50h 50h 100h BEI Z RPENDEL nur Hitch 50h KDW05040 50h 8 50h 250h 50h bei Lenkachse bei Lenkachse 100h 250h ...

Page 60: ...tting 4 Steering axle arrester ram special fitting 2 Drive shaft rear metering device 2 Lubrication of metering rollers chain 2 Bearing for lower metering rollers scraper floor 1 Scraper floor shaft rear 4 Compensation rocker right left for trailing arm unit only 2 Tandem axle brake axle automatic slack adjuster 8 4 Scraper floor shaft front 4 Ram of the cutting mechanism 2 Drive shaft front meter...

Page 61: ...er wagons with intact brake systems must be used for work in the field or for travelling on the road 6 13 2 Adjusting the transmission device After the first few kilometers travelled the transmission device and the brake linings of the brake drum will have bedded in The resulting play will have to be compensated for Checking the play The feeder wagon must be secured and shut down Move the lever 1 ...

Page 62: ...tions Removing the air filter Slacken the nut 2 Twist the air filter 1 Slacken the hook spring ring 3 Remove the filter element Maintaining the air filter Clean the air filter before the season starts Installing the air filter Installation is carried out in the reverse order of removal KLW10120 1 3 2 KLW10090 1 2 3 4 5 6 7 Make sure that the filter element is assembled in the correct sequence 1 Sp...

Page 63: ...ery week but at least after 20 operating hours The receiver is drained via the drainage valve on the underside Shut down the feeder wagon and secure Open the drain valve and release the condensation water Check the drain valve clean it and screw it back in A heavily contaminated or leaky drain valve must be replace with a new one 6 14 Care after daily use After daily operation the area of the conv...

Page 64: ...VI 18 Maintenance ...

Page 65: ...he vicinity of artificial fertilisers or animal housing Repair damaged paintwork and thoroughly treat bare metal with rust inhibitor Only jack up the short cut feeder wagon with a suitable vehicle jack Make sure that the jacked up short stalk metering wagon is stable Jack up the short cut feeder wagon to relieve the tyres Protect the tyres from external effects such as oil grease and radiation fro...

Page 66: ...VII 2 Overwintering ...

Page 67: ...e covers and protective devices in the correct manner All other safety instructions must also be followed to avoid injury and accidents 8 2 General information Lubricate all lubrication points with grease and oil the chains Wipe away any grease emerging from the lubrication points Check the oil level in the main transmission box and top up if necessary delivery rotor Check hydraulic hoses and pipe...

Page 68: ...VIII 2 Recommissioning ...

Page 69: ...fety system are tight System screw on the hydraulic valve unit not adjusted correctly Powersupplyinterrupted In this case switch off the power take off shaft Determine the cause of the fault and remove it then switch on the power take off shaft again 9 Faults causes and removal 9 1 Special safety instructions Maintenance care service and cleaning work must only be carried out with the machine shut...

Page 70: ...IX 2 Faults causes and removal ...

Page 71: ...t the type of tractor used to tow it The following parts are supplied loose These parts must be stowed in the storage compartment of the wagon 1 Articulated shaft 2 Control 3 Electrical cable for lights 4 Paint spray can 5 Operatinginstructions 6 Attachment shackle 7 Fittings in the box not in the picture Tarpaulin without metal eyelets x 1 Tarpaulin with 58 metal eyelets x 1 Metal rods x 2 Ropes ...

Page 72: ... tractor and short cut feeder wagon must be secured against rolling away The height adjustment articulated tow bar and the angle adjustment of the towing eye must only be carried out by the specialist dealer The hydraulic height adjustment must only be used for unloading on a level stretch Use on the road is only permitted with the articulated tow bar lowered Repair work on the hydraulic unit must...

Page 73: ...again The two rams must be adjusted equally If necessary adjust the position of the ram 1 and its mounting 2 i e by using one of the holes 3 in the tow barframe 4 1 3 2 KLW09330 KDW02070 1 2 3 KDW02360 B A A1 1 4 Adjusting the angle of the towing eye only for top mounted attachment The towing eye can be mounted in two positions so that the coupling between the trailer and the towing eye can be as ...

Page 74: ...d coupling see example must agree with the torque in the following table If these values do not agree the KRONE dealer must be informed A1 2 2 Overload coupling The wagon is fitted with a cam operated clutch linkage with a fixed torque setting When the linkage is overloaded the power from the tractor is interrupted The power take off shaft must be switched off When the power take off shaft is swit...

Page 75: ...aft with the overload safety device on the machine side Measure the overlap and adjust the length according to the articulated shaft manufacturer s operating instructions supplied with the machine The minimum overlap must be ensured even when the articulated shaft is bent hydraulicarticulatedtow bar VP 1 035 1 2 KR 1 080 2 1 A1 2 4 Assembling the articulated shaft Slide on the overload safety devi...

Page 76: ...gon switch off the engine apply the brake and remove the ignition key Enter the wagon by the side door Assemble the upper panels Assembly must be carried out by at least two people Swing up tubular hoops 4 Fasten tubular hoops 4 on each side with U profile 3 bolt 1 and nut 2 KDW03150 3 4 2 1 KDW03180 1 4 4 Place backboard 1 on the rear flap and attach on each side with 4 screws plain washers 2 KDW...

Page 77: ... to tubular hoop 2 and secure with bolt 2 and nut KDW03060 1 2 Fasten front panel 3 and side panel 4 via the slotted holes 1 with two bolts and plane washers KDW03040 1 3 4 2 Swing up front panel 4 Swing out side panels 2 KDW03100 1 2 ...

Page 78: ... 2 Next place the rope ends on the hooks The two outer hooks 2 each take two rope ends 3 A1 3 1 Installing the tarpaulins Installing the rear tarpaulin without metal eyelets Slide the tarpaulin 2 onto the rod 1 with reciprocal movements using the rope ends 3 Fit two rope ends on each end of the rod Push the other side of the tarpaulin on to the tube Push the tube into the marked retainers and secu...

Page 79: ...low guide the rope through the eyelets in the tarpaulin and place it on the hooks on the front panel The two outer ropes are also threaded through the two side eyelets in the tarpaulin Lay the tension ropes 3 and 4 round the front tubular hoop Hook the tension rope hooks 3 and 4 in the eyelets of the tarpaulin KLW07191 3 4 5 2 1 ...

Page 80: ...A 10 Appendix Operator friendlyoperation A2 Electrical circuit diagram ...

Page 81: ...A 11 Appendix ...

Page 82: ...A 12 Appendix ...

Page 83: ...A 13 Appendix ...

Page 84: ...ernard Krone GmbH Heinrich Krone Straße 10 D 48480 Spelle Postfach 11 63 D 48478 Spelle Phone 049 0 59 77 935 0 Fax 049 0 59 77 935 339 Internet http www krone de eMail info ldm krone de konsequent kompetent 17 Jul 2003 ...

Reviews: