Step 2: Disconnect and remove the Series 4000 device
97
Step 2: Disconnect and remove the Series 4000 device
Important:
Before you begin, be sure that you collected data from the Series
4000 device using your host application. Otherwise, the data will be lost.
Note about option kits:
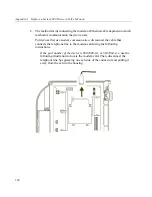
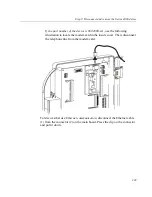
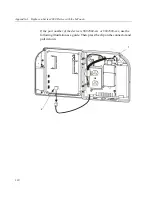
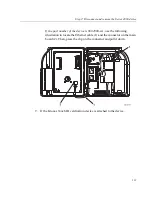
If you plan to upgrade some of your existing options
(such as the remote proximity reader or universal relay), for use with the InTouch,
do not remove the cable for those devices from the wall. You can remove the
terminal block from the cable, and then connect the wires to the transition board
of the InTouch. See the transition board installation guide for complete
information.
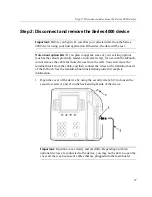
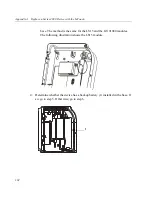
1. Open the cover of the device by using the security wrench (3) to loosen the
security screws (1 and 2) on the back and right side of the device.
Important:
Open the cover slowly and carefully. Depending on which
optional devices are connected to the device, you may not be able to open the
cover all the way because of cables that are plugged into the main board.
Summary of Contents for InTouch 9100 Slim Profile
Page 9: ...Chapter 1 Before You Install the InTouch ...
Page 21: ...Chapter 2 Install the Standard Model InTouch ...
Page 50: ...Chapter 2 Install the Standard Model InTouch 50 c Tighten both screws ...
Page 60: ...Chapter 2 Install the Standard Model InTouch 60 ...
Page 61: ...Chapter 3 Install the Slim Profile InTouch ...
Page 75: ...Step 6 Secure the cables with the strain relief clip 75 ...
Page 84: ...Chapter 3 Install the Slim Profile InTouch 84 ...
Page 85: ...Chapter 4 Troubleshooting and Preventive Maintenance ...
Page 94: ...Chapter 4 Troubleshooting and Preventive Maintenance 94 ...
Page 95: ...Appendix A Replace a Series 4000 Device with the InTouch ...

