background image

KRÜGER TECHNOLOGY S.L.   Pol. Agustinos C/ G Parcela B2 · 31013 Pamplona (Navarra) SPAIN

7.504.0219  r

ev

. 06     05/2017

P

amplona,

 08/05/2017

Carlos Krüger

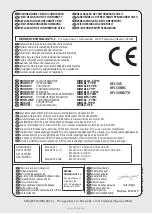
 DICHIARAZIONE CE/EU DI CONFORMITÀ 

 CE/EU DECLARATION OF CONFORMITY

 DECLARATION DE CONFORMITÉ CE/EU 

 CE/EU-ERKLÄRUNGSBESCHEINIGUNG

 DECLARACIÓN DE CONFORMIDAD CE/EU

 Dichiara sotto la propria responsabilità che la macchina: 

 Declares under its responsability that the machine: 

 Atteste sous sa responsabilité que la machine: 

 Erklärt unter der eigenen Verantwortung dass die Maschine: 

 Declara bajo su propia responsabilidad que la màquina:

 Declara sob própria responsabilidade que a maquina:

 заявляет под сбою ответственность, что:

 Verklaart onder zijn eigen verantwoordelijkheid dat de machine:


Oświadcza na własną odpowiedzialność, że urządzenie:

 forsikrer under eget ansvar at maskinen:


PRODOTTO:

LAVASCIUGAPAVIMENTI

MODELLO- TIPO: 


PRODUCT:


FLOOR SCRUBBER

MODEL- TYPE:


PRODUIT:


AUTOLAVEUSE

MODELE-TYPE:


PRODUKT:


SCHEUERSAUGMASCHINE

MODELL-TYP:


PRODUCTO: 

FREGADORA

MODELO - TIPO: 

PRODUTO:

LAVADORA FREGADORA DE PAVIMENTOS

MODELO-TIPO: 

АППАРАТ:

ПОЛОМОЕЧНЫЕ МАШИНЫ

МОДЕЛЬ-ТИП:

PRODUKT:

SCHROBAUTOMAAT

MODEL - TYPE:


PRODUKT:

AUTOMAT MYJĄCY

MODEL-TYPU

PRODUKT:

Gulvskuremaskin

MODELL TYPE:

 é conforme alle direttive CE/EU e loro successive modificazioni, ed alle norme EN:

 complies with directives  CE/EU, and subsequent modifications, and the standards EN:

 est conforme aux directives CE/EU et aux modifications successives ainsi qu’aux normes  EN:

 den Richtlinien CE/EU EG ,den nachfolgenden Änderungen sowie den Normen  EN :

 está en conformidad con las directivas CE/EU  y sus sucesivas modificaciones y también con la norma EN:

 está em conformidade com as directrizes CE/EUe bem como com as normas  EN  e as suas sucessivas modificações.


соответствует требованиям директивCE/EU и последующих модификаций, EN и стандартам, и последующих модификаций.

 in overeenstemming is met de Richtlijnen CE/EU en latere wijzigingen daarop en de normen EN:

 jest zgodny z dyrektywami CE/EUi ich późniejszymi zmianami, oraz z normami EN i ich późniejszymi zmianami. 

 er i overensstemmelse med direktivene CE/EU, og senere endringer, samt med standardene  og senere endringer :

 Il fascicolo tecnico si trova presso 

 Technical booklet at

 Dossier thecnique auprès de: 

 Das technische Aktenbündel befindet sich bei

 El manual técnico se encuentra en:

 Processo técnico em:

 Техдокументация зарегистрирована:

 Technisch dossier bij:

 Dokumentacja techniczna znajduje się w firmie

 File thecnique fra:

 Direttore generale

 General manager

 Directeur général

 Generaldirektor

 Director general

 Director geral

 Технические брошюры на:

 Algemeen directeur

 Dyrektor główny

 Administrerende direktør

KRÜGER TECHNOLOGY S.L

.   

Pol. Agustinos C/ G Parcela B2 · 31013 Pamplona (Navarra) SPAIN

KRÜGER 
TECHNOLOGY S.L. 

Pol. Agustinos C/ 

G Parcela B2 

31013 Pamplona 

(Navarra) SPAIN

EN 60335-1

EN 60335-2-72

EN 62233:2008

2006/42/EC

2014/35/EU

2014/30/EU 

2011/65/EU

EN 55014-1:2006+A1:2009+A2:2011

EN 55014-2:1997+AC:1997+A1:2001+A2:2008

EN 61000-3-2:2014.

EN 61000-3-3:2013.

EN 12100:2010

KFL50E

KFL50BBC

KFL50BBCTR

www.kruger.es

 DECLARAÇÃO DE CONFORMIDADE CE/EU

 ЗАЯВЛЕНИЕ О СООТВЕТСТВИИ ТРЕБОВАНИЯМ CE/EU


 VERKLARING VAN CE/EU CONFORMITEIT

 CE/EU DEKLARACJA ZGODNOŚCI

 CE/EU KONFORMITETS ERKLÆRING

Summary of Contents for KFL50BBC

Page 1: ...MANUAL FREGADORA HOMBRE A PIE KFL50E KFL50BBC KFL50BBCTR...

Page 2: ...ESPA OL P GINA 9 ENGLISH PAGE 25 www kruger es P gina 1 de 42 Manual KFL50E KFL50BBC KFL50BBCTR...

Page 3: ...2 1 3 A B 6 1 3 4 5 2 KFL50E AC 230V www kruger es P gina 2 de 42 Manual KFL50E KFL50BBC KFL50BBCTR...

Page 4: ...C D 2 2A 3A 3B 3C 1A 1 3 6 3 4 5 1 8 2 KFL50BBC DC 24V 7 www kruger es P gina 3 de 42 Manual KFL50E KFL50BBC KFL50BBCTR...

Page 5: ...E F 6 6A 1A 1B 1C 3B 5 4 3 2 1 7 8 3 4 5 6 1 9 2 KFL50BBCTR DC 24V with traction con tracci n 3C 3D 5A 3A www kruger es P gina 4 de 42 Manual KFL50E KFL50BBC KFL50BBCTR...

Page 6: ...H G 1 2 1 3 2 I www kruger es P gina 5 de 42 Manual KFL50E KFL50BBC KFL50BBCTR...

Page 7: ...1 2 L M 1 1 4 4 3 2 5 7 6 5 2 6 www kruger es P gina 6 de 42 Manual KFL50E KFL50BBC KFL50BBCTR...

Page 8: ...N O 1 1 2 3 3 2 4 www kruger es P gina 7 de 42 Manual KFL50E KFL50BBC KFL50BBCTR...

Page 9: ...P 1 www kruger es P gina 8 de 42 Manual KFL50E KFL50BBC KFL50BBCTR...

Page 10: ...LLA DE SECADO 6 8 MONTAJE Y DESMONTAJE DEL PROTECTOR CONTRA SALPICADURAS 6 9 MONTAJE Y DESMONTAJE DEL CEPILLO 6 10 LLENADO Y DESCARGA DEL DEP SITO DE LA SOLUCI N LIMPIADORA 6 11 VACIADO DEL DEP SITO D...

Page 11: ...T cnico Por t cnico se entienden las personas con la experiencia preparaci n t cnica y conocimientos legislativos y normativos necesarios para permitir realizar todo tipo de intervenci n en la m quin...

Page 12: ...l quidos gases polvos secos cidos y disolventes por ejemplo dilu yentes para pinturas acetona etc aunque est n diluidos no utilice productos inflama bles o explosivos por ejemplo gasolina aceite comb...

Page 13: ...uidamente la m quina se divide por grupos de materiales homog neos pl sticos de acuerdo con lo indicado por el s mbolo de reciclado metales goma embalajes En caso de componentes que contengan diferent...

Page 14: ...porte pri vados con rampas inclinadas se puede empujar directamente la m quina sin el pallet asegur ndose de que todos los componentes y la m quina est n adecuadamente protegidos para que no sufran go...

Page 15: ...o D 7 F 8 Para ello aferre los conectores no tire nunca de los cables En la Foto H se puede ver el esquema de conexi n de las bater as para las m quinas B BT Fije el cableado bater a a la bater a cone...

Page 16: ...os primeros dos diodos LED de la indicaci n de la velocidad 2 El interruptor ENCENDIDO MOTOR CEPILLO Foto E 5 sirve para seleccionar las bater as de tipo Pb Acido mientras el interruptor ENCENDIDO MOT...

Page 17: ...de dosificaci n de la soluci n detergente 3 Palanca sube baja grupo cepillo 4 Palanca sube baja boquilla de secado 5 Palanca de mando 6 Tubo de vaciado del dep sito de recuperaci n FOTO C MODELO B DC...

Page 18: ...de carga de la bater a el usua rio desconecta la bater a del cargador de bater as despu s de pocos segundos el cargador de bater as se pone a cero y se prepara a iniciar un nuevo proceso de carga El a...

Page 19: ...DESMONTAJE DEL PRO TECTOR CONTRA SALPICADURAS El protector contra salpicaduras Foto A 6 es engan chado al plato del grupo cepillo por por encastro en la cubierta de plastico Para desmontar el protecto...

Page 20: ...dep sitos apa gue inmediatamente el motor de aspiraci n y vac e el dep sito de recogida Para vaciar el dep sito Conduzca la m quina a un lugar adecuado para el vaciado del agua sucia preferiblemente...

Page 21: ...s de retroceder a fin de evitar aver as a la bo quilla de secado Modelo DC 24V con tracci n Compruebe la conexi n del conector bater as situado debajo del panel de mandos Foto F 8 Introducer y girar l...

Page 22: ...respondientes p rrafos Elimine la suciedad s lida llenando y vaciando los dep sitos hasta extraer toda la suciedad para ello utilice un tubo de lavado o similares Agua caliente a m s de 50 hidrolimpia...

Page 23: ...est dotada de protecciones el ctricas de los principales rganos de funcionamiento para evitar costosas aver as Donde previsto est n presentes disyuntores t rmicos para proteger el motor de tracci n y...

Page 24: ...ntado Comprobar el motivo cuerdas o similares que impiden el movimiento superficies excesivamente desconexas etc y presionar el disyuntor de resta blecimiento La correa de transmisi n est rota Cambiar...

Page 25: ...os no conformes con las advertencias indicadas en el manual de instruc ciones y tambi n por causas no dependientes de la norma y del funcionamiento o uso del aparato La maquina que se debe reparar se...

Page 26: ...9 BRUSH ASSEMBLY DISASSEMBLY 6 10 FILLING AND DRAINING THE SOLUTION TANK 6 11 DRAINING THE RECOVERY TANK 6 12 SPECIFIC INSTRUCTIONS FOR THE USE OF MODEL AC 230V 6 13 DRIVING THE MACHINE 6 14 WORK METH...

Page 27: ...e and regulatory knowledge that allows him to carry out any type of required work and the ability to recognize and to avoid possible risks du ring machine installation operation handling and maintenan...

Page 28: ...the machine on a slope Never leave the machine unattended with the key in and connected it may be left only after having disconnected it and taken the key out and guaranteeing against accidental move...

Page 29: ...cause serious problems for the machine or clog the hoses 3 2 NOISE AND VIBRATIONS For informations relating to noise and vibration data see page 134 4 HANDLING INFORMATION 4 1 PACKING LIFTING AND TRA...

Page 30: ...indicated with the term capacity which always refers to a discharge period Another important value is the number of possible dischar ges The capacity is expressed in amps per hour Ah while the dischar...

Page 31: ...at teries for B BT machines 5 1 5 CIRCUIT BOARD SETTINGS CONFI GURATION The machine is equipped to GEL battery circuit board configured If the operator whish to use e Pb Acid battery it is necessary t...

Page 32: ...BT DC 24V with traction Volts Battery Type B a t t e r y power test i n d i c a t o r LED Brush ope ration indi cator LED 20 0 21 0 Red LED FLASHING LED FLASHING Brush and suction mo tors are not work...

Page 33: ...Traction speed3 3D Traction speed 4 4 Increase speed switch 5 Brush motor switch 5A Brush motor operation led 6 Suction motor switch 6A Suction motor operation led PHOTO F MODEL BT T DC 24V WITH TRAC...

Page 34: ...wo knobs Photo M 6 in order to secure the squeegee to the support Firmly insert the suction hose Photo M 3 into the pipe in the squeegee body 6 5 SQUEEGEE DISASSEMBLY Disconnect the suction hose from...

Page 35: ...bons may damage or destroy the machine Follow the safety regulations specified in the re lative section and indicated on the detergent con tainer Contact the machine manufacturer to obtain a complete...

Page 36: ...Lower the squeegee unit by using the lift lower lever Photo B 3 Lower the brush plate unit by using the lift lower lever Photo B 2 Wash the floor moving forward slowly pulling the brush operation lev...

Page 37: ...described in 6 11 Turn off the machine using the key and remove it from the control panel If necessary charge the battery see the relative section 7 MAINTENANCE INFORMATION Turn the key remove it from...

Page 38: ...reduce the element s operating capacities An overflowing acid solution may corrode the ma chine Use battery chargers recommended by the manu facturer and in any case those that are suitable for the ty...

Page 39: ...n the recovery tank X Drain rinse with clean water or sanificate the recovery tank X Charge the batteries X X Check the acid level in the battery cells if batte ries are not maintenance free X Remove...

Page 40: ...the squeegee conduit or the inspection compartment is clogged Clean out and remove any obstructions from the conduits 8 7 THE BRUSH MOTOR OR THE SUC TION MOTOR DOESN T STOP Stop the machine cutting of...

Page 41: ...me The appliance shall not be replaced and the warranty shall not be extended once the appliance has been affected by a fault Repairs shall be carried out at one of our Authorised technical Service Ce...

Page 42: ...tido GeluidsdrukniveauLwAgegarandeerd Gwarantowany poziom mocy akustycznej Lydeffekt garantert Livello di potenza sonora misurato Acoustic power measured Niveau du puissance sonore mesur Abgemesstes S...

Page 43: ...NOTAS...

Page 44: ...NOTAS...

Page 45: ...NOTAS...

Page 46: ...NOTAS...

Page 47: ...vesainsiqu auxnormes EN denRichtlinienCE EUEG dennachfolgenden nderungensowiedenNormen EN est enconformidadconlasdirectivasCE EU ysussucesivasmodificacionesytambi nconlanormaEN est emconformidadecomas...

Page 48: ...KR GER TECHNOLOGY S L B 82526583 Pol gono Agustinos C G Parcela B2 31013 Pamplona Navarra ESPA A 34 948 343 393 info kruger es www kruger es...

Reviews: