16
www
.e
fut
ur
o
.c
om • www
.e
fut
ur
o
.c
om • www
.e
fut
ur
o
.c
om • www
.e
fut
ur
o
.c
om • www
.e
fut
ur
o
.c
om • www
.e
fut
ur
o
.c
om • www
.e
fut
ur
o
.c
om •
www
.e
fut
ur
o
.c
om
OPERATING INSTRUCTIONS
efuturo Wallbox
Setting the charging current limit
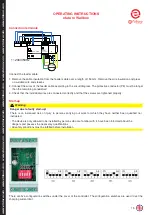
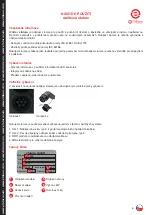
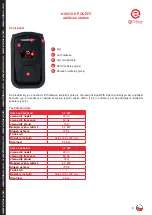
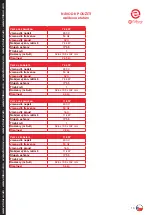
The charging current provided can be limited by the configuration switches numbered one to five. In this way, the
charging current can be adapted to the power available in the building installation, for example. The maximum charging
current provided depends on the device version (see type plate) and cannot be exceeded.
The setting is made by combining the individual configuration switches.
Switching on the device
Proceed as follows to switch on the charging station:
1. Make sure that the protective device in the charging station is switched on.
2. Switch on the supply voltage.
3. Check the supply voltage at the charging station for clockwise rotating field.
The LED info field indicates that the charging station is ready for operation
Test of the charging station
Warning
Danger of injury!
Risk of injury due to damage to the charging station. If it can be assumed that safe operation of the charging station
is not possible:
• Take the charging station out of operation
• Determine what is the fault and rectify it
!
Test according to DIN VDE 0100 or national regulations
During the initial start-up and at the specified maintenance intervals, carry out an inspection of the charging station in
accordance with DIN VDE 0100 or the corresponding valid national regulations.
System test
A test box is required for a system test. The test box simulates communication with the vehicle.
Perform a system test with a test box before authorising the charging station.
Perform the system test according to the documentation of the test box.
Closing the charging station
Attention
Damage to the device.
Damage to the device due to improper handling.
!
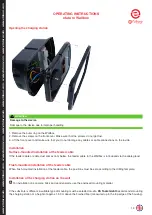
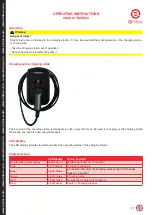
Closing the charging station
1. Place the front cover on the housing and make sure that you do not damage any cables or cable connections on the
inside.
2. Screw the front cover back on with the screws.
3. Click the outer ring back in.

