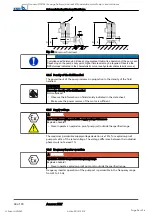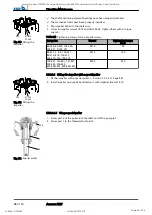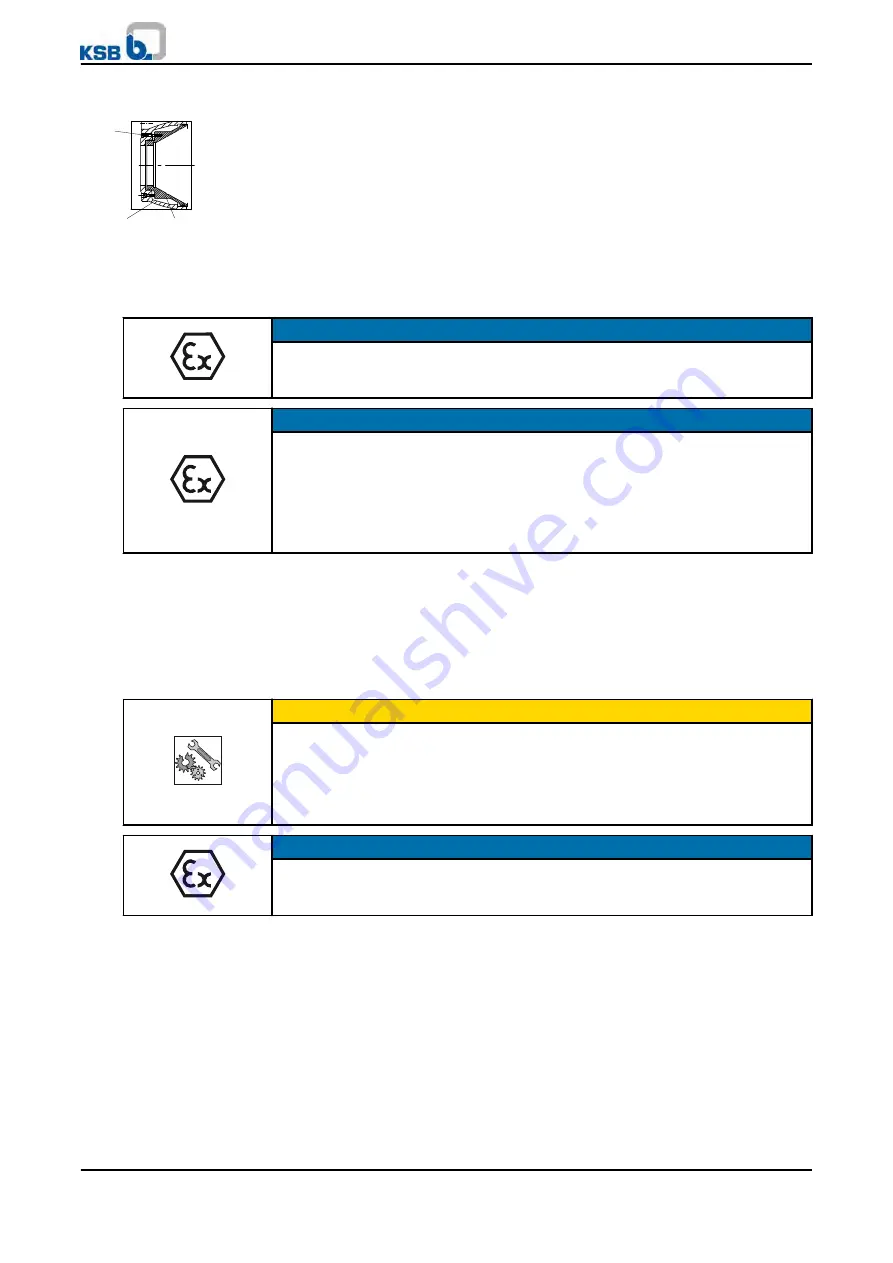
7.4.3.4 Removing the wear plate
✓
The back pull-out unit has been separated from the pump casing.
✓
The inside of the casing has been cleaned.
✓
Result of visual inspection: The wear plate needs to be replaced.
1. On transportable models, separate the pump casing from the piping.
2. Undo hexagon socket head cap screws 914.12.
3. Remove wear plate 135.01 and O-rings 412.34.
7.4.4 Dismantling the motor section
NOTE
Special regulations apply to repair work on explosion-proof pump sets. Modifications or
alteration of the pump set may affect explosion protection and are only permitted after
consultation with the manufacturer.
NOTE
The motors of explosion-proof pump sets are supplied in "flameproof enclosure" type of
protection. Any work on the motor section which may affect explosion protection, such as
re-winding and machining repairs, must be inspected and approved by an approved
expert or performed by the motor manufacturers. No modifications must be made to the
internal configuration of the motor space. Repair work at the flameproof joints must only
be performed in accordance with the manufacturer's instructions. Repair to the values in
tables 1 and 2 of EN 60079-1 is not permitted.
When dismantling the motor section and the power cables make sure that the cores/
terminals are clearly marked for future reassembly.
7.5
Reassembling the pump set
7.5.1 General information/Safety regulations
CAUTION
Improper reassembly
Damage to the pump!
▷
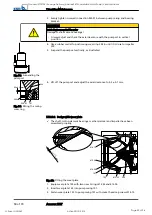
Reassemble the pump (set) in accordance with the general rules of sound
engineering practice.
▷
Use original spare parts only.
NOTE
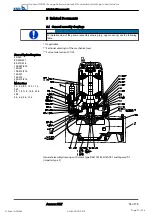
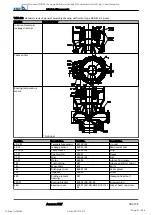
Before reassembling the motor section, check that all joints relevant to explosion
protection (flamepaths) are undamaged. Replace any components with damaged
flamepaths. Refer to the "Flamepaths" annex for the position of the flamepaths.
Always reassemble the pump set in accordance with the corresponding general
assembly drawing.
▪
O-rings
– Check O-rings for any damage and replace by new O-rings, if required.
– Never use O-rings that have been glued together from material sold by the
metre.
▪
Assembly adhesives
– Avoid the use of assembly adhesives, if possible.
During reassembly tighten all screws and bolts as specified in this manual. (
914.12
135
101
Fig. 24: Removing the
wear plate
Sequence
Seal elements
Tightening torques
7 Servicing/Maintenance
46 of 74
Amarex KRT
Goodnal STP ST041 Sewage Delivery (Amarex KRT Submersible Motor Pump) Vendor Manual
Q-Pulse Id VM362
Active 29/10/2013
Page 48 of 96


