9
SMARTRONIC MA
II - Assembly on pneumatic actuator
II - 1 ACTAIR 3 to 200, ACTAIR NG 2 to 160,
DYNACTAIR 1.5 to 100 et DYNACTAIR NG 1 to 80
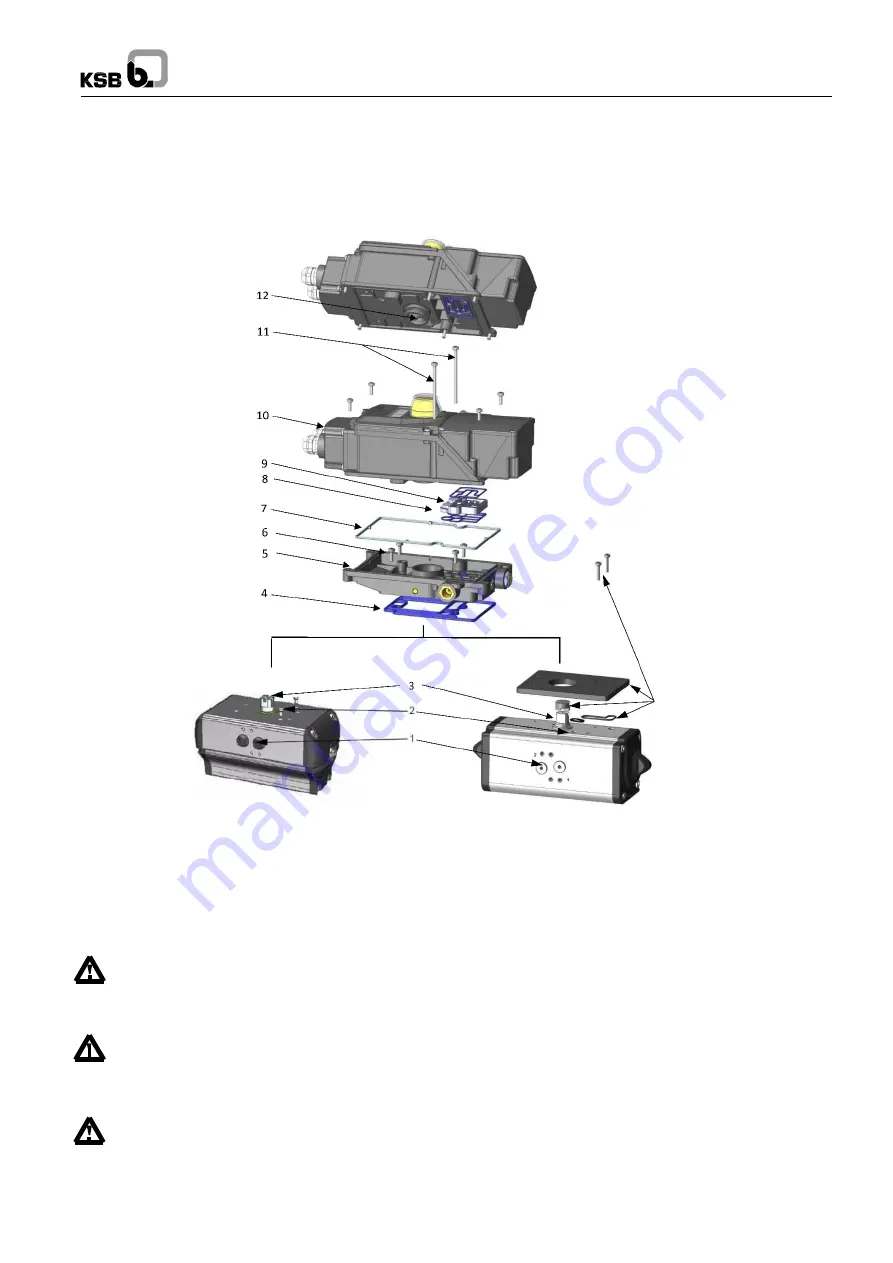
A- Check that the actuator has both plugs (item 1) on the external supply holes.
B- Remove the two screws with seals (item 2) (TORX T20 screwdriver).
C- Separate the unit (item 10) from the base (item 5) by unscrewing the 6 screws (item 11) (TORX T20 screwdriver).
D- Remove distribution plate A or B (item 8) with both gaskets, item 9.
E- Attach the base (item 5) to the actuator with the 4 screws (item 6) (TORX T20 screwdriver).
Tightening torque = 2.5 Nm
Check the correct position of the seal, item 4.
F- Reposition distribution plate A or B (item 8) with its two seals, item 9
Check the correct position of the seal, item 9.
G- Position the unit (item 10) on the base (item 5) taking care to engage the column (item 12) with the actuator shaft
(item 3) and tighten the 6 M4 screws (item 11) (TORX T20 screwdriver).
Check the correct position of the seal, item 7.
Adaptation kit for
ACTAIR NG and
DYNACTAIR NG


