11g Wireless Security Router User Guide
- 7 -
§
Power:
Green
The Power LED illuminates when the Wireless 11g Router is
powered on.
§
Diag
Red
The Diag LED illuminates when Router goes through its
self-diagnosis mode during boot-up. It will turn off upon
successful completion of the diagnostic.
For WLAN
§
Enable
/Activity:
Green
The Links LED illuminates when the wireless option is
enabled. When the wireless option is disabled (through the
web-based utility), the LED is off.
Blinking when there is wireless connection activity.
For WAN port & LAN ports (x4)
Green
Steady on when a successful 100Mbps connection is made
trough the corresponding port.
Blinking when data is flowing through this port.
§
Link/Act &
10/100:
Yellow
Steady on when a successful 10Mbps connection is made
trough the corresponding port.
Blinking when data is flowing through this port.
2-3 System Requirements and Setup
To connect to the Internet, an external ADSL or Cable modem and an Internet access
account from an ISP is required. In order to operate with the Advanced Wireless 11g
Router, each PC that is to be connected to the Advanced Wireless 11g Router should have
the following things installed:
1. Ethernet NIC (Network Interface Card: a 10Base-T or 10/100Base-T/TX
Ethernet card), or wireless client card for wireless connection.
2. Standard twisted-pair Ethernet cable (UTP network cable) with RJ-45
connectors.
3. System OS: Windows 95/98, Windows NT4.0, or Windows 2000/XP
4. TCP/IP network protocol.
5. Web browser, such as Microsoft Internet Explorer 5.0 or later, or Netscape
Navigator 6.0 or later.
Installing the TCP/IP Protocol
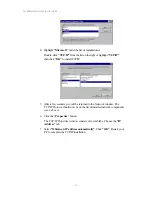
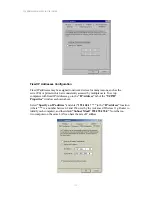
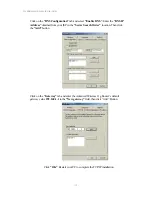
If you are not sure whether the TCP/IP Protocol has been installed, follow these steps to
check, and if necessary, install TCP/IP onto your PCs.
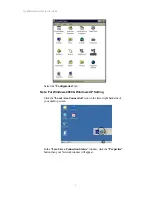
1. Click the
“Start”
button. Choose
“Settings”
, then
“Control Panel”
.
Double-click the
“Network”
icon. Your Network window should appear.


