11g Wireless Security Router User Guide
- 60 -
-
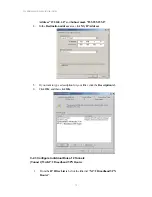
Select
“Manually”
in the
“Configure”
location from the drop-down list.
-
In the
“IP Address”
location, enter the IP Address that you want to
assign to the computer. (see the notes on Fixed IP Addresses 2-4
above).
-
Enter
“255.255.255.0”
in the
“Subnet Mask”
location.
-
Enter
“192.168.1.1”
(the Advanced Wireless 11g Router’s default IP
Address) in the
“Router Address”
location.
-
Enter the ISP’s IP Address in the
“Name Server”
location if your ISP
has provided the information.
-
Close the window.
4. Click
“Save”
from the file menu then
“Quit”
TCP/IP.
5. Restart the computer.
6-3 Advanced Wireless 11g Router Configuration
To configure your Advanced Wireless 11g Router, use your Web Browser and follow the
instructions given in Chapter 3: Internet Access, section 3.3. To configure advanced
settings, see Chapter 4: Advanced Applications.
6-4 Adding Advanced Wireless 11g Router to Existing Network
If the Advanced Wireless 11g Router is to be added to an existing Macintosh computer
network, the computers will have to be configured to connect to the Internet via the
Advanced Wireless 11g Router.
1. From the
“Apple
” menu, select
“Control Panel”
and click on
“TCP/IP”
.
2. From the
“File”
menu, select
“Configurations”
and select your existing
network configuration. Click
“Duplicate”
.
3. Rename your existing configuration. Click
“OK”
, and
“Make Active”
.
4. In the Setup area:
-
Select
“Manually”
in the
“Configure”
location from the drop-down
list.
-
In the
“IP Address”
location, enter the IP Address that you want to
assign to the computer. (see the note on fixed IP Addresses 2-4 above).
-
Enter
“255.255.255.0”
in the
“Subnet Mask”
location.
-
Enter
“192.168.1.1”
(the Advanced Wireless 11g Router’s default IP
Address) in the
“Router Address”
location.
-
Enter the ISP’s IP Address in the
“Name Server”
location if your ISP
has provided the information.

