background image


 3/3 


Model Specifications 

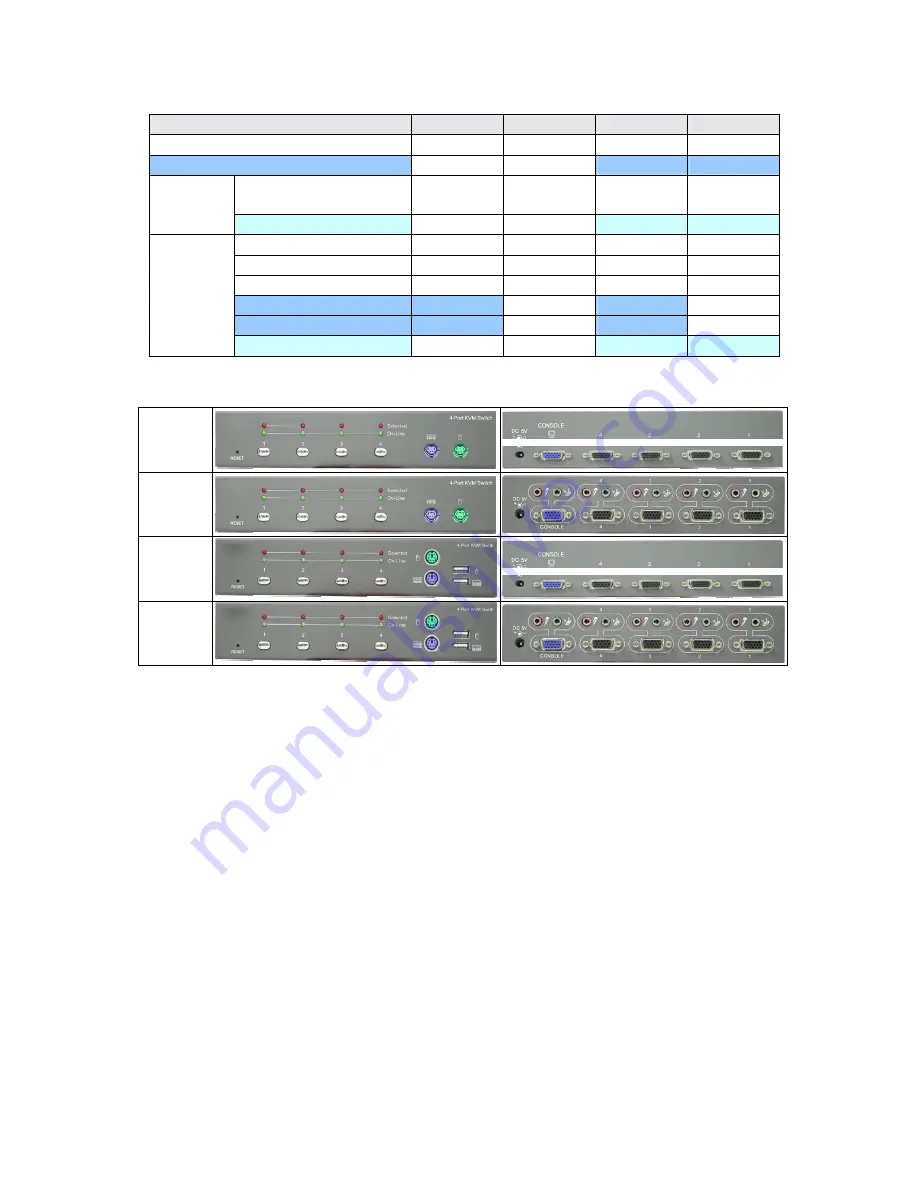
KCF-141 

KCB-141 

KCF-141A  KCB-141A

4-Port model 


Audio model 


HDB-15 
(VGA+USB+2 PS/2) 

4 4 4 4 

PC Ports 

Audio (mic/speaker) 


4


4


PS/2 Keyboard 


PS/2 mouse 


Video HDB-15 


USB Keyboard 


USB mouse 


Console 

Audio (mic/speaker) 


KCB-141 

KCB-141A 


KCF-141 

KCF-141A 


Summary of Contents for KCB-121

Page 1: ...2 Port 4 Port KVM SWITCH User s Manual Version 2 0 060731 ...

Page 2: ... KCB 121 KCF 121A KCB 121A 2 Port model Audio model HDB 15 VGA USB 2 PS 2 2 2 2 2 PC Ports Audio mic speaker 2 2 PS 2 Keyboard PS 2 mouse Video HDB 15 USB Keyboard USB mouse Console Audio mic speaker KCB 121 KCB 121A KCF 121 KCF 121A ...

Page 3: ... KCB 141 KCF 141A KCB 141A 4 Port model Audio model HDB 15 VGA USB 2 PS 2 4 4 4 4 PC Ports Audio mic speaker 4 4 PS 2 Keyboard PS 2 mouse Video HDB 15 USB Keyboard USB mouse Console Audio mic speaker KCB 141 KCB 141A KCF 141 KCF 141A ...

Page 4: ...to the KVM switch can be added or removed at any time without shutting the unit down Support 2 types of switching 1 Hardware Push Button control 2 Hot key command control from PS 2 or USB keyboard Provide Auto scan function to alternate video between computers in a preset interval Provide LED display for PC status monitoring Supports VGA resolutions up to 2048 x 1536 Provide Beeper during switchin...

Page 5: ... mini DIN Video 1 x HDB 15 female Speaker 1 x audio female jacket audio model Console Ports Microphone 1 x audio female jacket audio model Auto Scan Interval 5 250 Seconds DDC DDC2 monitor Yes Max Resolution 2048x1536 85Hz Hot Swappable Yes Operating systems supported Windows 98SE ME 2000 XP 2003 Server Linux Mac OS9 OSX and Sun Micro System Device driver No Need Power By PS 2 and or USB or Extern...

Page 6: ...6 6 2 2 Front Panel and Rear Panel The following figure illustrated 4 Port model with Audio and PS2 USB console as example Figure 2 1 Front Panel Rear Panel ...

Page 7: ...omputers or Servers PCs The following equipment must be equipped with each computer or server A VGA SVGA or Multisync card Type A USB port or PS 2 6 pin mini DIN for Keyboard and Mouse Cables The KVM Switch must be used with specific combo 4 in 1 cables To purchase more cable sets contact your dealer Figure 3 1 Combo 4 in 1 cable ...

Page 8: ...t the USB keyboard which has built in USB HUB Console connections Plug USB or PS 2 keyboard USB or PS 2 mouse arbitrarily and VGA video into the Console ports located on the front panel A combination of USB mouse and PS 2 keyboard or a combination of PS 2 mouse and USB keyboard are all supported by the KVM Switch unit System connections Use KVM combo 4 in 1 cable as shown in Figure 3 1 to connect ...

Page 9: ...ne USB PS 2 keyboard mouse ports and VGA into PCs at same time recommended in priority Figure 4 1 Figure 4 1 Speaker Microphone PS 2 USB and VGA connected at same time 2 Plug only Speaker Microphone PS 2 keyboard mouse ports and VGA into PCs Figure 4 2 Figure 4 2 Speaker Microphone PS 2 and VGA connected ...

Page 10: ...M Switch has the ability to switch the keyboard video mouse audio microphone simultaneously Note When using the two step Hot Key sequences the keys must be pressed within 5 seconds otherwise the Hot Key action is terminated 5 1 Push Button on front panel Figure 5 1 Push Button for PC Port Selection Push the button directly to select the connected PC ...

Page 11: ... change leading key to Caps Lock Ctrl Ctrl Num Lock Enter to change leading key to Num Lock Ctrl Ctrl Scroll Lock Enter to change leading key to Scroll Lock Note The default leading hotkey setting is Scroll Lock After changing the leading hotkey setting the new setting will take effect immediately until the KVM switch is powered off or reset 5 2 2 PC Selection Hot key commands Scroll Scroll 1 Ente...

Page 12: ...50 seconds The interval is adjustable before switching to the next PC Pressing any key will stop the Auto scan and the console monitor screen will jump back to the original PC Adjustable scan time interval setting 5 250 sec Hot key command Scroll Scroll S 5 250 Enter 5 2 4 Beeper Enable Hot key commands Scroll Scroll B Enter to disable Beeper Scroll Scroll B Enter to enable Beeper The Speaker Beep...

Page 13: ...ble Audio auto switch mode Note One long beep Audio auto switch mode is disabled Three short beeps Audio auto switch mode is enable Audio Auto Switch Mode When this mode is enabled the hardware push button can select and switch the PC and the associated Audio at the same time When disabled only PC is switched This mode has default setting enabled Audio means speaker and microphone signals Audio on...

Page 14: ...ng PC Audio to PC 1 Scroll Scroll F2 Enter Combined switching PC Audio to PC 2 Scroll Scroll F3 Enter Combined switching PC Audio to PC 3 Scroll Scroll F4 Enter Combined switching PC Audio to PC 4 Scroll Scroll A 1 Enter Audio switching to PC1 s audio Scroll Scroll A 2 Enter Audio switching to PC2 s audio Scroll Scroll A 3 Enter Audio switching to PC3 s audio Scroll Scroll A 4 Enter Audio switchin...

Page 15: ... the PS 2 or USB keyboard press the LEFT Window KEY first this key usually is located between the left Ctrl key and left Alt key then press the second associated key Sun Micro System Function Key PS 2 or USB Keyboard Stop L_Win L_Alt Props L_Win L_Ctrl Compose L_Win L_Shift Front L_Win F1 Open L_Win F2 Find L_Win F3 Again L_Win F4 Undo L_Win F5 Copy L_Win F6 Paste L_Win F7 Cut L_Win F8 Help L_Win ...

Page 16: ... a Class B computing device in accordance with the specifications in Part 15 of the FCC Rules These specifications are designed to provide reasonable protection against such interference in a residential installation However there is no guarantee that interference will not occur in a particular installation If this device does cause harmful interference to radio or television reception which can b...

Reviews: