0
0
2
2
0
0
1
1
0
0
3
3
10/REAR WHEEL
64
100104-10
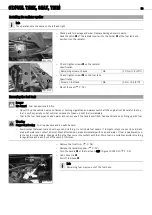
Setting a wide toe width:
–
Mount the spacing sleeve
with the cone facing inward.
–
Mount the conical ring
with the cone facing outward.
–
Mount the wheel hub
.
–
Mount the washer and the new self-locking nut.
100102-10
–
Remove the vehicle from the work stand. (
–
Tighten nuts
on both sides.
Specification
Nut, rear wheel hub
M18x1,5
130
Nm
(95.9
lbf
ft)
–
Shift gear to neutral.
14.8
Removing the rear axle
–
Engage 1st gear.
100102-12
–
Loosen nuts
of the wheel hubs on both sides.
–
Jack up the vehicle. (
–
Remove nuts
on both sides and take all parts off of the rear axle.
600409-10
–
Remove chain joint
. Remove the chain from the rear sprocket.
600410-10
–
Loosen screw
.
–
Turn clamping nut
counterclockwise using the special tool until lock rings
are
freely accessible. Remove the lock rings.
Open-end wrench accessory 46mm (83019010461) (
–
Turn clamping nut
clockwise using the special tool and remove.
600411-10
–
Remove screws
.
–
Push back the brake linings by tilting brake caliper
slightly to one side on the
brake disc. Carefully pull the brake caliper off of the brake disc and let it hang to
one side.
Info
Do not operate the foot brake when the brake caliper has been removed.


