background image

MAINTENANCE WORK ON CHASSIS AND ENGINE

35

9.10

Checking riding sag of shock absorber

C

C

0

0

A

A

400222-10

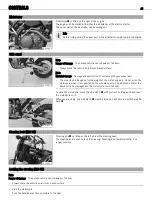
Measure distance

of rear wheel unloaded. (

p. 34)

With another person holding the motorcycle, the rider should sit on the saddle with
full protective clothing in a normal sitting position (feet on footrests) and bounce
up and down a few times until the rear suspension levels out.

The other person now has to measure the distance between the rear axle and a
fixed point.

Make a note of the value as measurement

.

Info

The riding sag is the difference between measurements

and

.

Check the riding sag.

Riding sag

105 mm (4.13 in)

» If the riding sag differs from the specified measurement:

Adjust the riding sag.

x

(

p. 36)

9.11

Adjusting spring preload of the shock absorber

x

Danger

Danger of accidents

The shock absorber is under high pressure.

The shock absorber is filled with highly compressed nitrogen, so never dismantle the shock absorber or carry out any main-
tenance on it yourself.

Info

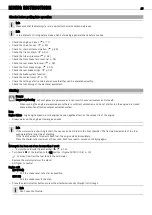
Before changing the spring preload, make a note of the present setting, e.g., by measuring the length of the spring.

Remove shock absorber.

x

(

p. 36)

After removing the shock absorber, clean it thoroughly.

A

A

2

2

1

1

400216-10

Loosen screw

.

Turn adjusting ring

until the spring is no longer under tension.

Combination wrench (50329080000)
Hook wrench (T106S)

Measure the overall spring length when not under tension.

Tighten the spring by turning adjusting ring

to measurement

.

Guideline

Spring preload

9 mm (0.35 in)

Info

Depending on the static sag and/or the riding sag, it may be necessary to
increase or decrease the spring preload.

Tighten screw

.

Guideline

Screw, shock absorber adjusting ring

M6

5 Nm (3.7 lbf ft)

Install the shock absorber.

x

(

p. 36)

Summary of Contents for 450 EXC RACING 2006

Page 1: ...OWNER S MANUAL 2010 450 EXC EU 530 EXC EU 450 XC W USA ART NO 3211484en ...

Page 2: ......

Page 3: ...hnical specifica tions prices colors forms materials services designs equipment etc without prior notice and without specifying reasons to adapt these to local conditions as well as to stop production of a particular model without prior notice KTM accepts no liability for delivery options deviations from illustrations and descriptions as well as misprints and other errors The models portrayed part...

Page 4: ...uthorized KTM workshop as additional order 30 Important checks and maintenance work to be carried out by the rider 30 MAINTENANCE WORK ON CHASSIS AND ENGINE 32 Jacking up the motorcycle 32 Removing the motorcycle from the work stand 32 Checking the basic chassis setting with the rider s weight 32 Compression damping of shock absorber 32 Adjusting high speed compression damping of the shock absorbe...

Page 5: ...x 68 Installing the fuel tank x 69 Cooling system 70 Checking antifreeze and coolant level 70 Checking the coolant level 70 Draining coolant x 71 Refilling coolant x 71 Glass fiber yarn filling of main silencer 72 Removing main silencer 72 Installing the main silencer 72 Dismounting the air filter box lid 72 Installing the air filter box lid 72 Removing the air filter x 73 Installing the air filte...

Page 6: ...derstanding In the interest of your own safety have these jobs done in an authorized KTM workshop There your motorcycle will be serviced optimally by specially trained experts using the specialist tools required Identifies a page reference more information is provided on the specified page Formats used The typographical and other formats used are explained in the following Specific name Identifies...

Page 7: ... schedule is reached Pay careful attention to the prescribed running in period inspection and maintenance intervals If you observe these exactly you will ensure a much longer service life for your motorcycle Warranty The work prescribed in the service schedule must be carried out in an authorized KTM workshop and confirmed in the customer s ser vice record since otherwise no warranty claims will b...

Page 8: ...ay close attention to the notes warning Info Various information and warning labels are affixed to the vehicle Do not remove information warning labels If they are miss ing you or others may not recognize dangers and may therefore be injured Grades of risks Danger Identifies a danger that will immediately and invariably lead to fatal or serious permanent injury if the appropriate measures are not ...

Page 9: ...VIEW OF VEHICLE 7 3 1 View of the vehicle from the left front example 800014 10 1 Side stand 2 Shift lever 3 Chain guide 4 Fuel tap 5 Air filter box lid 6 Clutch lever 7 Hand brake lever ...

Page 10: ...Level viewer for brake fluid rear 2 Fork compression adjustment 3 Foot brake pedal 4 Kickstarter 5 Horn 6 Filler cap 7 Fork rebound adjustment 8 Electric starter button 9 Speedometer 10 Short circuit button 11 Shock absorber compression adjustment 12 Shock absorber rebound adjustment ...

Page 11: ...0 The type label is fixed to the front of the steering head 4 3 Key number EXC EU 500125 10 The key number is stamped on the key strap 4 4 Engine number 500072 10 The engine number is stamped on the left side of the engine under the engine sprocket 4 5 Fork part number 500082 10 The fork part number is stamped on the inner side of the fork stub ...

Page 12: ...LOCATION OF SERIAL NUMBERS 10 4 6 Shock absorber part number 500129 10 The shock absorber part number is stamped on the top of the shock absorber above the adjusting ring on the engine side ...

Page 13: ...utton pressed In this position the ignition circuit is interrupted a running engine stops and a non running engine will not start 5 4 Short circuit button EXC EU 500134 10 The short circuit button is fitted on the left side of the handlebar Possible states Short circuit button in basic position In this position the ignition circuit is closed and the engine can be started Short circuit button press...

Page 14: ...ch has no function when delivered It can be used if lighting is fit ted later 5 8 Horn button EXC EU 500134 11 The horn button is fitted on the left side of the handlebar Possible states Horn button in neutral position Horn button pressed The horn is operated in this position 5 9 Flasher switch EXC EU 500145 10 Flasher switch is fitted on the left side of the handlebar Possible states Flasher ligh...

Page 15: ...5 mm corresponds to the size of the 21 front wheel with a series produc tion tire The display then changes to the last selected mode 5 13 Tripmaster switch Option Tripmaster switch You can use the trip master switch to control the functions of the speedometer from the handlebar Info The trip master is an optional accessory 5 14 Setting kilometers or miles Info If you change the unit the value ODO ...

Page 16: ...ton for 3 5 seconds The settings are saved and the Setup menu closed Info If no button is pressed for 20 seconds or if no impulse comes from the wheel speed sensor the settings are automatically saved and the Setup menu closed 5 16 Adjusting the speedometer functions Info Upon delivery only the SPEED H and SPEED ODO display modes are activated Condition The motorcycle is standing 400318 01 Press t...

Page 17: ...PEED appears on the left side of the display The current speed is displayed in the SPEED display mode The current speed can be displayed in Km h or Mph Info Making the setting according to the country When an impulse comes from the front wheel the left side of the speedometer display changes to the SPEED mode and the current speed is shown 5 19 Display mode SPEED H service hours 400316 01 Conditio...

Page 18: ...ss the button Stops the current lap time and saves it and the stop watch starts the next lap Press the button for 3 5 seconds The stop watch and the lap time are reset Press the button briefly Next display mode 5 22 Display mode SPEED ODO odometer 400317 01 Press the button briefly and repeatedly until ODO appears at the bottom right of the display In ODO display mode the total number of kilometer...

Page 19: ...ly mode SPEED A1 average speed 1 400325 01 Press the button briefly and repeatedly until A1 appears at the top right of the display A1 average speed 1 shows the average speed calculated using TR1 trip master 1 and S1 stop watch 1 The calculation of this value is activated by the first impulse of the wheel speed sensor and ends 3 seconds after the last impulse Press the button No function Press the...

Page 20: ...isplay mode SPEED H service hours No function No function The display changes to the Setup menu of the speedometer functions Next display mode Display mode SPEED CLK clock No function No function The display changes to the Setup menu of the clock Next display mode Display mode SPEED LAP lap time Starts or stops the clock Stops the current lap time and saves it and the stop watch starts the next la...

Page 21: ...he tap handle on the fuel tap you can open or close the supply of fuel to the carburetor Possible states Fuel supply closed OFF No fuel can flow from the tank to the carburetor Fuel supply open ON Fuel can flow from the tank to the carburetor The fuel tank empties down to the reserve Reserve fuel supply open RES Fuel can flow from the tank to the carburetor The fuel tank empties completely 5 30 Op...

Page 22: ...of the handlebar Activating the choke function frees an opening through which the engine can draw extra fuel This gives a richer fuel air mixture which is needed for a cold start Info If the engine is warm the choke function must be deactivated Possible states Choke function activated The choke lever is pulled to the stop Choke function deactivated The choke lever is pushed back to the stop 5 34 S...

Page 23: ...e only Do not sit on the motorcycle when it is supported by the side stand only The side stand and or the frame could be damaged and the motorcycle could fall over To park the motorcycle press the side stand with your foot to the ground and lean the motorcycle on it 500141 10 When you are riding the side stand must be folded up and secured with the rubber band 5 38 Steering lock EXC EU 500126 10 S...

Page 24: ...ove the key Steering is no longer possible Info Never leave the key in the steering lock 5 40 Unlocking the steering EXC EU Insert the key in the steering lock turn it to the left pull it out and turn it to the right Remove the key You can now steer the bike again Info Never leave the key in the steering lock ...

Page 25: ...he rear brake can fail due to overheating Take your foot off the foot brake pedal if you do not want to brake Warning Danger of accidents Unstable riding behavior Do not exceed the maximum permitted weight and axle loads Warning Risk of misappropriation Usage by unauthorized persons Never leave the vehicle while the engine is running Secure the vehicle against use by unauthorized persons Info When...

Page 26: ...mum permissible overall weight 335 kg 739 lb Maximum permissible front axle load 145 kg 320 lb Maximum permissible rear axle load 190 kg 419 lb Check the spoke tension p 64 Info The spoke tension must be checked after half an hour of operation Run the engine in 6 2 Running in the engine During the running in phase do not exceed the specified engine speed and engine performance Guideline Maximum en...

Page 27: ...ficient ventilation and do not start or run the engine in a closed space without an effective exhaust extraction system Note Engine failure High engine speeds in cold engines have a negative effect on the service life of the engine Always warm up the engine at low engine speeds Info If the motorcycle is unwilling to start the cause can be old fuel in the float chamber The flammable elements of the...

Page 28: ...siderably Always open the throttle only as much as the engine can handle abrupt throttle opening increases fuel consumption To shift down brake and close the throttle at the same time Pull the clutch lever and shift into a lower gear release the clutch lever slowly and open the throttle or shift again Switch off the engine if you expect to be standing for a long time Guideline 2 min Avoid frequent...

Page 29: ...fall over Brake the motorcycle Shift gear to neutral XC W USA Press and hold the short circuit button while the engine is idling until the engine stops EXC EU Press and hold the short circuit button while the engine is idling until the engine stops Turn handle of the fuel tap to the OFF position Figure 500137 10 p 19 Park the motorcycle on firm ground 7 7 Refueling Danger Fire hazard Fuel can easi...

Page 30: ...easurement Guideline Measurement of 35 mm 1 38 in Total fuel tank capacity approx EXC EU 9 0 l 2 38 US gal Super unleaded ROZ 95 RON 95 PON 91 p 102 Total fuel tank capacity approx XC W USA 9 2 l 2 43 US gal Super unleaded ROZ 95 RON 95 PON 91 p 102 Close the filler cap p 19 ...

Page 31: ...out sharp bends Check that the electrical equipment is functioning properly Check the headlight adjustment EXC EU p 67 Brakes Check the front brake linings p 55 Check the rear brake linings p 59 Check the brake discs p 52 Check the front brake fluid level p 54 Check the rear brake fluid level p 58 Check brake lines for damage and leakage Check the free play of the hand brake lever p 53 Check the f...

Page 32: ...arm rollers x Check the timing chain tensioner function x Check the balancer shaft x Check the crankshaft run out at the bearing pin x Change conrod bearing x Change the crankshaft main bearing x Check the transmission x Check the shift mechanism x Check the spring length of the oil pressure regulator valve x Change glass fiber yarn filling of main silencer x Replace foot brake cylinder seals x Ch...

Page 33: ... Clean the air filter x p 73 Check the tire air pressure p 64 Check the tire condition p 63 Check the coolant level p 70 Empty the carburetor float chamber x p 76 Check that all operating elements for smooth operation Check braking Check all screws nuts and hose clamps regularly for tightness NB1A Depending on conditions of use according to requirements ...

Page 34: ...es are adjusted for a standard rider weight with full protective clothing Guideline Standard rider weight 75 85 kg 165 187 lb If your weight is above or below the standard range you have to adjust the basic setting of the suspension components accord ingly Small weight differences can be compensated by adjusting the spring preload but in the case of large weight differences the springs must be rep...

Page 35: ...ismantle the shock absorber or carry out any main tenance on it yourself Info The low speed setting can be seen during the slow to normal compression of the shock absorber 400209 10 Turn adjusting screw clockwise with a screwdriver up to the last perceptible click Info Do not loosen nut Turn back counterclockwise by the number of clicks corresponding to the shock absorber type Guideline Compressio...

Page 36: ...istance as vertical as possible between the rear axle and a fixed point for example a mark on the side cover Make a note of the value as measurement Remove the motorcycle from the work stand p 32 9 9 Checking static sag of shock absorber 0 0 0 B B 0 0 A A 400221 10 Measure distance of rear wheel unloaded p 34 Ask someone to help you by holding the motorcycle upright Measure the distance between th...

Page 37: ...rber x Danger Danger of accidents The shock absorber is under high pressure The shock absorber is filled with highly compressed nitrogen so never dismantle the shock absorber or carry out any main tenance on it yourself Info Before changing the spring preload make a note of the present setting e g by measuring the length of the spring Remove shock absorber x p 36 After removing the shock absorber ...

Page 38: ...k absorber p 33 9 13 Removing the shock absorber x Jack up the motorcycle p 32 800023 10 Remove screw and lower the rear wheel with the swing arm as far as possible without blocking the rear wheel Fix the rear wheel in this position Remove screw push splash protector to the side and remove the shock absorber 9 14 Installing the shock absorber x 800023 11 Push splash protector to the side and posit...

Page 39: ...ection covers Turn adjusting screws clockwise until they stop Info The adjusting screws are located at the bottom end of the fork legs Make the same adjustment on both fork legs Turn back counterclockwise the number of clicks corresponding to the fork type Guideline Compression damping Comfort 26 clicks Standard 22 clicks Sport 20 clicks Info Turn clockwise to increase damping turn counterclockwis...

Page 40: ...rease spring preload turn counterclockwise to reduce spring preload Adjusting the spring preload has no influence on the absorption setting of the rebound damping Basically however you should set the rebound damping higher with a higher spring preload 9 19 Bleeding fork legs Jack up the motorcycle p 32 100021 10 Remove bleeder screws briefly Any excess pressure escapes from the interior of the for...

Page 41: ...ews Guideline Remaining screws chassis M6 10 Nm 7 4 lbf ft Position the brake line and cable harness Put the clamp on mount and tighten screws Position the fork protection on the right fork leg Mount and tighten screws Guideline Remaining screws chassis M6 10 Nm 7 4 lbf ft 9 23 Checking steering head bearing play Warning Danger of accidents Unsafe riding behavior due to incorrect steering head bea...

Page 42: ...deline Screw top steering head M20x1 5 10 Nm 7 4 lbf ft Using a plastic hammer tap lightly on the upper triple clamp to avoid strains Fully tighten screw Guideline Screw top triple clamp M8 20 Nm 14 8 lbf ft Tighten screw Guideline Screw top steering stem M8 20 Nm 14 8 lbf ft Check the steering head bearing play p 39 9 25 Adjusting play of steering head bearing x XC W USA Jack up the motorcycle p ...

Page 43: ...eft Loosen screw Remove the fork leg on the right 100023 11 EXC EU Loosen screw Remove the fork leg on the left Loosen screw Remove the fork leg on the right 9 27 Installing the fork legs x 100021 10 Position the fork legs Info The topmost sunk nut in the fork leg must be flush to the upper edge of the upper triple clamp Position the bleeder screw to the front 500094 11 XC W USA Fully tighten scre...

Page 44: ...t fork leg Remove the fork protector upwards 9 29 Installing the fork protector x 500105 10 Position the fork protection on the left fork leg Mount and tighten screws Guideline Remaining screws chassis M6 10 Nm 7 4 lbf ft Position the fork protection on the right fork leg Mount and tighten the screws Guideline Remaining screws chassis M6 10 Nm 7 4 lbf ft Install the fork legs x p 41 9 30 Removing ...

Page 45: ...ke off top triple clamp with the handlebar and place it on one side Info Protect the motorcycle and its attachments from damage by covering them Do not bend the cables and lines 500150 10 Remove protector ring Remove the lower triple clamp with the steering stem Remove the upper steering head bearing 9 32 Installing the lower triple clamp x XC W USA 0 0 2 2 0 0 1 1 0 0 3 3 500098 10 Clean the bear...

Page 46: ...d free laying Check the steering head bearing play p 39 9 33 Installing the lower triple clamp x EXC EU 0 0 2 2 0 0 1 1 500151 10 Clean the bearing and sealing elements check for damage and grease Long life grease p 103 Insert the lower triple clamp with the steering stem Mount the upper steering head bearing Info Check whether the top steering head seal is correctly positioned Push on protective ...

Page 47: ...lamp x p 44 9 35 Dismounting the front fender 500092 10 Remove screws Remove the front fender Make sure that the distance bushings remain in place 9 36 Installing the front fender 500092 10 Ensure that the spacing sleeves are mounted in the fender Position the front fender Mount and tighten screws Guideline Remaining screws chassis M6 10 Nm 7 4 lbf ft Info Take care with the contact between the ho...

Page 48: ... brake line and cable harness Put the clamp on mount and tighten screw Check the headlamp setting 9 39 Dismount the start number plate XC W USA 500101 10 Remove screw and take off clamp Remove screw with distance bushing Remove the start number plate 9 40 Installing the start number plate XC W USA 500101 11 Position the start number plate Mount and tighten screw with the distance bushing Guideline...

Page 49: ...e handlebar clamp Remove the handlebar and lay it to one side Info Protect the motorcycle and its attachments from damage by covering them Do not bend the cables and lines Remove the two screws Remove the handlebar support Place the handlebar support in the required position Fit and tighten the two screws Guideline Screw handlebar support M10 40 Nm 29 5 lbf ft Loctite 243 Info Position the left an...

Page 50: ...ire steering range The idle speed must not change If the idle speed changes Adjust the gas Bowden cable play x p 48 9 45 Adjusting the gas Bowden cable play x Dismount the fuel tank x p 68 Check gas Bowden cable route p 47 500153 10 Move the handlebar to the straight ahead position Push back bellows Loosen nut Turn adjusting screw in as far as possible Loosen nut Turn adjusting screw so that there...

Page 51: ...ntershaft of the transmission can break On the other hand if the chain is loose it can fall off the engine sprocket or the rear sprocket and block the rear wheel or damage the engine Check for correct chain tension and adjust if necessary Jack up the motorcycle p 32 400213 10 Push the chain at the end of the chain sliding component upwards to measure the chain tension Info The upper chain section ...

Page 52: ...ft gear to neutral Pull on the upper part of the chain with the specified weight Guideline Weight of chain wear measurement 10 15 kg 22 33 lb Measure the distance of 18 chain links in the lower chain section Info Chain wear is not always even so you should repeat this measurement at different chain positions Maximum distance at the longest chain section 272 mm 10 71 in If the distance is greater t...

Page 53: ...e M20x1 5 80 Nm 59 lbf ft Info The wide adjustment range of the chain adjusters 32 mm enables different secondary transmissions with the same chain length Chain adjusters can be turned by 180 Remove the motorcycle from the work stand p 32 9 53 Adjusting chain tension after checking 400225 13 Loosen nut Loosen nuts Adjust the chain tension by turning the adjusting screws left and right Guideline Ch...

Page 54: ...n correctly aligned Tighten nuts 9 55 Adjusting chain guide x 400252 10 Remove screws and Take off the chain guide Condition Number of teeth 44 teeth Insert nut in hole Position the chain guide Mount and tighten screws and Guideline Remaining screws chassis M6 10 Nm 7 4 lbf ft Condition Number of teeth 45 teeth Insert nut in hole Position the chain guide Mount and tighten screws and Guideline Rema...

Page 55: ...ake lever according to specifications 400196 11 XC W USA Push the hand brake lever forward and check free travel Free travel of hand brake lever 3 mm 0 12 in If the free travel does not meet specifications adjust the basic position of handbrake lever p 53 400196 13 EXC EU Push the hand brake to the handlebar and check free travel Free travel of hand brake lever 3 mm 0 12 in If the free travel does...

Page 56: ...he handlebar to a horizontal position Check the brake fluid level in the viewer If the brake fluid is below the MIN mark Add front brake fluid x p 54 9 61 Adding front brake fluid x Warning Danger of accidents Brake system failure If the brake fluid level falls below the MIN mark this indicates a leakage in the brake system or worn out brake linings Have the brake system checked in an authorized K...

Page 57: ...nimum thickness Minimum thickness 1 mm 0 04 in If the minimum thickness is less than specified Change the front brake linings x p 56 Check the brake linings for damage and cracking If damage or cracking is visible Change the front brake linings x p 56 9 63 Removing front brake linings x Warning Danger of accidents Improper brake maintenance and repair Always have your brake system maintained and r...

Page 58: ...brake disc 500089 12 Insert the brake pads insert bolt and mount locking split pins Position brake caliper mount and tighten screws Guideline Screw front brake caliper M8 25 Nm 18 4 lbf ft Loctite 243 Mount cable clip Operate the hand brake lever repeatedly until the brake linings lie on the brake disc and there is a tight spot 9 65 Changing the front brake linings x Warning Skin irritations Brake...

Page 59: ... specifications 500139 11 Disconnect spring Move the foot brake lever backwards and forwards between the end stop and the foot brake cylinder piston bracket and check free travel Guideline Free travel at foot brake lever 3 5 mm 0 12 0 2 in If the free travel does not meet specifications Adjust the basic position of the footbrake lever x p 57 Reconnect spring 9 67 Adjusting basic position of footbr...

Page 60: ...f accidents Brake system failure If the brake fluid level falls below the MIN mark this indicates a leakage in the brake system or worn out brake linings Have the brake system checked in an authorized KTM workshop and do not ride any further Warning Skin irritations Brake fluid can cause skin irritation on contact Avoid contact with skin and eyes and keep out of the reach of children If brake flui...

Page 61: ...rkshop 400236 10 Press the brake caliper by hand on to the brake disc in order to press back the brake piston Info Make sure when pushing back the brake piston that you do not press the brake caliper against the spokes Remove the locking split pins withdraw the bolt and take out the brake pads Clean brake caliper and brake caliper support 9 72 Installing the rear brake linings x Warning Danger of ...

Page 62: ... old brake fluid Have the front and rear brake fluid replaced according to the service plan in an authorized KTM workshop Warning Environmental hazard Hazardous substances cause environmental damage Oil grease filters fuel cleaners brake fluid etc should be disposed of as stipulated in applicable regulations Info Never user DOT 5 brake fluid This is based on silicone oil and is colored purple Oil ...

Page 63: ...raw the wheel spindle Take the front wheel out of the fork Info Do not pull the hand brake lever when the front wheel is removed Always lay the wheel down in such a way that the brake disc is not dam aged 500086 10 Remove spacing sleeves 9 75 Installing the front wheel x Warning Danger of accidents Reduced braking due to oil or grease on the brake discs Always keep the brake discs free of oil and ...

Page 64: ...sc in order to press back the brake piston Info Make sure when pushing back the brake piston that you do not press the brake caliper against the spokes Remove nut Remove chain adjuster Withdraw the wheel spindle only enough to allow the rear wheel to be pushed forward Push the rear wheel forward as far as possible Remove the chain from the rear sprocket Holding the rear wheel withdraw the wheel sp...

Page 65: ... the foot brake lever repeatedly until the brake linings lie on the brake disc and there is a tight spot Remove the motorcycle from the work stand p 32 9 78 Checking tire condition Info Only mount tires approved and or recommended by KTM Other tires could have a negative effect on riding behavior The type condition and air pressure of the tires all have an important impact on the riding behavior o...

Page 66: ...ont 1 0 bar 15 psi Rear 1 0 bar 15 psi Road tire pressure EXC EU Front 1 5 bar 22 psi Rear 2 0 bar 29 psi If the tire pressure does not meet specifications Correct the tire pressure Mount the dust cap 9 80 Checking spoke tension Warning Danger of accidents Unstable riding behavior due to loose spokes If you ride with loose spokes the spokes can break Have the spoke tension corrected in an authoriz...

Page 67: ...ect the positive plus cable of the bat tery Hang the rubber band out to the bottom Lift the battery up 9 82 Installing the battery x 500069 11 Place the battery in the battery holder 4Ah battery YTX5L BS p 91 Reconnect the rubber band Attach the plus cable and replace the plus pole cover Attach the minus cable Mount the seat p 68 9 83 Recharging the battery x Warning Risk of injury Battery acid an...

Page 68: ...vel does not have to be checked Switch off all power consumers and switch off the engine Remove the seat p 68 Disconnect the minus negative cable of the battery to avoid damage to the motor cycle s electronics 400240 10 Connect the battery charger to the battery Switch on the battery charger Battery charger 58429074000 You can also use the battery charger to test rest potential and start potential...

Page 69: ...cm 2 in Stand the motorcycle upright in front of the wall at distance The driver in full protective clothing should now sit on the motorcycle in a normal sitting position feet on the footrests Guideline Distance 5 m 16 ft Switch on low beam Check the headlight adjustment The border between light and dark must be exactly at the lower mark when the motorcycle is operational and complete with rider I...

Page 70: ...uel in the fuel tank expands when warm and can escape if the tank is overfilled See specifications on filling up with fuel Warning Danger of poisoning Fuel is poisonous and a health hazard Avoid contact between fuel and skin eyes and clothing Do not inhale fuel vapors If fuel gets into your eyes rinse immedi ately with water and contact a doctor Wash affected skin areas immediately with soap and w...

Page 71: ...id contact between fuel and skin eyes and clothing Do not inhale fuel vapors If fuel gets into your eyes rinse imme diately with water and contact a doctor Wash affected skin areas immediately with soap and water If fuel is swallowed contact a doctor immediately Change clothing that has come into contact with fuel 500067 01 Position the fuel tank and install the two spoilers to the side of the rad...

Page 72: ...lothes that have come into contact with coolants Keep coolants out of the reach of children 400243 10 Stand the motorcycle upright on a horizontal surface Remove the radiator cap Check the antifreeze of the coolant 25 45 C 13 49 F If the antifreeze of the coolant does not meet specifications Correct the antifreeze of the coolant Check the coolant level in the radiator Coolant level above radiator ...

Page 73: ... immediately with soap and water If coolant is swallowed contact a doctor immediately Change clothes that have come into contact with coolants Keep coolants out of the reach of children 400335 11 Stand the vehicle upright Place a suitable container under the water pump cover Remove screw Remove the radiator cap Completely drain the coolant Fit screw with a new seal and tighten it Guideline Screw w...

Page 74: ...ry hot when the vehicle is driven Allow the exhaust system to cool down Do not touch hot components 800020 10 Disconnect spring Remove screws and take off main silencer 9 99 Installing the main silencer 800020 11 Mount the main silencer Mount and tighten screws Guideline Remaining screws chassis M6 10 Nm 7 4 lbf ft Reconnect spring 9 100 Dismounting the air filter box lid 800021 10 Pull off the ai...

Page 75: ...onto the air filter support Put in both parts together position them and fix them with the air filter support Info If the air filter is not correctly mounted dust and dirt can penetrate into the engine and can cause damage Install the air filter box lid p 72 9 104 Cleaning air filter x Warning Environmental hazard Hazardous substances cause environmental damage Oil grease filters fuel cleaners bra...

Page 76: ... Use only clean brake fluid from a sealed container 400339 10 Move the clutch fluid reservoir mounted on the handlebar to a horizontal position Remove screws Remove cover with membrane Check the fluid level Fluid level under top level of container 4 mm 0 16 in If the fluid level does not meet specifications Correct the fluid level of the hydraulic clutch Brake fluid DOT 4 DOT 5 1 p 102 Position th...

Page 77: ...ount and tighten the screws Info Clean up overflowed or spilt fluid immediately with water 9 108 Carburetor idle 400341 10 The idle setting of the carburetor has a big influence on the starting behavior stable idling and the response to throttle opening That means that an engine with a correctly set idle speed is easier to start than if the idle is set wrongly Info The carburetor and its component...

Page 78: ...speed you have to mount a smaller idling jet The idle adjusting screw must not be opened more than two turns If more than two turns are necessary rich mixture use a larger idling jet After changing the idling jet start from the beginning with the adjusting steps Adjust the idle speed with adjusting screw Guideline Choke function deactivated The choke lever is pushed in to the stop XC W USA p 20 Ch...

Page 79: ...is cold Check the engine oil level The engine oil must be between the halfway mark and the top of the oil level viewer If the engine oil level is below the specified level Top up the engine oil p 79 9 112 Changing engine oil and oil filter cleaning engine oil screen x Drain the engine oil and clean the engine oil screen x p 77 Remove the oil filter x p 78 Install the oil filter x p 78 Fill up with...

Page 80: ... area under cold water immediately Warning Environmental hazard Hazardous substances cause environmental damage Oil grease filters fuel cleaners brake fluid etc should be disposed of as stipulated in applicable regulations Place a suitable container under the engine 200113 10 Remove screws Remove oil filter cover with O ring 200114 10 Pull the oil filter insert out of the oil filter casing Circlip...

Page 81: ...space without an effective exhaust extraction system Start the engine and check that it is oil tight Check the engine oil level p 77 9 117 Topping up engine oil Info Too little engine oil or poor quality engine oil results in premature wear to the engine 200115 10 Remove the screw cap on the generator cover and fill up with engine oil Engine oil SAE 10W 50 p 102 Mount and tighten screw cap Danger ...

Page 82: ...ourself hold the affected area under cold water immediately Warning Environmental hazard Hazardous substances cause environmental damage Oil grease filters fuel cleaners brake fluid etc should be disposed of as stipulated in applicable regulations Info Drain the gear oil only when the engine is warm Stand the motorcycle on its side stand on a horizontal surface 500159 10 Place a suitable container...

Page 83: ... oil tight Check the gear oil level p 79 9 122 Adding gear oil x Info Too little gear oil or poor quality oil results in premature wear to the transmission 200116 10 Remove gear oil level check screw 200118 11 Remove screw cap Stand the vehicle upright Top up with gear oil until it flows out of the bore of the gear oil level screw Engine oil SAE 10W 50 p 102 Mount and tighten the gear oil level ch...

Page 84: ...m Check the ignition system x Short circuit cable in cable harness frayed short circuit button or emer gency OFF switch defective Check the wiring harness visual check Check the electrical system Plug connector of CDI control device pulse generator or ignition coil oxi dized Clean the plug connector and treat it with con tact spray Water in carburetor or jets blocked Check adjust the carburetor co...

Page 85: ...stem for leakage Check the coolant level p 70 Too little air stream Switch off engine when standing Radiator fins very dirty Clean radiator fins Foam formation in cooling system Drain the coolant x p 71 Refill the coolant x p 71 Bent radiator hose Change the radiator hose x Thermostat defective Check the thermostat x Guideline Opening temperature 70 C 158 F High oil consumption Engine vent hose be...

Page 86: ...cleaner p 103 Info Use warm water containing normal motorcycle cleaner and a soft sponge After rinsing the motorcycle with a gentle water spray allow it to dry thoroughly Empty the carburetor float chamber x p 76 Warning Danger of accidents Reduced braking due to wet or dirty brakes Clean or dry dirty or wet brakes by riding and braking gently After cleaning ride the vehicle a short distance until...

Page 87: ...il and oil filter and clean the engine oil screen x p 77 Change the gear oil and clean the gear oil screen x p 80 Check the antifreeze and coolant level p 70 Drain the fuel from the tanks into a suitable container Empty the carburetor float chamber x p 76 Check the tire air pressure p 64 Remove the battery x p 65 Recharge the battery x p 65 Guideline Storage temperature of battery without direct s...

Page 88: ...ing not a bearing bush DLC plated piston pins Pistons Forged light alloy Piston rings 1 compression ring 1 oil scraper ring Engine lubrication Pressure circulation lubrication with 2 rotor pumps engine 1 rotor pump transmission Primary transmission 33 76 Clutch Multidisc clutch in oil bath hydraulically activated Transmission ratio 1st gear 14 36 2nd gear 17 32 3rd gear 19 28 4th gear 22 26 5th ge...

Page 89: ...TECHNICAL DATA ENGINE 87 13 3 Capacity coolant Coolant 0 95 l 1 qt Coolant p 102 Coolant mixed ready to use p 102 ...

Page 90: ...w gear oil level check M6 8 Nm 5 9 lbf ft Screw idler M6 10 Nm 7 4 lbf ft Loctite 243 Screw kickstarter spring hanger M6 10 Nm 7 4 lbf ft Screw kickstarter stop M6 10 Nm 7 4 lbf ft Loctite 243 Screw oil filter cover M6 10 Nm 7 4 lbf ft Screw shift drum locating M6 10 Nm 7 4 lbf ft Loctite 243 Screw shift lever M6 10 Nm 7 4 lbf ft Loctite 243 Screw starter motor M6 10 Nm 7 4 lbf ft Screw stator bra...

Page 91: ...ft Spark plug M12x1 25 15 20 Nm 11 1 14 8 lbf ft Gear oil drain plug with magnet M12x1 5 20 Nm 14 8 lbf ft Oil pressure control valve plug M12x1 5 20 Nm 14 8 lbf ft Plug SLS M12x1 5 20 Nm 14 8 lbf ft Plug rocker arm M14x1 25 20 Nm 14 8 lbf ft Plug gear oil screen M16x1 5 20 Nm 14 8 lbf ft Plug engine oil screen M17x1 5 20 Nm 14 8 lbf ft Nut inner clutch hub M18x1 5 80 Nm 59 lbf ft Nut primary gear...

Page 92: ...IN FCR MX 39 Carburetor identfication number 3900L Needle position 1st position from top Idle mixture adjusting screw Open 1 75 turns Pump membrane stop 2 15 mm 0 0846 in Main jet 180 Jet needle OBDTQ Idling jet 40 Idle air jet 100 Cold start jet 85 Leakage nozzle 40 15 3 530 EXC EU Carburetor type KEIHIN FCR MX 39 Carburetor identfication number 3900J Needle position 5th position from top Idle mi...

Page 93: ...3 52 Final drive XC W USA 13 52 Final drive 530 EXC EU 15 45 14 52 Chain 5 8 x 1 4 Rear sprockets available 38 40 42 45 48 49 50 51 52 Steering head angle 63 5 Wheelbase 1 475 10 mm 58 07 0 39 in Seat height unloaded 985 mm 38 78 in Ground clearance unloaded 380 mm 14 96 in Weight without fuel approx EXC EU 113 9 kg 251 1 lb Weight without fuel approx XC W USA 112 2 kg 247 4 lb Maximum permissible...

Page 94: ...00 21 51M TT Bridgestone M59 110 100 18 64M TT Bridgestone M402 Additional information is available in the Service section under http www ktm com 16 3 Capacity fuel Total fuel tank capacity approx EXC EU 9 0 l 2 38 US gal Super unleaded ROZ 95 RON 95 PON 91 p 102 Total fuel tank capacity approx XC W USA 9 2 l 2 43 US gal Super unleaded ROZ 95 RON 95 PON 91 p 102 Fuel reserve approx 2 l 2 qt ...

Page 95: ...s Spring length with preload spacer s 510 mm 20 08 in Spring rate Weight of rider 65 75 kg 143 165 lb 4 4 N mm 25 1 lb in Weight of rider 75 85 kg 165 187 lb 4 6 N mm 26 3 lb in Weight of rider 85 95 kg 187 209 lb 4 8 N mm 27 4 lb in Air chamber length 110 20 30 mm 4 33 0 79 1 18 in Spring preload Preload Adjuster Comfort 2 turns Standard 2 turns Sport 4 turns Fork length 940 mm 37 01 in FORK OIL ...

Page 96: ...ns Standard 1 5 turns Sport 1 turn Rebound damping Comfort 26 clicks Standard 24 clicks Sport 22 clicks Spring preload 9 mm 0 35 in Spring rate Weight of rider 65 75 kg 143 165 lb 69 N mm 394 lb in Weight of rider 75 85 kg 165 187 lb 72 N mm 411 lb in Weight of rider 85 95 kg 187 209 lb 76 N mm 434 lb in Spring length 250 mm 9 84 in Gas pressure 10 bar 145 psi Static sag 35 mm 1 38 in Riding sag 1...

Page 97: ...8 15 Nm 11 1 lbf ft Screw front brake caliper M8 25 Nm 18 4 lbf ft Loctite 243 Screw handlebar clamp M8 20 Nm 14 8 lbf ft Screw side stand fixing M8 40 Nm 29 5 lbf ft Loctite 243 Screw subframe M8 35 Nm 25 8 lbf ft Loctite 243 Screw top steering stem XC W USA M8 17 Nm 12 5 lbf ft Loctite 243 Screw top steering stem EXC EU M8 20 Nm 14 8 lbf ft Screw top triple clamp XC W USA M8 17 Nm 12 5 lbf ft Sc...

Page 98: ...2 2 2 2 CR1 1 CR 1 1 1 1 2 3 3 4 4 3 3 3 2 P1 B3 H13 H15 H18 S2 H4 H11 H7 H2 H9 H3 H5 H1 N2 G2 B1 L1 L2 A6 S5 S6 S7 K2 S8 E6 S10 M1 K1 G1 H14 S1 1 4 1 2 5 6 7 11 10 12 13 14 2 1 2 1 2 1 2 1 4 re wh re bl gn re re gn re bl re wh ye bl br ye bl ye br or pu bl or ye re br re ye gn bu wh bu gn ye re br ye re br ye wh bu ye bl bl ye bu br ye re br bl wh re ye re bl wh re ye re ye bl wh gn br wh bu wh b...

Page 99: ...ht K1 Starter relay with main fuse K2 Flasher relay L1 Pulse generator L2 Ignition coil M1 Starter motor N2 Voltage regulator rectifier P1 Speedometer S1 Rear brake light switch S2 Front brake light switch S5 Tripmaster switch optional S6 Light switch S7 Horn button short circuit button S8 Flasher switch S10 Electric starter button S11 Emergency OFF switch EXC R AUS X1 Ignition curve plug connecti...

Page 100: ...WIRING DIAGRAM 98 ye Yellow ye bl Yellow black ye re Yellow red ...

Page 101: ...WIRING DIAGRAM 99 ...

Page 102: ...h w r b wh ye re wh re bl gn re re gn re bl re wh bu wh br ye bl bu wh br br ye r b e r e y r b l b e y l b l b e r u b h w r b bu ye bl bl ye bu ye re wh re wh re ye re br ye re br wh ye bl h w h w gr gr bl wh bl br br br bl br bl H7 H11 B3 P1 S5 S9 S6 S10 E6 H14 M1 K1 G1 N2 H5 G2 L1 B1 A6 L2 X1 500248 10 ...

Page 103: ...arter relay with main fuse L1 Pulse generator L2 Ignition coil M1 Starter motor N2 Voltage regulator rectifier P1 Speedometer S5 Tripmaster switch optional S6 Light switch S9 Short circuit button S10 Electric starter button X1 Ignition curve plug connection bl Black bl wh Black white br Brown bu Blue bu wh Blue white gn Green gr Gray re Red re bl Red black re wh Red white wh White wh re White red ...

Page 104: ... 50 Corrosion antifreeze 50 Distilled water Coolant mixed ready to use Antifreeze 40 C 40 F Supplier Motorex Anti Freeze Engine oil SAE 10W 50 According to JASO T903 MA p 105 SAE p 105 SAE 10W 50 Guideline Use only engine oils that comply with the specified standards see specifications on the container and that possess the corre sponding properties KTM recommends Motorex products Synthetic engine ...

Page 105: ...x products Supplier Motorex Protect Shine 645 Contact spray Specification KTM recommends Motorex products Supplier Motorex Accu Contact High luster polish for paint Specification KTM recommends Motorex products Supplier Motorex Moto Polish Long life grease Specification KTM recommends Motorex products Supplier Motorex Fett 2000 Motorcycle cleaner Specification KTM recommends Motorex products Suppl...

Page 106: ...S 104 Oil for foam air filter Specification KTM recommends Motorex products Supplier Motorex Twin Air Liquid Bio Power Universal oil spray Specification KTM recommends Motorex products Supplier Motorex Joker 440 Universal ...

Page 107: ...ice intervals are demanded for automobile engines high performance at high engine speeds are in the fore ground for motorcycle engines With most motorcycles the gearbox and the clutch are lubricated with the same oil as the engine The JASO MA Standard meets these special requirements SAE The SAE viscosity classes were defined by the Society of Automotive Engineers and are used for classifying oils...

Page 108: ...9 Chain wear checking 50 Chassis number 9 Choke 20 Cleaning 84 Clutch changing fluid 74 fluid level checking 74 Clutch lever 11 adjusting basic position 74 Compression damping fork adjusting 37 Compression damping high speed of shock absorber adjusting 32 Compression damping low speed shock absorber adjusting 33 Coolant draining 71 refilling 71 Coolant level checking 70 Cooling system 70 E Electri...

Page 109: ...12 Owner s manual 6 P Play in gas Bowden cable adjusting 48 checking 48 Putting into operation advice on first use 23 after storage 85 checks before putting into operation 25 R Rear sprocket engine sprocket checking for wear 50 Rear wheel installing 62 removing 62 Rebound damping fork adjusting 37 shock absorber adjusting 33 Riding sag adjusting 36 S Seat mounting 68 removing 68 Service schedule 2...

Page 110: ...es 95 engine 86 87 engine tightening torques 88 89 fork 93 shock absorber 94 Tire air pressure checking 64 Tire condition checking 63 Transport 6 Troubleshooting 82 83 Type label 9 U Use definition 5 V View of vehicle left front 7 right rear 8 W Warranty 5 Wiring diagram 96 101 Work rules 5 ...

Page 111: ... 3211484en 3211484en KTM Sportmotorcycle AG 5230 Mattighofen Austria http www ktm com 12 2008 Photo Mitterbauer ...

Reviews: