background image

MAINTENANCE ON CHASSIS AND ENGINE

45

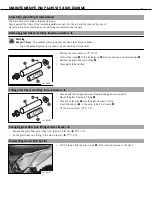
Adjusting basic position of footbrake lever

b

x

Warning

Danger of accidents

Brake system failure.

If there is no free travel on the foot brake pedal, pressure builds up on the rear brake in the brake system. The rear brake
can fail due to overheating. Adjust free travel on foot brake pedal according to specifications.

200373-10

Disconnect spring

b

.

Loosen nut

b

and with push rod

b

, turn it back until you have maximum free play.

To adjust the basic position of the footbrake lever individually, lossen nut

b

and

turn screw

b

accordingly.

Info

The range of adjustment is limited.

Turn push rod

b

accordingly until you have free play

b

. If necessary, adjust the

basic position of the footbrake lever.

Specification

Free play at foot brake lever

3… 5

b

mm (0.12… 0.2

b

in)

Hold screw

b

and tighten nut

b

.

Specification

Remaining nuts, chassis

M8

30

b

Nm

(22.1

b

lbf

b

ft)

Hold push rod

b

and tighten nut

b

.

Specification

Remaining nuts, chassis

M6

15

b

Nm

(11.1

b

lbf

b

ft)

Reconnect spring

b

.

Checking the rear brake fluid level

Warning

Danger of accidents

Brake system failure.

MIN

If the brake fluid level falls below the MIN mark, this indicates a leakage in the brake system or worn-out brake linings.

Have the brake system checked in an authorized KTM workshop, and do not ride any further.

Warning

Danger of accidents

Reduced braking due to old brake fluid.

Have the front and rear brake fluid replaced according to the service plan in an authorized KTM workshop.

400234-10

Stand the vehicle upright.

Check the brake fluid level in the viewer

b

.

»

When in the viewer

b

an air bubble is visible:

Add rear brake fluid.

b

x

(

P. 46)

Summary of Contents for 450 SXS-F

Page 1: ...OWNER S MANUAL 2008 450bSXS F ART NO 3211253en ...

Page 2: ......

Page 3: ...cifica tions prices colors forms materials services designs equipment etc without prior notice and without specifying reasons to adapt these to local conditions as well as to stop production of a particular model without prior notice KTM accepts no liability for delivery options deviations from illustrations and descriptions as well as printing and other errors The models portrayed partly contain ...

Page 4: ...eeding fork legs 27 Cleaning dust boots of fork legs 27 Loosening the fork protection 27 Positioning the fork protection 27 Checking play of steering head bearing 28 Adjusting play of steering head bearingbx 28 Fork offset 29 Setting the fork offsetbx 29 Removing the fork legsbx 30 Installing the fork legsbx 31 Removing the fork protectorbx 31 Installing the fork protectorbx 32 Removing the lower ...

Page 5: ...bx 61 Cleaning air filterbx 61 Adjusting basic position of clutch lever 62 Checking fluid level of hydraulic clutch 62 Changing fluid level of hydraulic clutchbx 62 Carburetor idle 63 Carburetor adjusting idlebx 63 Emptying the carburetor float chamberbx 64 Checking engine oil level 65 Changing engine oil and oil filter cleaning oil screenbx 65 Draining engine oilbx 65 Cleaning the oil screenbx 66...

Page 6: ...echnical understanding In the interest of your own safety have these jobs done in an authorized KTM workshop There your motorcycle will be serviced optimally by specially trained experts using the specialist tools required Identifies a page reference more information is provided on the specified page Formats used The typographical and other formats used are explained in the following Specific name...

Page 7: ...ge resulting from manipulations and alterations to the motorcycle Fuel oils etc You should use the fuels oils and greases according to specifications as listed in the owner s manual Spare parts accessories For your own safety use only spare parts and accessories approved by KTM KTM accepts no liability for other products and any resulting damage or loss Transport Note Danger of damageಘDanger of da...

Page 8: ...Read this owner s manual carefully and completely before making your first trip It contains a lot of information and tips to help you operate and handle your motorcycle Only then will you find out how to customize the motorcycle ideally for your own use and how you can protect yourself from injury The owner s manual also contains important information on servicing the motorcycle ದ The owner s manu...

Page 9: ...f vehicle front left side 200393 10 1 Hand brake lever 2 Start number plate 3 Front fender 4 Front wheel 5 Fork part number 6 Oil filter cover 7 Plug in stand 8 Shift lever 9 Choke button 10 Air filter 11 Filler cap 12 Clutch lever ...

Page 10: ... OF VEHICLE 8 View of vehicle rear right side 200394 10 1 Main silencer 2 Shock absorber 3 Brake caliper of rear brake 4 Rear wheel 5 Foot brake pedal 6 Manifold 7 Chassis number type label 8 Throttle grip ...

Page 11: ...e front of the steering head Engine number 400194 10 The engine numberb is stamped on the left side of the engine under the engine sprocket Fork part number 500082 10 The fork part numberb is stamped on the inner side of the fork stub Shock absorber part number 500083 10 The shock absorber part numberb is stamped on the top of the shock absorber above the adjusting ring on the engine side ...

Page 12: ...ed ದbHot start lever is pushed back to the stop Hand brake lever 400196 10 The hand brake leverb is located on the right side of the handlebar and operates the front wheel brake Short circuit button 400197 10 The short circuit buttonb is fitted on the left side of the handlebar Possible states Short circuit buttonb in basic position ದbIn this position the ignition circuit is closed and the engine ...

Page 13: ...t free Closing filler cap 400199 11 ದ Replace the filler cap and turn clockwise until the release buttonb locks in place Info Run the fuel tank breather hoseb without kinks Choke 400202 10 The chokeb is fitted on the left side of the carburetor Activating the choke function frees an opening through which the engine can draw extra fuel This gives a richer fuel air mixture which is needed for a cold...

Page 14: ...ears Foot brake pedal 200363 10 The foot brake pedalb is located in front of the right footrest and operates the rear wheel brake Plug in stand 400203 10 Note Danger of damageಘDanger of damage by the vehicle running away or falling over ದ Always place the vehicle on a firm and even surface To park the motorcycle insert the plug in standb in the left side of the wheel spindle Info Remove the plug i...

Page 15: ...foot brake pedal if you do not want to brake Warning Danger of accidentsಘUnstable riding behavior ದ Do not exceed the maximum permitted weight and axle loads Warning Risk of misappropriationಘUsage by unauthorized persons ದ Never leave the vehicle while the engine is running Secure the vehicle against use by unauthorized persons Info When using your motorcycle remember that others may feel disturbe...

Page 16: ... loads Specification Maximum permissible overall weight 335bkg 739blb Maximum permissible front axle load 145bkg 320blb Maximum permissible rear axle load 190bkg 419blb ದ Run the engine in Running in the engine ದ During the running in phase do not exceed the specified engine speed and engine performance Specification Maximum engine speed During the first 3 service hours 7 000brpm Maximum engine pe...

Page 17: ...sufficient ventilation and do not start or run the engine in a closed space Note Engine failureಘHigh engine speeds in cold engines have a negative effect on the service life of the engine ದ Always warm up the engine at low engine speeds Info If the motorcycle is unwilling to start the cause can be old fuel in the float chamber The flammable elements of the fuel evaporate after a long time of stand...

Page 18: ...throttle opening increases fuel consumption ದ To shift down brake if necessary and close the throttle at the same time ದ Pull the clutch lever and shift into a lower gear release the clutch lever slowly and open the throttle or shift again ದ Switch off the engine if you expect to be standing for a long time Specification ุb2bmin ದ Avoid frequent and longer slipping of the clutch This heats the eng...

Page 19: ...l up the vehicle near open flames or burning cigarettes and always switch off the engine first Be careful that no fuel is spilt especially on hot vehicle components Clean up spilt fuel immediately ದ Fuel in the fuel tank expands when warm and can escape if the tank is overfilled See specifications on filling up with fuel Warning Danger of poisoningಘFuel is poisonous and a health hazard ದ Avoid con...

Page 20: ... the front brake linings P 42 Check the rear brake linings P 46 Check the brake discs P 40 Check the front brake fluid level P 41 Check the rear brake fluid level P 45 Check brake lines for damage and leakage Check the free play of the hand brake lever P 41 Check the free play of the foot brake lever P 44 Check brake system function Check screws and guide bolts of brake system for tightness Chassi...

Page 21: ...k wear of all transmission components including shafts and bearings Check the spring length of the oil pressure regulator valve Change glass fiber yarn filling of main silencer bx P 60 Replace foot brake cylinder seals Check carburetor components S10A Every 10 service hours corresponds to about 70 liters of fuel after every race S20N After 20 service hours corresponds to about 140 liters of fuel S...

Page 22: ...ant level P 58 Empty the carburetor float chamber bx P 64 Check that all operating elements for smooth operation Check braking Check all screws nuts and hose clamps regularly for tightness NB1A Depending on conditions of use according to requirements ...

Page 23: ...are adjusted for a standard rider weight with full protective clothing Standard rider weight 75 85bkg 165 187blb If your weight is above or below the standard range you have to adjust the basic setting of the suspension components accordingly Small weight differences can be compensated by adjusting the spring preload but in the case of large weight differences the springs must be replaced Compress...

Page 24: ...setting can be seen during the slow to normal compression of the shock absorber 200365 10 ದ Turn the adjusting screwb clockwise with a screwdriver until it stops Info Do not loosen nutb ದ Turn back counterclockwise the number of clicks corresponding to the shock absorber type Specification Compression damping low speed Comfort 15bclicks Standard 12bclicks Sport 10bclicks Info Turn clockwise to inc...

Page 25: ...the rear axle and a fixed point for example a mark on the side cover ದ Make a note of the value as measurementb ದ Remove the motorcycle from the work stand P 21 Checking static sag of the shock absorber 400221 10 ದ Measure distanceb of rear wheel unloaded P 23 ದ Ask someone to help you by holding the motorcycle upright ದ Measure the distance between the rear axle and the fixed point again ದ Make a...

Page 26: ... P 25 Adjusting spring preload of the shock absorberbx Danger Danger of accidentsಘThe shock absorber is under high pressure ದ The shock absorber is filled with highly compressed nitrogen so never dismantle the shock absorber or carry out any main tenance on it yourself Info Before changing the spring preload make a note of the present setting e g by measuring the length of the spring ದ Remove shoc...

Page 27: ...ewb and lower the rear wheel with the swing arm as far as possible without blocking the rear wheel Fix the rear wheel in this position ದ Remove screwb push splash protectorb to the side and remove the shock absorber Installing shock absorberbx 200366 11 ದ Check parts for damage and wear Replace damaged or worn parts ದ Push splash protectorb to the side and position the shock absorber Mount and tig...

Page 28: ... fork legs ದ Turn back counterclockwise the number of clicks corresponding to the fork type Specification Compression damping Comfort 18bclicks Standard 15bclicks Sport 12bclicks Info Turn clockwise to increase damping turn counterclockwise to reduce sus pension damping Adjusting rebound damping of fork Info The hydraulic rebound damping determines the fork suspension behavior 400207 10 ದ Remove p...

Page 29: ...keep the brake discs free of oil and grease and clean them with brake cleaner when necessary ದ Clean and oil the dust boots and inner fork tube of both fork legs Universal oil spray P 84 ದ Press the dust boots back into their normal position ದ Remove excess oil ದ Position the fork protection P 27 ದ Remove the motorcycle from the work stand P 21 Loosening the fork protection 500087 11 ದ Remove scre...

Page 30: ... fro over the entire steering range The handlebar must be able to move easily over the entire steering range No resting locations should be noticeable If click positions are noticeable ದ Adjust the play of the steering head bearing bx P 28 ದ Check the steering head bearing and replace if required ದ Remove the motorcycle from the work stand P 21 Adjusting play of steering head bearingbx ದ Jack up t...

Page 31: ...rkingb you get better riding stability on fast race courses Fork offset Front marking 17 5bmm 0 689bin At markingb you get better handling in bends Fork offset Rear marking 20 5bmm 0 807bin Setting the fork offsetbx ದ Jack up the motorcycle P 21 ದ Dismount the start number plate P 34 ದ Dismount the front fender P 33 200385 10 ದ Loosen the screws of the lower triple clampb ದ Remove screwb 200386 10...

Page 32: ...rewsb Specification Screw bottom triple clamp M8 15bNm 11 1blbfbft Info Screwb is mounted during adjustment work ದ Adjust the play of the steering head bearing bx P 28 ದ Fit the start number plate P 34 ದ Install front fender P 33 ದ Remove the motorcycle from the work stand P 21 Removing the fork legsbx ದ Remove front wheel bx P 48 500093 12 ದ Remove screwsb and take off clamp ದ Remove screwsb and ...

Page 33: ...9 11 ದ Fully tighten screwb Specification Screw top triple clamp M8 17bNm 12 5blbfbft ದ Fully tighten screwb Specification Screw bottom triple clamp M8 15bNm 11 1blbfbft 500093 13 ದ Position brake caliper mount and tighten screwsb Specification Screw front brake caliper M8 25bNm 18 4blbfbft Loctite 243 ದ Position the brake line Put the clamp on mount and tighten screwsb ದ Fit front wheel bx P 49 R...

Page 34: ...sb and hang the CDI control unit to the side Info Do not unplug the CDI control unit ದ Loosen screwb Remove nutb with screwb ದ Remove screwb take off top triple clamp with the handlebar and place it on one side Info Protect the motorcycle and its attachments from damage by covering them Do not bend the cables and lines 200390 10 ದ Remove O ringb Remove protector ringb ದ Remove the lower triple cla...

Page 35: ...steering stem M8 17bNm 12 5blbfbft Loctite 243 ದ Check the cable harness cable brake and clutch line for free movement and rout ing ದ Check play of steering head bearing P 28 Greasing the steering head bearingbx ದ Remove the lower triple clamp bx P 32 ದ Install the lower triple clamp bx P 32 Dismounting the front fender 500092 10 ದ Remove screwsb Remove the front fender ದ Make sure that the distan...

Page 36: ... holes 14bmm 0 55bin The holes on the handlebar support are placed at a distance ofb from the center Distanceb between holes 3 5bmm 0 138bin The handlebar can be mounted in 6 different positions This enables you to mount the handlebar in the position most suitable for the rider Adjusting handlebar positionbx 200384 02 ದ Remove the four screwsb Remove the handlebar clamp Remove the handlebar and la...

Page 37: ...running the engine always make sure there is sufficient ventila tion and do not start or run the engine in a closed space ದ Start the engine and let it run idle Move the handlebar to and fro over the entire steering range The idle speed must not change If the idle speed changes ದ Adjust the gas Bowden cable play bx P 35 Adjusting the gas Bowden cable playbx ದ Dismount the fuel tank bx P 55 ದ Check...

Page 38: ...Checking the chain tension Warning Danger of accidentsಘDanger caused by incorrect chain tension ದ If the chain tension is too high the components of the secondary power train chain engine sprocket rear sprocket bear ings in transmission and rear wheel are under additional load Apart from premature wear in extreme cases the chain can rupture or the countershaft of the transmission can break On the ...

Page 39: ...n tension does not meet specifications ದ Adjust the chain tension when fitting rear wheel P 39 Checking the rear sprocket engine sprocket for wear 400227 01 ದ Check the rear sprocket engine sprocket for wear If the rear sprocket engine sprocket are worn ದ Replace rear sprocket engine sprocket Info When fitting the chain joint always make sure that the closed side of the joint faces forward riding ...

Page 40: ...nt upwards to measure chain tensionb Info The upper chain sectionb must be taut Chain wear is not always even so you should repeat this measurement at different chain positions 400225 10 ದ Loosen nutb ದ Loosen nutsb ದ Adjust the chain tension by turning the left and right adjusting screwsb Specification Chain tension 8 10bmm 0 31 0 39bin Turn the left and right adjusting screwsb so that the markin...

Page 41: ... fitted correctly on the adjusting screwsb ದ Tighten nutb Specification Nut rear wheel spindle M20x1 5 80bNm 59blbfbft Info The wide adjustment range of the chain adjusters 32 mm enables different secondary transmissions with the same chain length The chain adjustersb can be turned by 180 Adjusting chain tension fitting rear wheel 400225 11 ದ Loosen nutsb ದ Adjust the chain tension by turning the ...

Page 42: ...d KTM workshop and do not ride any further The brake fluid reservoirs of the front and rear brakes are dimensioned so that they do not need topping up with brake fluid even if the brake linings are worn Brake calipers The brake calipers of this series are floating which means that they are not fixed to the brake caliper support The lateral compensation ensures an optimal position of the brake pad ...

Page 43: ...andlebar Turn the adjusting screw counterclockwise to decrease the distance between the handbrake lever and the handlebar The range of adjustment is limited Turn the adjusting screw by hand only and do not apply any force Do not make any adjustments while riding ದ Check the free play of the hand brake lever P 41 Checking the front brake fluid level Warning Danger of accidentsಘBrake system failure ...

Page 44: ...uid batteries etc according to regulations Info KTM recommends DOTb5 1 brake fluid from Motorex This has a higher wet boiling point than DOTb4 brake fluid and provides greater safety for high demands Never user DOTb5 brake fluid This is based on silicone oil and is colored purple Oil seals and brake lines are not designed for DOTb5 brake fluid Avoid contact between brake fluid and painted parts Br...

Page 45: ...er when necessary Warning Danger of accidentsಘReduced braking due to use of non approved brake linings ದ Brake linings available from accessory suppliers are often not tested and approved for use on KTM vehicles The construc tion and friction factor of the brake linings and therefore the brake power can differ considerably from the original KTM brake linings If brake linings are used that differ f...

Page 46: ...ner 400230 10 ದ Remove the front brake linings bx P 43 ದ Move the brake fluid reservoir mounted on the handlebar to a horizontal position ದ Remove screwsb ದ Remove coverb with membraneb ದ Press the brake piston back to its basic position and make sure that no brake fluid overflows from the brake fluid reservoir ದ Mount the front brake linings bx P 43 ದ Add brake fluid to levelb Specification Measu...

Page 47: ...footbrake lever Specification Free play at foot brake lever 3 5bmm 0 12 0 2bin ದ Hold screwb and tighten nutb Specification Remaining nuts chassis M8 30bNm 22 1blbfbft ದ Hold push rodb and tighten nutb Specification Remaining nuts chassis M6 15bNm 11 1blbfbft ದ Reconnect springb Checking the rear brake fluid level Warning Danger of accidentsಘBrake system failure ದ MINIf the brake fluid level falls...

Page 48: ...fo KTM recommends brake fluid DOTb5 1 frombMotorex This brake fluid has a higher wet boiling point than brake fluid DOTb4 and offers more protection under high load Never user DOTb5 brake fluid This is based on silicone oil and is colored purple Oil seals and brake lines are not designed for DOTb5 brake fluid Avoid contact between brake fluid and painted parts Brake fluid attacks paint Use only cl...

Page 49: ...gs ದ Brake linings available from accessory suppliers are often not tested and approved for use on KTM vehicles The construc tion and friction factor of the brake linings and therefore the brake power can differ considerably from the original KTM brake linings If brake linings are used that differ from the originals there is no guarantee that they comply with the origi nal license The vehicle no l...

Page 50: ...d on silicone oil and is colored purple Oil seals and brake lines are not designed for DOTb5 brake fluid Avoid contact between brake fluid and painted parts Brake fluid attacks paint Use only clean brake fluid from a sealed container 400233 10 ದ Remove the rear brake linings bx P 47 ದ Stand the vehicle upright ದ Remove screw capb with membraneb and the O ring ದ Press the brake piston back to its b...

Page 51: ...ecessary 500086 11 ದ Check parts for damage and wear Replace damaged or worn parts ದ Clean and grease shaft seal ringsb and bearing surfaceb of the distance bush ings Long life grease P 84 ದ Fit the distance bushings 500084 11 ದ Lift the front wheel into the fork position it and insert the wheel spindle ದ Mount and tighten screwb Specification Screw front wheel spindle M24x1 5 40bNm 29 5blbfbft ದ ...

Page 52: ...heel spindle Take the rear wheel out of the swing arm Info Do not operate the foot brake when the rear wheel is removed Always lay the wheel down in such a way that the brake disc is not dam aged 400260 11 ದ Remove the spacing sleevesb Fitting rear wheelbx Warning Danger of accidentsಘReduced braking due to oil or grease on the brake discs ದ Always keep the brake discs free of oil and grease and cl...

Page 53: ...g behavior The type condition and air pressure of the tires all have an important impact on the riding behavior of the motorcycle The front and rear wheels must be fitted with tires with similar profiles Worn tires have a negative effect on riding behavior especially on wet surfaces ದ Examine the tires for cuts foreign bodies and other damage ದ Check the depth of the tread Info Note local national...

Page 54: ...acid and battery gases cause serious cauterization ದ Keep batteries out of the reach of children ದ Wear suitable protective clothing and goggles ದ Avoid contact with battery acid and battery gases ದ Keep the battery away from sparks or open fire Charge only in well ventilated rooms ದ In the event of skin contact rinse with large amounts of water If battery acid gets in the eyes rinse with water fo...

Page 55: ... Take defective or used batteries to a battery recycling operator Warning Environmental hazardಘProblem materials cause environmental damage ದ Dispose of oil grease filters fuel cleaning substances brake fluid batteries etc according to regulations Info Even if there is no load on the battery it loses power every day The charge state and the type of charge are very important for the service life of...

Page 56: ...e 3bmonths ದ Mount the seat P 55 Removing a fuse ದ Switch off all power consuming components and switch off the engine ದ Dismount the air filter box lid P 60 400270 10 ದ Remove the protection coverb Info The fuseb is located in the starter relayb under the filter box cover ದ Remove the fuseb Replacing the fuse Warning Fire hazardಘThe electrical system can be overloaded by the use of incorrect fuse...

Page 57: ...ility Changing the ignition curve from Soft to Performance ದ Connect plug connectionb Figureb500218 10b P 55 Performance ದbHigher performance Removing the seat 500080 10 ದ Remove screwb Lift up the seat at the rear pull it back and then remove from above Mounting the seat 500068 01 ದ Check parts for damage and wear Replace damaged or worn parts ದ Hook the front of the seat into the flange adapter ...

Page 58: ...e reach of children ದ Turn off the fuel tap and pull off the fuel hose ದ Remove screwsb with collar sleeve 500066 10 ದ Remove screwb with collar sleeve ದ Remove the tube from the fuel tank vent line 500067 10 ದ Pull both spoilers to the side of the radiator bracketb and take the fuel tank away upwards Installing the fuel tankbx Danger Fire hazardಘFuel can easily catch fire ದ Never fill up the vehi...

Page 59: ...permissible with out danger of function problems 120b C 248b F Coolant P 82 Cooling is effected by the air stream The lower the speed the less the cooling effect Dirty cooling fins also reduce the cool ing effect Checking antifreeze and coolant level Warning Danger of scaldingಘThe coolant gets very hot when the motorcycle is driven and is under high pressure ದ Do not open the radiator radiator hos...

Page 60: ...d skin areas immediately with soap and water If coolant is swallowed contact a doctor immediately Change clothes that have come into contact with coolants Keep coolants out of the reach of children 400243 10 ದ Stand the motorcycle upright on a horizontal surface ದ Remove the radiator cap ದ Check the coolant level in the radiator Coolant levelb above radiator fins 10bmm 0 39bin If the level of the ...

Page 61: ...come into contact with coolants Keep coolants out of the reach of children 400244 10 ದ Make sure that the screwb is tightened ದ Stand the vehicle upright ದ Pour coolant in up to measurementb above the radiator fins Specification 10bmm 0 39bin Coolant 1 2bl 1 3bqt Coolant P 82 Coolant mixed ready to use P 82 ದ Refit the radiator cap ದ Make a short test ride ದ Check the coolant level P 58 Removing m...

Page 62: ...ain silencer P 59 200380 01 ದ Drill out the rivetsb of the locking capb Remove end cap and external tubeb ದ Remove the glass fiber yarn fillingb ದ Clean parts to be refitted Fitting glass fiber yarn filling in main silencerbx 200380 02 ದ Check parts for damage and wear Replace damaged or worn parts ದ Mount the glass fiber yarn fillingb ದ Push the outer pipeb over the glass fiber yarn filling ದ Ins...

Page 63: ...10 ದ Hang the air filter holderb out to the bottom and swing it to the side Remove the air filter with the air filter support ದ Remove the air filter from the air filter support Installing the air filterbx 500107 10 ದ Check parts for damage and wear Replace damaged or worn parts ದ Mount the clean air filter onto the air filter support ದ Put in both parts together position them and fix them with th...

Page 64: ...not apply any force Do not make any adjustments while riding Checking fluid level of hydraulic clutch Info The fluid level rises with increasing wear of the clutch lining disc Do not use brake fluid 400245 10 ದ Move the clutch fluid reservoir mounted on the handlebar to a horizontal position ದ Remove screwsb ದ Remove the coverb with membraneb ದ Check the fluid level Fluid level under top level of ...

Page 65: ...ior stable idling and the response to throttle opening That means that an engine with a correctly set idle speed is easier to start than if the idle is set wrongly Info The carburetor and its components are subject to increased wear caused by engine vibration Wear can result in malfunctioning The idle speed is adjusted with the adjustment screwb The idle mixture is adjusted with the idle mixture a...

Page 66: ... fill up the vehicle near open flames or burning cigarettes and always switch off the engine first Be careful that no fuel is spilt especially on hot vehicle components Clean up spilt fuel immediately ದ Fuel in the fuel tank expands when warm and can escape if the tank is overfilled See specifications on filling up with fuel Warning Danger of poisoningಘFuel is poisonous and a health hazard ದ Avoid...

Page 67: ...P 67 ದ Fill up with engine oil bx P 67 Draining engine oilbx Warning Danger of scaldingಘEngine oil and gear oil get very hot when the motocycle is driven ದ Wear suitable protective clothing and gloves If you scald yourself hold the affected area under cold water immediately Warning Environmental hazardಘProblem materials cause environmental damage ದ Dispose of oil grease filters fuel cleaning subst...

Page 68: ... area ದ Check parts for damage and wear Replace damaged or worn parts ದ Fit and tighten plugb with oil screenb and O rings Specification Plug oil screen M32x1 5 30bNm 22 1blbfbft Removing the oil filterbx Warning Danger of scaldingಘEngine oil and gear oil get very hot when the motocycle is driven ದ Wear suitable protective clothing and gloves If you scald yourself hold the affected area under cold...

Page 69: ...5bl 1 43bqt Engine oil SAE 10W 50 P 82 ದ Mount and tighten screw capb Danger Danger of poisoningಘExhaust gases are poisonous and can result in uncon sciousness and or death ದ When running the engine always make sure there is sufficient ventila tion and do not start or run the engine in a closed space ದ Start the engine and check that it is oil tight ದ Check the engine oil level P 65 Topping up eng...

Page 70: ...ignition system Have work on the ignition system car ried out in an authorized KTM workshop ದ Remove spark plug connect ignition cable hold spark plug to ground bare metal area on engine and try to start the engine Specification You should see a strong spark on the spark plug ದ If there is no spark change the spark plug ದ If there is still no spark remove the spark plug cap from the ignition cable...

Page 71: ...fective ದ Have ignition system checked Engine stalls or is popping into the carbu retor Lack of fuel ದ Fill up with fuel P 17 Engine takes in bad air ದ Check rubber sleeves and carburetor for tightness Engine overheats Too little coolant in cooling system ದ Check the cooling system for leakage ದ Check the coolant level P 58 Too little air stream ದ Switch off engine when standing Radiator fins very...

Page 72: ...ntbrush Motorcycle cleaner P 84 Info Use warm water containing normal motorcycle cleaner and a soft sponge ದ After rinsing the motorcycle with a gentle water spray allow it to dry thoroughly ದ Empty the carburetor float chamber bx P 64 Warning Danger of accidentsಘReduced braking due to wet or dirty brakes ದ Clean or dry dirty or wet brakes by riding and braking gently ದ After cleaning ride the veh...

Page 73: ...hange the engine oil and oil filter and clean the oil screen bx P 65 ದ Check the antifreeze and coolant level P 57 ದ Drain the fuel from the tanks into a suitable container ದ Empty the carburetor float chamber bx P 64 ದ Check the tire air pressure P 51 ದ Remove the battery bx P 52 ದ Recharge the battery bx P 53 Specification Storage temperature of battery without direct sunshine 0 35b C 32 95b F ದ...

Page 74: ... Piston pin bearing No bearing bush piston pins made of TiAl alloy with DLC coating Pistons Forged light alloy Piston rings 1 compression ring 1 oil scraper ring Engine lubrication Pressure circulation lubrication with 3 rotor pumps Primary transmission 29 74 Transmission ratio 1st gear 17 32 2nd gear 19 30 3rd gear 21 28 4th gear 23 26 Generator 12bV 42bW Ignition Contactless controlled fully ele...

Page 75: ...d M6 10bNm 7 4blbfbft Engine oil any Screw exhaust flange M6 10bNm 7 4blbfbft Loctite 243 Screw starter motor M6 10bNm 7 4blbfbft ದ Screw ignition pulse generator cable holder M6 10bNm 7 4blbfbft Loctite 243 Screw clutch cover M6 10bNm 7 4blbfbft ದ Screw clutch spring M6 10bNm 7 4blbfbft ದ Screw clutch slave cylinder M6 10bNm 7 4blbfbft ದ Screw engine housing M6 10bNm 7 4blbfbft ದ Screw oil filter...

Page 76: ...4 8blbfbft ದ Oil drain plug with magnet M12x1 5 20bNm 14 8blbfbft ದ Axle guide rail for timing chain M14x1 15bNm 11 1blbfbft ದ Axle tension rail for timing chain M14x1 15bNm 11 1blbfbft ದ Nut compensating sprocket M14x1 20bNm 14 8blbfbft Loctite 243 Oil suction pipe M14x1 15bNm 11 1blbfbft Loctite 243 Oil pressure regulator valve plug M14x1 5 18bNm 13 3blbfbft ದ Nut inner clutch hub M18x1 5 80bNm ...

Page 77: ...r 4125I Needle position 4th position from top Idle mixture adjusting screw Open 1 5bturns Pump membrane stop 2 15bmm 0 0846bin Hot start button Diameter of bore in carburetor body 2 5bmm 0 098bin Main jet 190 Jet needle OBDTR Idling jet 42 Main air jet 200 Idle air jet 100 Cold start jet 85 Throttle slide 15 ...

Page 78: ...rockets available 38 40 42 45 48 49 50 51 52 Steering head angle 63 5 Wheelbase 1 475 10bmm 58 07 0 39bin Seat height unloaded 925bmm 36 42bin Ground clearance unloaded 380bmm 14 96bin Weight without fuel 104 6bkg 230 6blb Maximum permissible front axle load 145bkg 320blb Maximum permissible rear axle load 190bkg 419blb Maximum permissible overall weight 335bkg 739blb 4Ah battery YTX5L BS Battery ...

Page 79: ...rd groove from top Sport 3rd groove from top Spring length with preload spacer s 497bmm 19 57bin Spring rate Weight of rider 65 75bkg 143 165blb 4 6bN mm 26 3blb in Weight of rider 75 85bkg 165 187blb 4 8bN mm 27 4blb in Weight of rider 85 95bkg 187 209blb 5 0bN mm 28 6blb in Gas pressure 1 8bbar 26bpsi Fork length 940bmm 37 01bin Capacity fork oil Oil capacity cartridge 195bml 6 59bfl boz Fork oi...

Page 80: ...turns Standard 20bturns Sport 20bturns Rebound damping Comfort 26bclicks Standard 24bclicks Sport 22bclicks Spring preload 5bmm 0 2bin Spring rate Weight of rider 65 75bkg 143 165blb 72bN mm 411blb in Weight of rider 75 85bkg 165 187blb 76bN mm 434blb in Weight of rider 85 95bkg 187 209blb 80bN mm 457blb in Spring length 250bmm 9 84bin Gas pressure 10bbar 145bpsi Static sag 35bmm 1 38bin Riding sa...

Page 81: ...amp M8 15bNm 11 1blbfbft ದ Screw fork stub M8 15bNm 11 1blbfbft ದ Screw top steering stem M8 17bNm 12 5blbfbft Loctite 243 Screw steering stem bottom M8 20bNm 14 8blbfbft Loctite 243 Screw handlebar clamp M8 20bNm 14 8blbfbft ದ Screw engine brace M8 33bNm 24 3blbfbft ದ Screw subframe M8 35bNm 25 8blbfbft Loctite 243 Engine carrying screw M10 60bNm 44 3blbfbft ದ Remaining nuts chassis M10 50bNm 36 ...

Page 82: ... i h w k c a l b e t i h w d e r n e e r g white red white black yellow blue green red brown blue white black yellow blue yellow yellow black brown red white black red white yellow black grey grey black black white yellow black black white red white 0 0 7 7 0 0 8 8 0 0 9 9 0 0 6 6 0 0 4 4 0 0 5 5 0 0 3 3 0 0 2 2 0 0 1 1 0 0 b k bk 0 0 b l bl 0 0 b m bm WIRING DIAGRAM 80 5 1 5 0 Wiring diagram 4002...

Page 83: ...rter motor 9 Short circuit button 10 Throttle valve sensor TPS 11 Ignition curve plug connection 12 CDI controller Cable colors black black black white black white brown brown brown white brown white blue blue blue white blue white green green grey gray grey black gray black red red red white red white white white yellow yellow yellow black yellow black ...

Page 84: ... Antifreeze 40b C 40b F Supplier Motorex ದ AntibFreeze Hydraulic fluid 15 according to ದ ISO VG 15 Specification ದ Use only hydraulic fluid that complies with the specified standards see specifications on the container and that possesses the corresponding properties KTM recommends Motorex products Supplier Motorex ದ HydraulicbFluidb75 Engine oil SAE 10W 50 according to ದ JASObT903bMA P 86 ದ SAE P ...

Page 85: ...SUBSTANCES 83 Supplier Motorex ದ RacingbForkbOil ...

Page 86: ...fication ದ KTM recommends Motorex products Supplier Motorex ದ Motorex bChainbLubeb622 Air filter cleaner Specification ದ KTM recommends Motorex products Supplier Motorex ದ Motorex bTwinbAirbDirtbBiobRemover Oil for foam air filter Specification ದ KTM recommends Motorex products Supplier Motorex ದ Motorex bTwinbAirbLiquidbPower Motorcycle cleaner Specification ದ KTM recommends Motorex products Supp...

Page 87: ...85 High luster polish for paint Specification ದ KTM recommends Motorex products Supplier Motorex ದ Motorex bMotobPolish Contact spray Specification ದ KTM recommends Motorex products Supplier Motorex ದ Motorex bAccubContact ...

Page 88: ...ng service intervals are demanded for automobile engines high performance at high engine speeds are in the fore ground for motorcycle engines With most motorcycles the gearbox and the clutch are lubricated with the oil as the engine The JASO MA Standard meets these special requirements SAE The SAE viscosity classes were defined by the Society of Automotive Engineers and are used for classifying oi...

Page 89: ...sting 40 Chain tension adjusting 38 checking 36 Chain wear checking 37 Chassis number 9 Choke 11 Cleaning 70 Clutch changing fluid 62 checking fluid level 62 Clutch lever 10 adjusting basic position 62 Compression damping fork adjusting 26 Compression damping high speed of shock absorber adjusting 21 Compression damping low speed of shock absorber adjusting 22 Coolant draining 58 refilling 59 Cool...

Page 90: ...utting into operation Advice on first use 13 after storage 71 Checks before putting into operation 15 R Rear sprocket engine sprocket checking for wear 37 Rear wheel fitting 50 removing 50 Rebound damping fork adjusting 26 of shock absorber adjusting 22 Riding sag adjusting 25 S Seat mounting 55 removing 55 Shock absorber checking riding sag 24 checking static sag 23 fitting 25 removing 25 Short c...

Page 91: ...INDEX 89 Wiring diagram 80 81 ...

Page 92: ... 3211253en 3211253en KTM Sportmotorcycle AG 5230 Mattighofen Austria http www ktm com 12 2007 Photo Mitterbauer ...

Reviews: