ENGINE
GR1600EU, WSM
1-S17
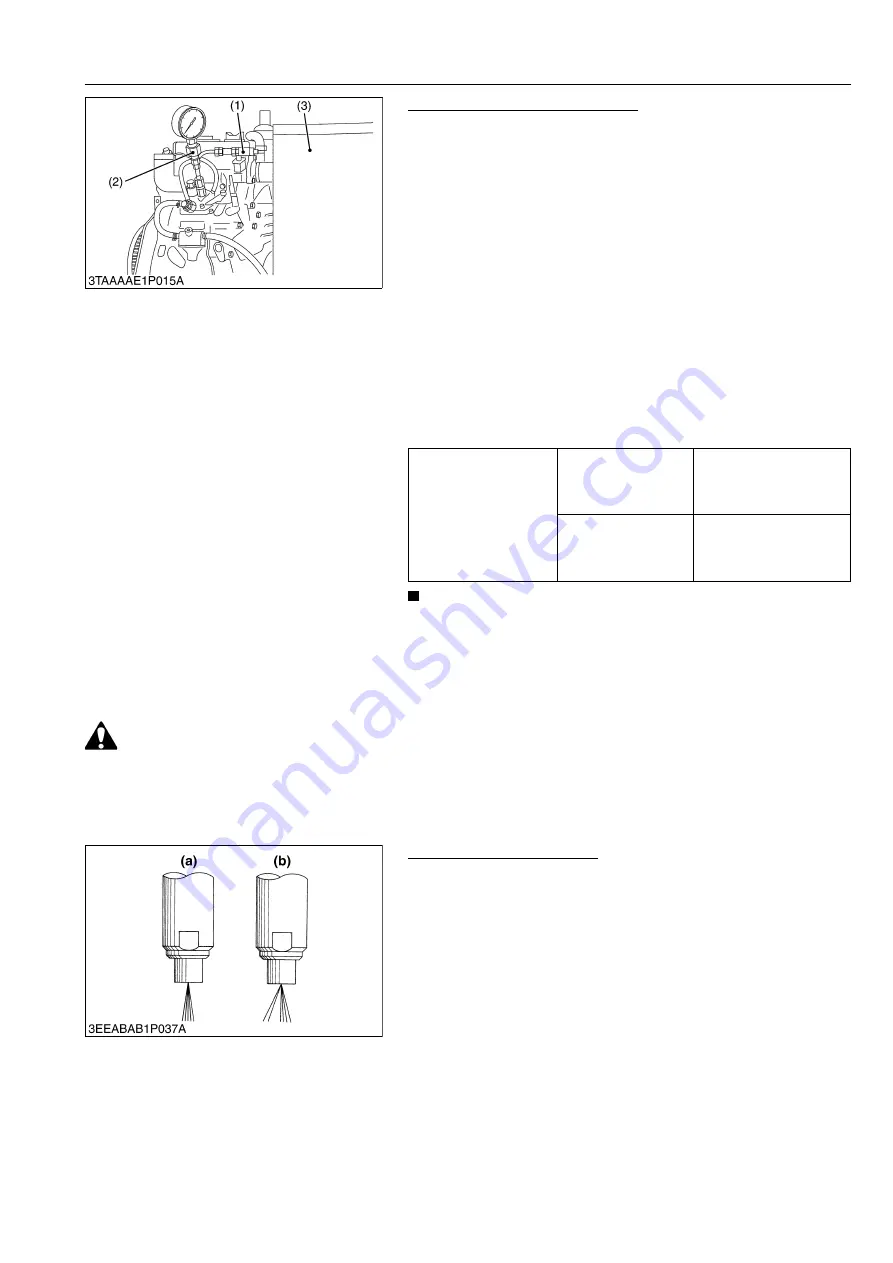
Fuel Tightness of Delivery Valve
1. Remove the engine stop solenoid.
2. Remove the injection pipes and glow plugs.
3. Set a pressure tester to the fuel injection pump.
4. Install the injection nozzle (1) jetted with the proper injection
pressure to the injection pump pressure tester (2).
5. Run the starter to increase the pressure.
6. Stop the starter when the fuel jets from the injection nozzle.
After that, turn the flywheel by hand and raise the pressure to
approx. 13.7 MPa (140 kgf/cm
2
, 1990 psi).
7. Now turn the flywheel back about half a turn (to keep the plunger
free). Keep the flywheel at this position and clock the time taken
for the pressure to drop from 13.7 to 12.8 MPa (from 140 to 130
kgf/cm
2
, from 1990 to 1850 psi).
8. Measure the time needed to decrease the pressure from 13.7 to
12.8 MPa (from 140 to 130 kgf/cm
2
, 1990 to 1850 psi).
9. If the measurement is less than allowable limit, replace the
pump with new one or repair with a KUBOTA-authorized pump
service shop.
NOTE
• Never try to disassemble the injection pump assembly. For
repairs, you are strongly requested to contact a
KUBOTA-authorized pump service shop.
9Y1210595ENS0093US0
CAUTION
• Check the injection pressure and condition after you make sure that there is nobody standing in the
direction the fume goes.
• If the fume from the nozzle directly contacts the human body, cells may be destroyed and blood
poisoning may be caused.
9Y1210595ENS0094US0
Nozzle Spraying Condition
1. Set the injection nozzle to a nozzle tester (Code
No. 07909-31361), and check the nozzle spraying condition.
2. If the spraying condition is damaged, replace the nozzle piece.
9Y1210595ENS0018US0
Fuel tightness of delivery
valve
Factory specification
10 seconds
13.7
→
12.8 MPa
140
→
130 kgf/cm
2
1990
→
1850 psi
Allowable limit
5 seconds
13.7
→
12.8 MPa
140
→
130 kgf/cm
2
1990
→
1850 psi
(1) Injection Nozzle
(2) Injection Pump Pressure Tester
(3) Protection Cover for Jetted Fuel
(a) Good (b) Bad
KiSC issued 11, 2013 A
Summary of Contents for GR1600EU
Page 1: ...GR1600EU WORKSHOP MANUAL KiSC issued 11 2013 A ...
Page 4: ...I INFORMATION KiSC issued 11 2013 A ...
Page 10: ...INFORMATION GR1600EU WSM I 5 9Y1210595INI0002US0 KiSC issued 11 2013 A ...
Page 11: ...INFORMATION GR1600EU WSM I 6 9Y1210595INI0003US0 KiSC issued 11 2013 A ...
Page 12: ...INFORMATION GR1600EU WSM I 7 9Y1210595INI0007US0 KiSC issued 11 2013 A ...
Page 16: ...INFORMATION GR1600EU WSM I 11 2 GR1600ID 9Y1210595INI0009US0 KiSC issued 11 2013 A ...
Page 17: ...G GENERAL KiSC issued 11 2013 A ...
Page 80: ...1 ENGINE KiSC issued 11 2013 A ...
Page 138: ...2 TRANSAXLE KiSC issued 11 2013 A ...
Page 194: ...3 BRAKES KiSC issued 11 2013 A ...
Page 195: ...CONTENTS 1 BRAKE MECHANISM 3 M1 MECHANISM KiSC issued 11 2013 A ...
Page 205: ...4 FRONT AXLE KiSC issued 11 2013 A ...
Page 213: ...5 STEERING KiSC issued 11 2013 A ...
Page 221: ...6 ELECTRICAL SYSTEM KiSC issued 11 2013 A ...
Page 223: ...ELECTRICAL SYSTEM GR1600EU WSM 6 M1 1 WIRING DIAGRAM 1 GR1600EU GR1600F KiSC issued 11 2013 A ...
Page 224: ...ELECTRICAL SYSTEM GR1600EU WSM 6 M2 2 GR1600ID KiSC issued 11 2013 A ...
Page 257: ...7 MOWER KiSC issued 11 2013 A ...


