GENERAL PRECAUTIONS
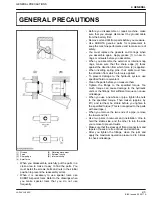
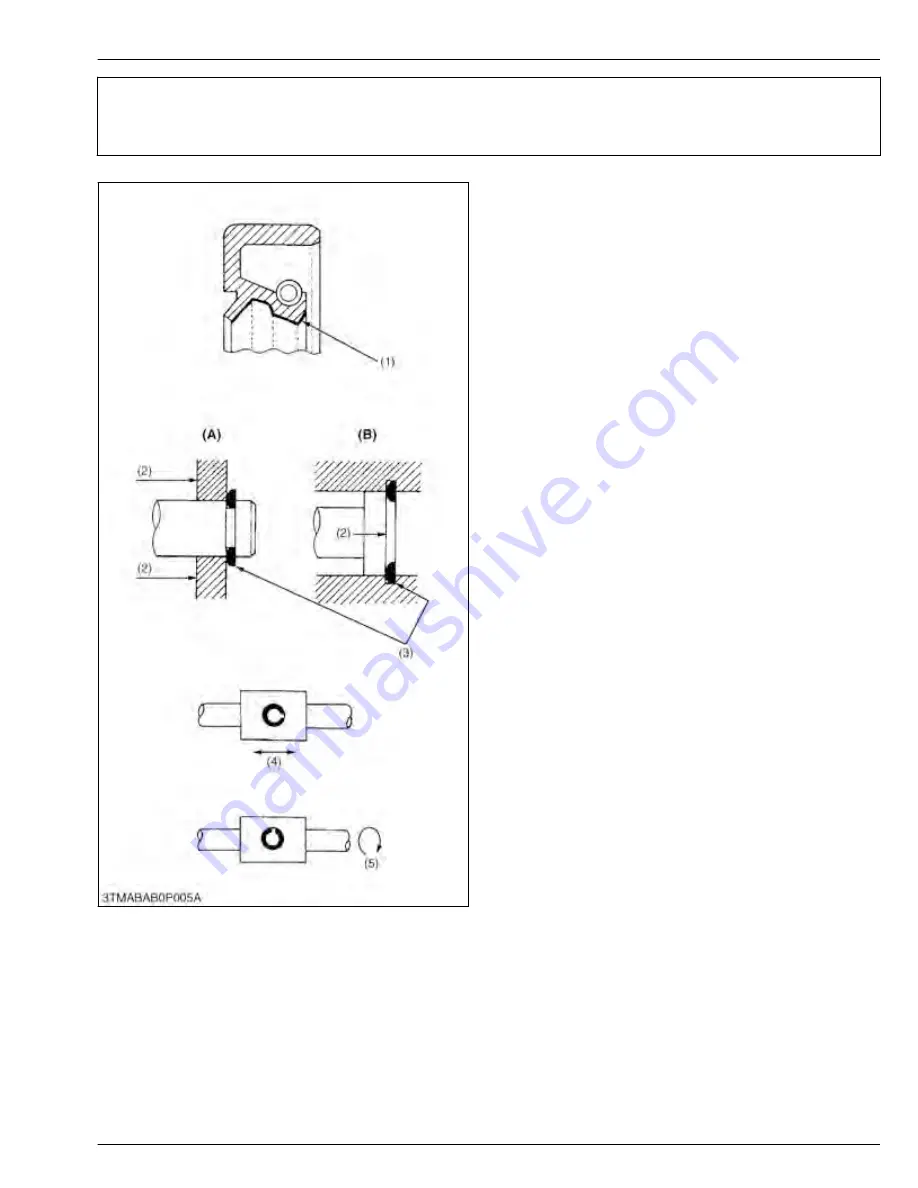
(1) Grease
(2) Force
(3) Sharp edge
(4) Axial force
(5) Rotating movement
(A) External circlip
(B) Internal circlip
• When you disassemble, carefully put the parts in a
clean area to make it easy to find the parts. You
must install the screws, bolts and nuts in their initial
position to prevent the reassembly errors.
• When it is necessary to use special tools, use
KUBOTA special tools. Refer to the drawings when
you make special tools that you do not use
frequently.
• Before you disassemble or repair machine, make
sure that you always disconnect the ground cable
from the battery first.
• Remove oil and dirt from parts before you measure.
• Use KUBOTA genuine parts for replacement to
keep the machine performance and to make sure of
safety.
• You must replace the gaskets and O-rings when
you assemble again. Apply grease (1) to new O-
rings or oil seals before you assemble.
• When you assemble the external or internal snap
rings, make sure that the sharp edge (3) faces
against the direction from which force (2) is applied.
• When inserting spring pins, their splits must face
the direction from which a force is applied.
• To prevent damage to the hydraulic system, use
specified fluid or equivalent.
• Clean the parts before you measure them.
• Tighten the fittings to the specified torque. Too
much torque can cause damage to the hydraulic
units or the fittings. Not sufficient torque can cause
oil leakage.
• When you use a new hose or pipe, tighten the nuts
to the specified torque. Then loosen (approx. by
45°) and let them be stable before you tighten to
the specified torque (This is not applied to the parts
with seal tape.).
• When you remove the two ends of a pipe, remove
the lower end first.
• Use two pliers in removal and installation. One to
hold the stable side, and the other to turn the side
you remove to prevent twists.
• Make sure that the sleeves of flared connectors and
tapers of hoses are free of dust and scratches.
• After you tighten the fittings, clean the joint and
apply the maximum operation pressure 2 to 3 times
to check oil leakage.
GENERAL PRECAUTIONS
2. GENERAL
LA344, LA344S
2-3
KiSC issued 02, 2017 A
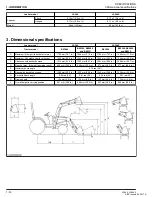
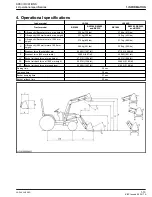
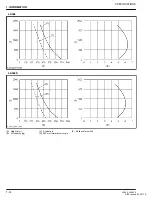
Summary of Contents for LA344
Page 1: ...LA344 LA344S WORKSHOP MANUAL FRONT LOADER KiSC issued 02 2017 A ...
Page 5: ...1 INFORMATION KiSC issued 02 2017 A ...
Page 9: ...1 INFORMATION SAFETY FIRST 1 4 LA344 LA344S KiSC issued 02 2017 A ...
Page 11: ...1 INFORMATION SAFETY DECALS 1 6 LA344 LA344S KiSC issued 02 2017 A ...
Page 12: ...SAFETY DECALS 1 INFORMATION LA344 LA344S 1 7 KiSC issued 02 2017 A ...
Page 15: ...1 INFORMATION TERMINOLOGY 1 10 LA344 LA344S KiSC issued 02 2017 A ...
Page 20: ...2 GENERAL KiSC issued 02 2017 A ...
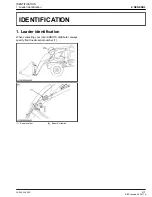
Page 22: ...2 GENERAL IDENTIFICATION 2 2 LA344 LA344S KiSC issued 02 2017 A ...
Page 24: ...2 GENERAL 2 4 LA344 LA344S KiSC issued 02 2017 A ...
Page 26: ...2 GENERAL LUBRICATING SYSTEM 2 6 LA344 LA344S KiSC issued 02 2017 A ...
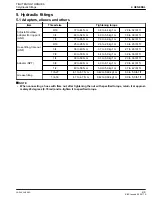
Page 30: ...2 GENERAL TIGHTENING TORQUES 5 Hydraulic fittings 2 10 LA344 LA344S KiSC issued 02 2017 A ...
Page 32: ...2 GENERAL MAINTENANCE CHECK LIST 2 12 LA344 LA344S KiSC issued 02 2017 A ...
Page 36: ...2 GENERAL SPECIAL TOOLS 1 Special tools for loader 2 16 LA344 LA344S KiSC issued 02 2017 A ...
Page 37: ...3 FRONT LOADER KiSC issued 02 2017 A ...
Page 71: ...3 FRONT LOADER SERVICING 5 Servicing 3 34 LA344 LA344S KiSC issued 02 2017 A ...


