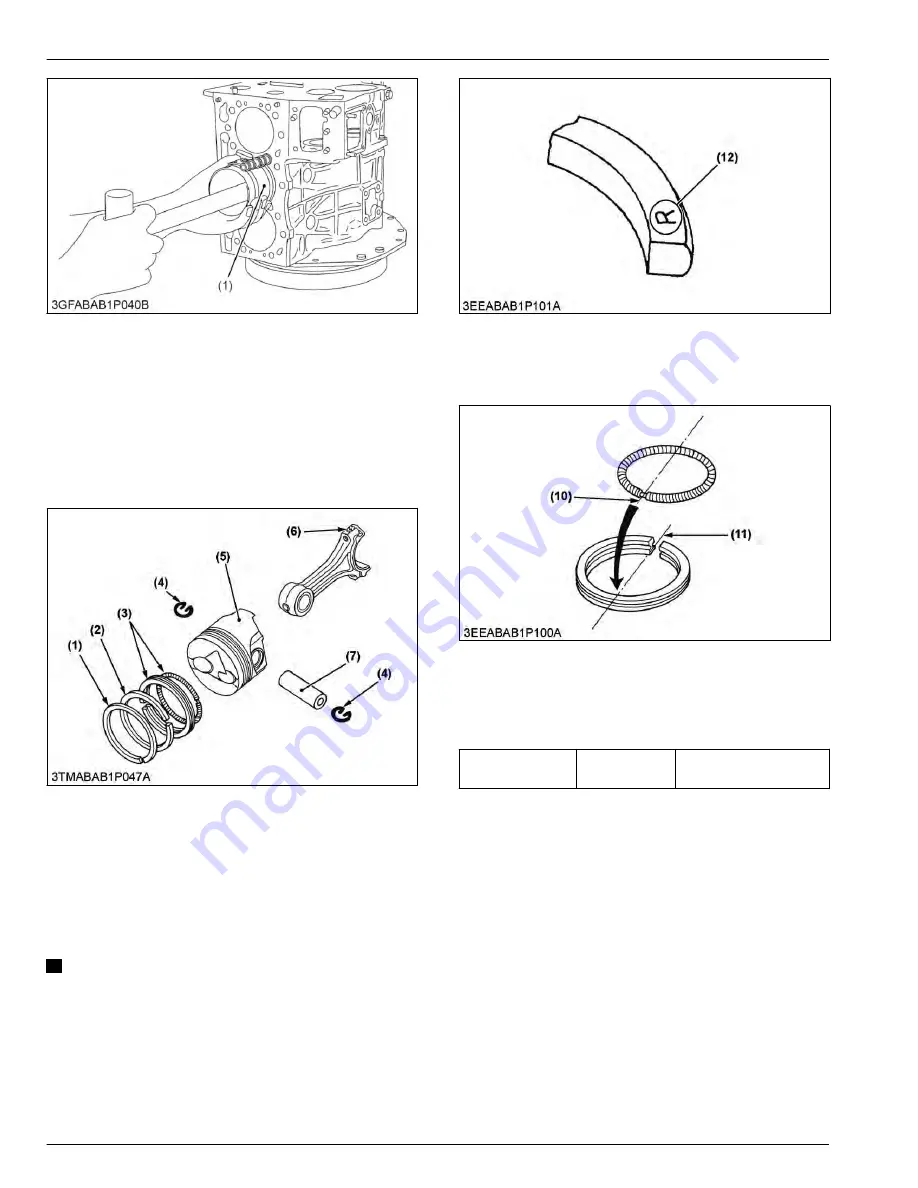
(1) Piston ring compressor
• Before inserting the piston into the cylinder, apply
enough engine oil to the piston.
• When inserting the piston into the cylinder, face the
mark on the connecting rod to the injection pump.
5.2.3.3 Removing piston ring and
connecting rod
(1) Top ring
(2) Second ring
(3) Oil ring
(4) Piston pin circlip
(5) Piston
(6) Connecting rod
(7) Piston pin
1. Remove the piston rings using a piston ring tool.
2. Remove the piston pin (7), and separate the
connecting rod (6) from the piston (5).
(When reassembling)
NOTE
• Mark the same number on the connecting rod
and the piston so as not to change the
combination.
• Install the rings so that the manufacturer's mark
(12) near the gap faces the top of the piston.
(12) Manufacturer's mark
• When installing the oil ring onto the piston, place
the expander joint (10) on the opposite side of the
oil ring gap (11).
(10) Expander joint
(11) Oil ring gap
• Apply engine oil to the piston pin.
• When installing the connecting rod to the piston,
immerse the piston in oil and insert the piston pin to
the piston.
Temperature of oil
Factory specifi-
cation
For 10 to 15 minutes
80
℃
(176
℉
)
• When installing the connecting rod to the piston,
align the mark (8) on the connecting rod to the fan-
shaped concave (9).
3. ENGINE
SERVICING
5. Disassembling and assembling
3-52
BX1880,BX2380,BX2680,RCK60B-23BX,RCK54-23BX,RCK48-18BX,RCK60D-26BX,RCK54D-26BX
KiSC issued 03, 2019 A
Summary of Contents for ,RCK60B-23BX
Page 19: ...1 INFORMATION KiSC issued 03 2019 A ...
Page 42: ...2 GENERAL KiSC issued 03 2019 A ...
Page 111: ...3 ENGINE KiSC issued 03 2019 A ...
Page 190: ...4 TRANSAXLE KiSC issued 03 2019 A ...
Page 255: ...5 FRONT AXLE KiSC issued 03 2019 A ...
Page 274: ...6 STEERING KiSC issued 03 2019 A ...
Page 291: ...7 HYDRAULIC SYSTEM KiSC issued 03 2019 A ...
Page 344: ...8 ELECTRICAL SYSTEM KiSC issued 03 2019 A ...
Page 399: ...9 MOWER KiSC issued 03 2019 A ...


