Undersize
0.20 mm
0.0079 in.
0.40 mm
0.016 in.
Dimension D
51.721 to
51.740 mm dia.
2.0362 to 2.0370 in.
dia.
51.521 to
51.540 mm dia.
2.0284 to 2.0291 in.
dia.
The crankshaft journal must be fine-finished to higher than Max. =
0.8S
6.5 Cylinder
6.5.1 Checking cylinder wear
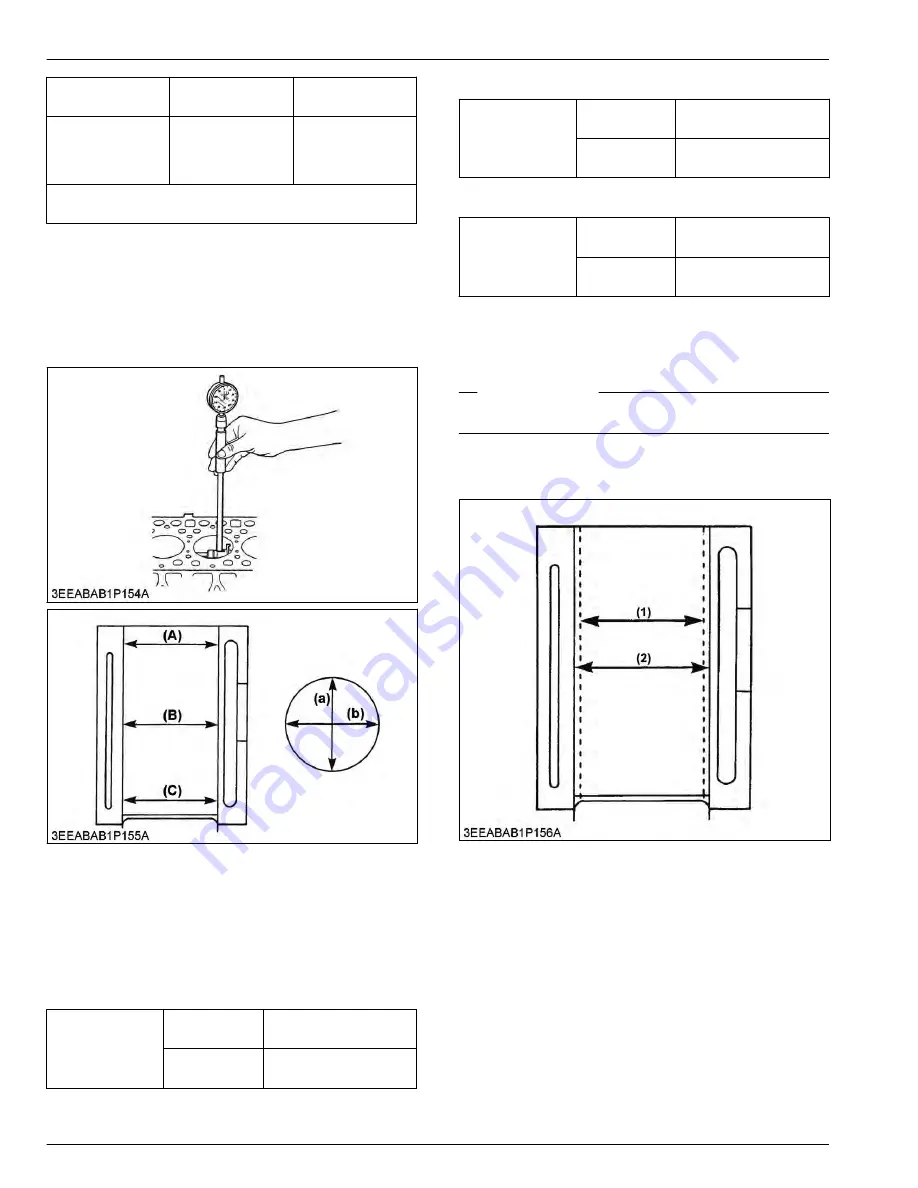
1. Measure the I.D. of the cylinder at the six positions
(see figure) with a cylinder gauge to find the
maximum and minimum I.D.'s.
(A) Top
(B) Middle
(C) Bottom (Skirt)
(a) Right-angled to piston pin
(b) Piston pin direction
2. Get the difference (maximum wear) between the
maximum and the minimum I.D.'s.
3. If the wear exceeds the allowable limit, bore and
hone to the oversize dimension.
BX1880
Cylinder liner I.D.
Factory specifi-
cation
67.000 to 67.019 mm
2.6378 to 2.6385 in.
Allowable limit
67.150 mm
26437 in.
BX2380
Cylinder liner I.D.
Factory specifi-
cation
72.000 to 72.019 mm
2.8347 to 2.8353 in.
Allowable limit
72.150 mm
2.8406 in.
BX2680
Cylinder liner I.D.
Factory specifi-
cation
76.000 to 76.019 mm
2.9922 to 2.9928 in.
Allowable limit
76.15 mm
2.998 in.
4. Visually check the cylinder wall for scratches. If
deep scratches are found, the cylinder should be
bored.
RELATED PAGE
6.5.2 Correcting cylinder (Oversize) on page 3-76
6.5.2 Correcting cylinder (Oversize)
(1) Cylinder I.D. (Before correc-
tion)
(2) Cylinder I.D. (Oversize)
3. ENGINE
SERVICING
6. Servicing
3-76
BX1880,BX2380,BX2680,RCK60B-23BX,RCK54-23BX,RCK48-18BX,RCK60D-26BX,RCK54D-26BX
KiSC issued 03, 2019 A
Summary of Contents for ,RCK60B-23BX
Page 19: ...1 INFORMATION KiSC issued 03 2019 A ...
Page 42: ...2 GENERAL KiSC issued 03 2019 A ...
Page 111: ...3 ENGINE KiSC issued 03 2019 A ...
Page 190: ...4 TRANSAXLE KiSC issued 03 2019 A ...
Page 255: ...5 FRONT AXLE KiSC issued 03 2019 A ...
Page 274: ...6 STEERING KiSC issued 03 2019 A ...
Page 291: ...7 HYDRAULIC SYSTEM KiSC issued 03 2019 A ...
Page 344: ...8 ELECTRICAL SYSTEM KiSC issued 03 2019 A ...
Page 399: ...9 MOWER KiSC issued 03 2019 A ...


