6.3 Checking backlash between
differential pinion and differential
side gear
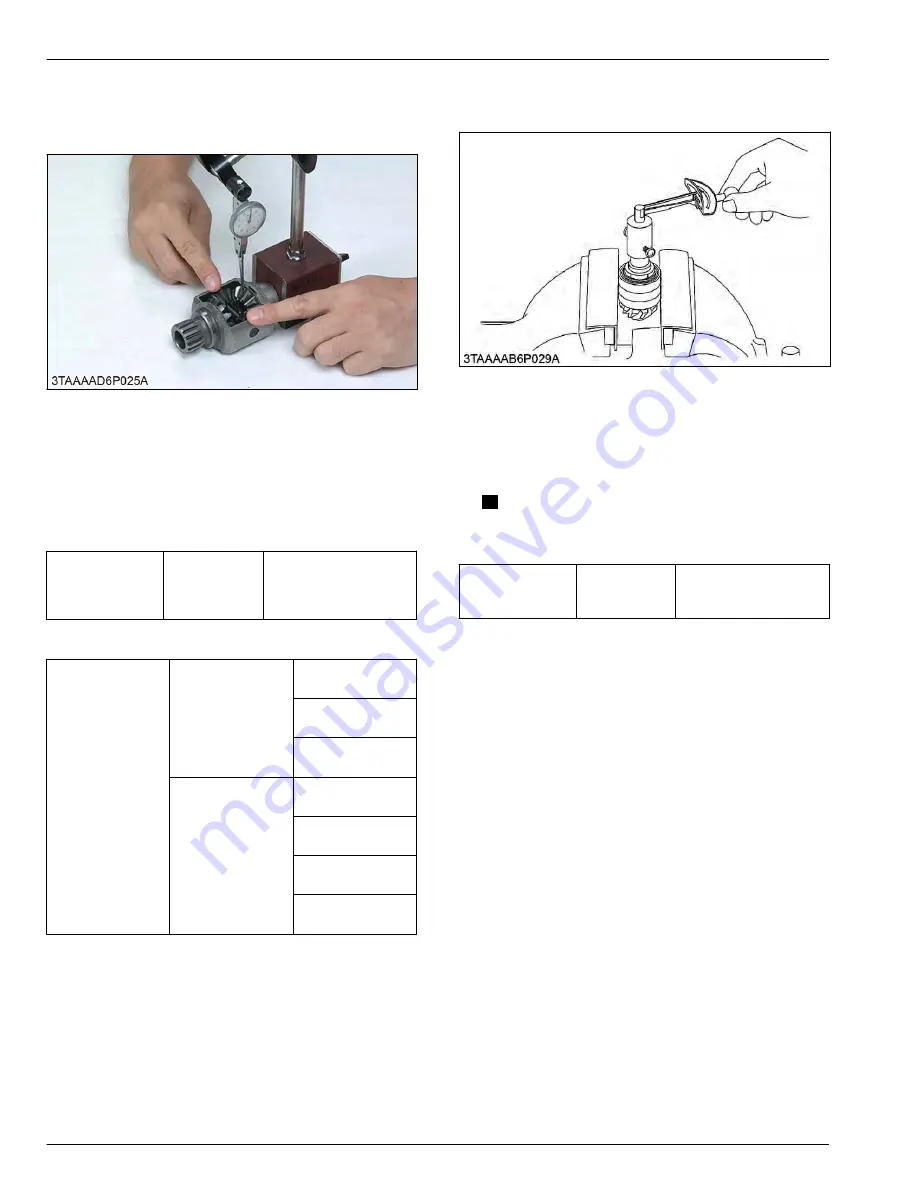
1. Set a dial gauge (lever type) on a tooth of the
differential pinion.
2. Fix the differential side gear, and move the
differential pinion to measure the backlash.
3. If the measurement exceeds the factory
specifications, adjust with the differential side gears
shims.
Backlash between
differential pinion
and differential
side gear
Factory specifi-
cation
0.1 to 0.3 mm
0.004 to 0.01 in.
(Reference)
Thickness of adjust-
ing shims
For side gear
0.80 mm
0.031 in.
1.0 mm
0.039 in.
1.2 mm
0.047 in.
For pinion
3.30 mm
0.130 in.
3.50 mm
0.138 in.
3.70 mm
0.146 in.
3.90 mm
0.154 in.
6.4 Checking turning torque of bevel
pinion shaft
1. Clamp the spiral bevel pinion shaft assembly to the
vise and tighten the staking nut.
2. Measure the turning torque of bevel pinion shaft.
3. If the turning torque is not within the factory
specifications, adjust with the lock nut.
NOTE
• After turning force adjustment, be sure to
stake the lock nut.
Turning torque
Factory specifi-
cation
0.80 to 1.0 N
⋅
m
0.082 to 0.10 kgf
⋅
m
0.59 to 0.73 lbf
⋅
ft
5. FRONT AXLE
SERVICING
6. Servicing
5-16
BX1880,BX2380,BX2680,RCK60B-23BX,RCK54-23BX,RCK48-18BX,RCK60D-26BX,RCK54D-26BX
KiSC issued 03, 2019 A
Summary of Contents for ,RCK60B-23BX
Page 19: ...1 INFORMATION KiSC issued 03 2019 A ...
Page 42: ...2 GENERAL KiSC issued 03 2019 A ...
Page 111: ...3 ENGINE KiSC issued 03 2019 A ...
Page 190: ...4 TRANSAXLE KiSC issued 03 2019 A ...
Page 255: ...5 FRONT AXLE KiSC issued 03 2019 A ...
Page 274: ...6 STEERING KiSC issued 03 2019 A ...
Page 291: ...7 HYDRAULIC SYSTEM KiSC issued 03 2019 A ...
Page 344: ...8 ELECTRICAL SYSTEM KiSC issued 03 2019 A ...
Page 399: ...9 MOWER KiSC issued 03 2019 A ...


