5. If the backlash is not within the factory
specifications, adjust with shim (3).
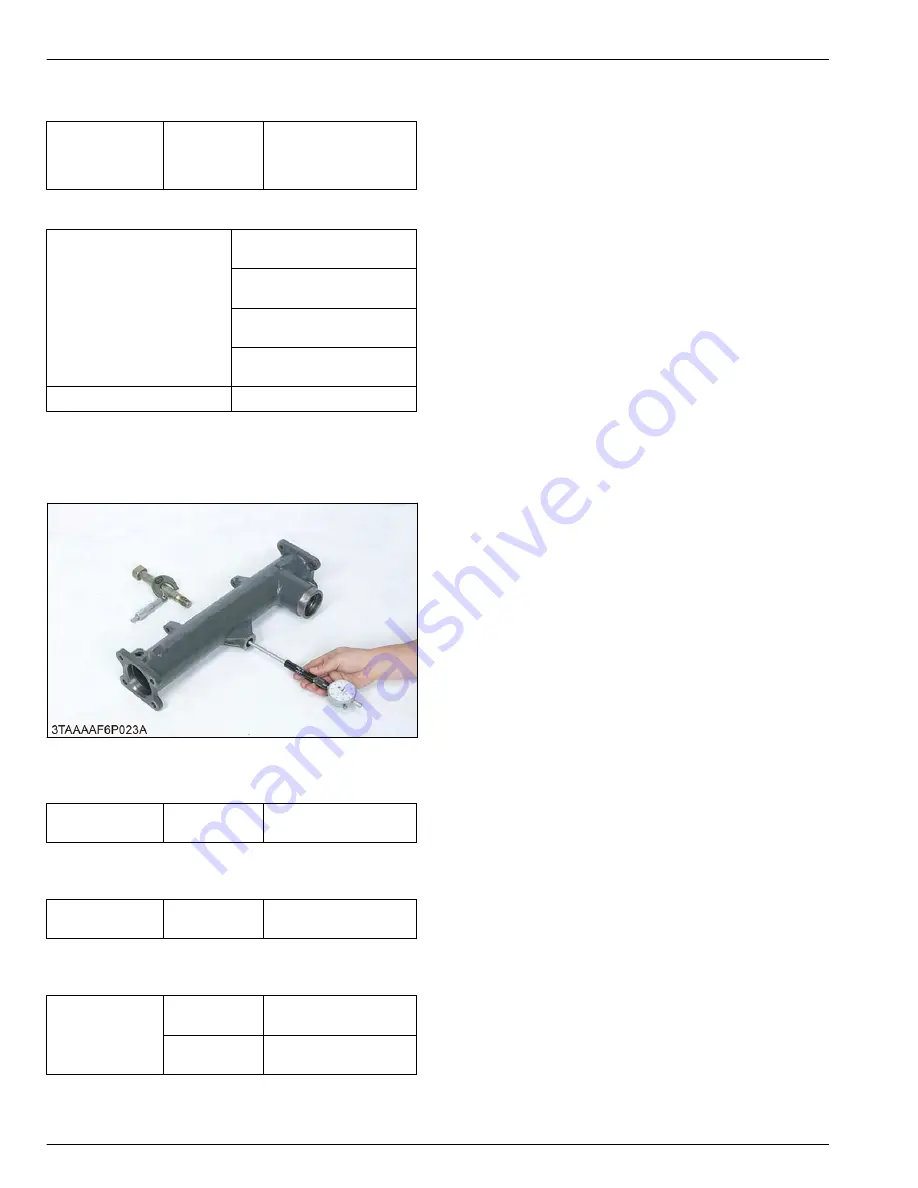
Backlash between
12T bevel gear
and 15T bevel
gear
Factory specifi-
cation
0.1 to 0.3 mm
0.004 to 0.01 in.
(Reference)
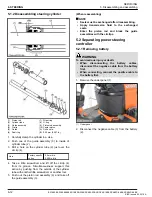
Thickness of adjusting shims
(3)
0.8 mm
0.03 in.
1.0 mm
0.039 in.
1.2 mm
0.047 in.
1.4 mm
0.055 in.
Tooth contact
More than 35%
6.7 Checking clearance between
center pin and pin support bushing
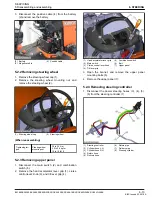
1. Measure the center pin O.D. with an outside
micrometer.
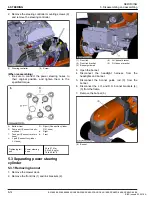
Center pin O.D.
Factory specifi-
cation
19.850 to 20.000 mm
0.78150 to 0.78740 in.
2. Measure the pin support bush I.D. of the front axle
with a cylinder gauge.
Bush I.D.
Factory specifi-
cation
20.000 to 20.081 mm
0.78741 to 0.79059 in.
3. If the clearance exceeds the allowable limit, replace
it.
Clearance be-
tween center pin
and pin support
bush
Factory specifi-
cation
0 to 0.231 mm
0 to 0.00909 in.
Allowable limit
0.70 mm
0.028 in.
5. FRONT AXLE
SERVICING
6. Servicing
5-18
BX1880,BX2380,BX2680,RCK60B-23BX,RCK54-23BX,RCK48-18BX,RCK60D-26BX,RCK54D-26BX
KiSC issued 03, 2019 A
Summary of Contents for ,RCK60B-23BX
Page 19: ...1 INFORMATION KiSC issued 03 2019 A ...
Page 42: ...2 GENERAL KiSC issued 03 2019 A ...
Page 111: ...3 ENGINE KiSC issued 03 2019 A ...
Page 190: ...4 TRANSAXLE KiSC issued 03 2019 A ...
Page 255: ...5 FRONT AXLE KiSC issued 03 2019 A ...
Page 274: ...6 STEERING KiSC issued 03 2019 A ...
Page 291: ...7 HYDRAULIC SYSTEM KiSC issued 03 2019 A ...
Page 344: ...8 ELECTRICAL SYSTEM KiSC issued 03 2019 A ...
Page 399: ...9 MOWER KiSC issued 03 2019 A ...


