OPERATING THE ENGINE
14
STOPPING THE ENGINE
1. After slowing the engine to idle, turn the key to "OFF".
2. Return the engine hand throttle (if equipped) to its idle
engine speed position.
3. Remove the key.
WARMING UP
To avoid serious injury:
A
Be sure to set the parking brake during warm-
up.
A
Be sure to set the range shift lever to the
"NEUTRAL" position and lock both the
hydraulic lift cylinder and the hydraulic outlet
levers to the "OFF" position with restricting
plate (if equipped) during warm-up.
For 5 minutes after engine start-up, allow engine to warm
up without applying any load. This is to allow oil to reach
every part of the engine. If load should be applied to the
engine without this warm-up period, problems may
develop such as seizure, breakage or premature wear
may develop.
B
Warm-Up Transmission Oil in the Low
Temperature Range
Hydraulic oil serves as transmission fluid. In cold weather,
the oil may be cold with increased viscosity. This can
cause delayed oil circulation or abnormally low hydraulic
pressure for some time after engine start-up. This in turn
can create problems with the hydraulic system.
To prevent the above, observe the following instructions:
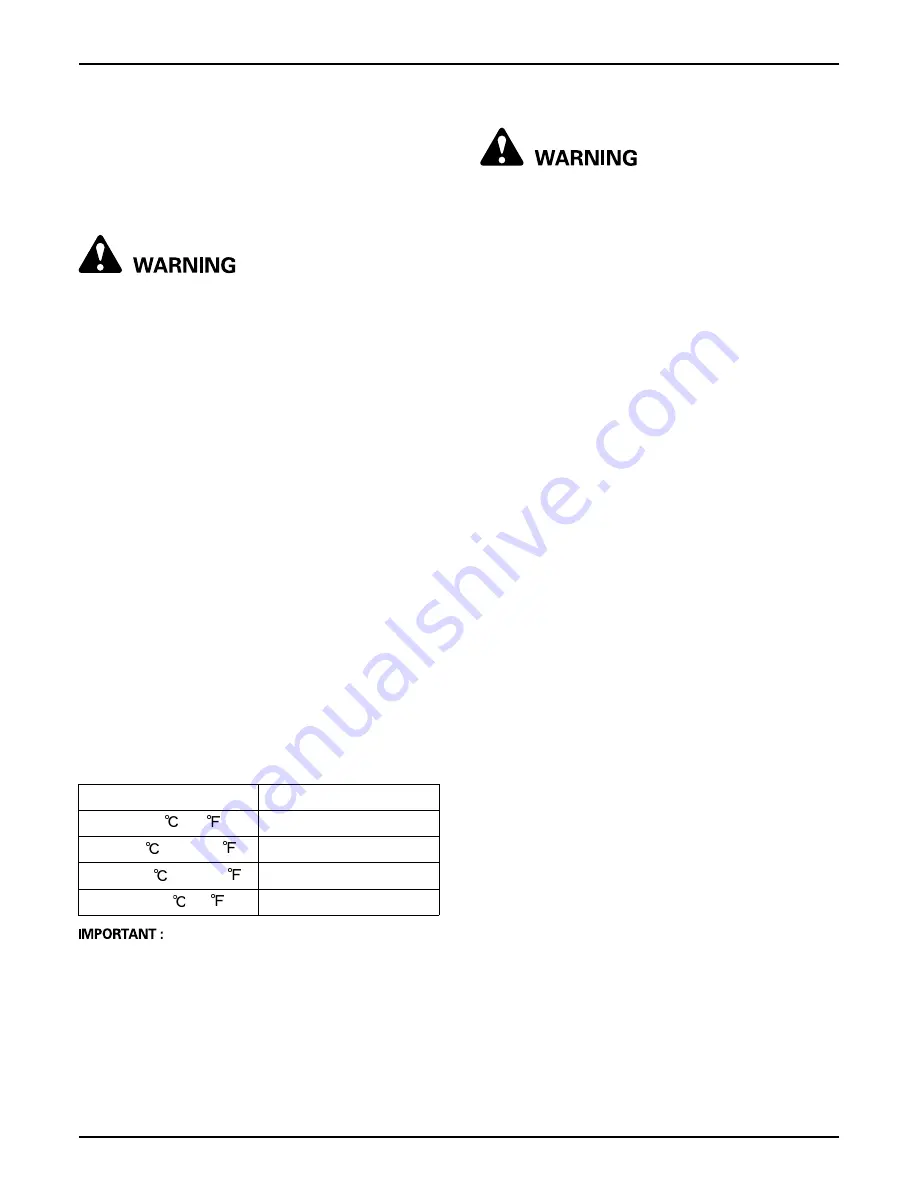
Warm up the engine at about 50% of rated rpm according
to the table below:
A
Do not operate the vehicle under full load condition
until it is sufficiently warmed up.
JUMP STARTING
To avoid serious injury:
A
Keep cigarettes, sparks, and flames away from
battery.
A
If vehicle battery is frozen, do not jump start
engine.
A
Do not connect other end of negative jumper
cable to negative terminal of vehicle battery.
A
The parts such as the muffler may be hot. Be
careful not to get burned in connecting jumper
cables.
When jump starting the engine, follow the instructions
below to safely start the engine.
1. Bring helper vehicle with a battery of the same voltage
as the disabled vehicle within easy cable reach. "THE
VEHICLES MUST NOT TOUCH".
2. Engage the parking brake of both vehicles and put the
shift lever in neutral. Shut the engine off.
3. Put on safety goggles and rubber gloves.
4. Ensure the vent caps are securely in place. (if
equipped)
5. Attach the red clamp to the positive (red, (+) or pos.)
terminal of the dead battery and clamp the other end
of the same cable to the positive (red, (+) or pos.)
terminal of the helper battery.
6. Clamp the other cable to the negative (black, (-) or
neg.) terminal of the helper battery.
7. Clamp the other end to the engine block or frame of
the disabled vehicle as far from the dead battery as
possible.
8. Start the helper vehicle and let its engine run for a few
moments. Start the disabled vehicle.
9. Disconnect the jumper cables in the exact reverse
order of attachment. (Steps 7, 6 and 5).
Ambient temperature
Warm-up time requirement
Above 0
(32
)
Approx. 5 minutes
-10 to 0
(14 to 32
)
5 to 10 minutes
-20 to -10
(-4 to 14
)
10 to 15 minutes
Below -20
(-4
)
More than 15 minutes
Summary of Contents for RTV-X1120D
Page 10: ......
Page 16: ...SAFE OPERATION 6 8 DANGER WARNING AND CAUTION LABELS ...
Page 17: ... 7 SAFE OPERATION ...
Page 18: ...SAFE OPERATION 8 ...
Page 19: ... 9 SAFE OPERATION ...
Page 20: ...SAFE OPERATION 10 ...
Page 22: ......


