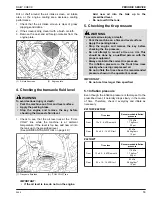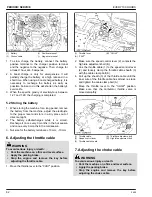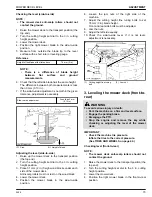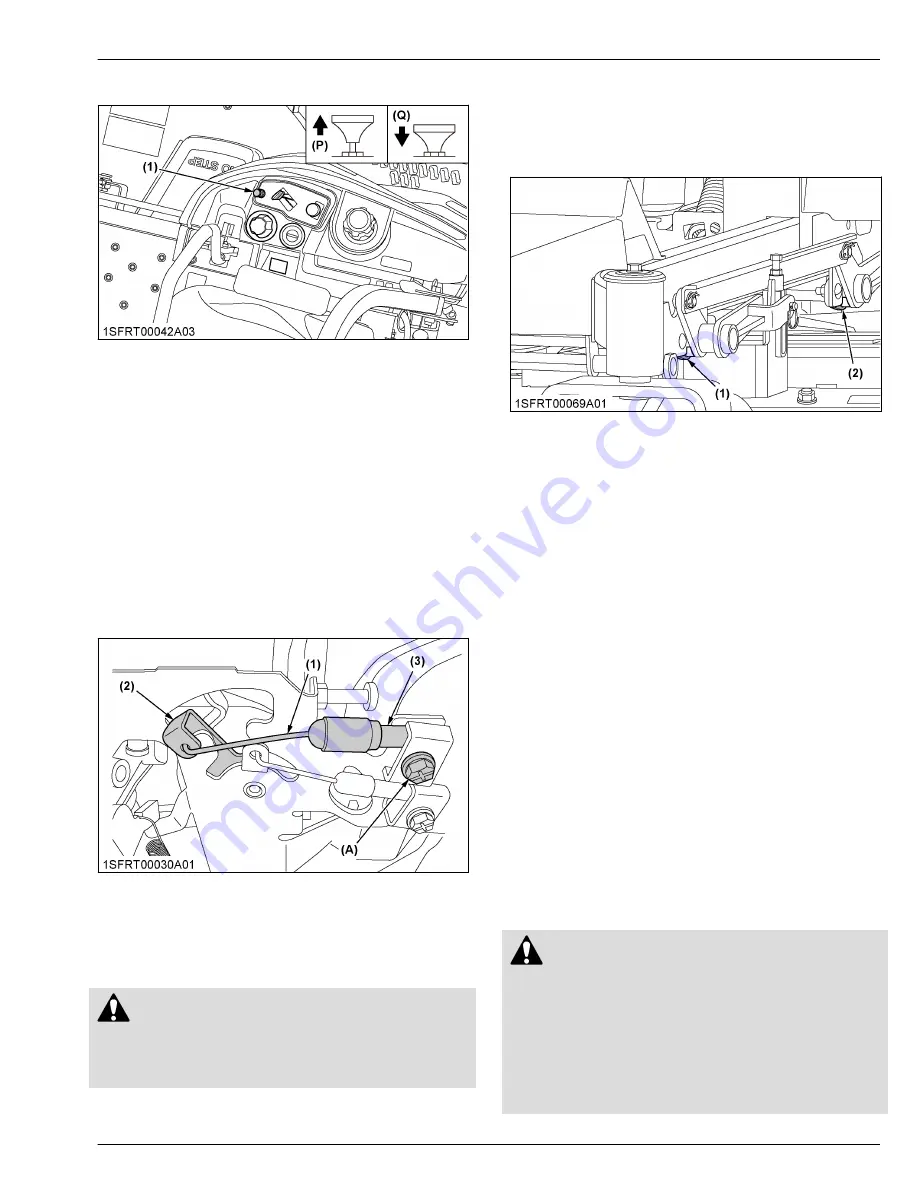
1. Move the choke knob to the
“OFF”
position.
(1) Choke knob
(P) “PULL” (ON)
(Q) “PUSH” (OFF)
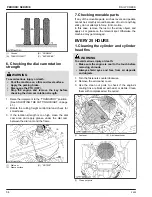
2. Link the choke cable (1) to the choke control lever
(2), and loosely clamp the choke cable sheath (3)
with the cable clamp bolt (A). Make sure that the
carburetor choke valve is fully opened.
3. Pull up the sheath (3) of the choke cable until the
inner wire of the choke cable has almost no slack,
and tighten the cable clamp bolt (A).
4. Move the choke knob to the
“ON”
position. Make
sure that the carburetor choke valve is completely
closed.
5. Make sure that the choke valve turns from fully
closed position to fully opened position when
actuating the choke knob.
(1) Choke cable
(2) Choke control lever
(3) Choke cable sheath
(A) Choke cable clamp bolt
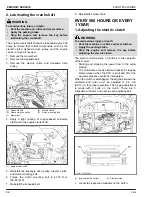
8. Greasing mower link bushings
WARNING
To avoid serious injury or death:
• Be sure to stop the engine and remove the key
before greasing.
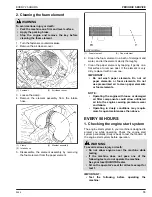
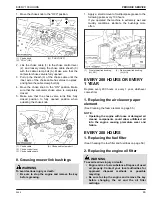
1. Apply a small amount of multipurpose grease to the
following points every 100 hours.
If you operated the machine in extremely wet and
muddy conditions, lubricate the bushings more
often.
(1) Front mower link bushing
(LH, RH)
(2) Rear mower link bushing
(LH, RH)
EVERY 200 HOURS OR EVERY
1 YEAR
Replace every 200 hours or every 1 year, whichever
comes first.
1. Replacing the air cleaner paper
element
(See Cleaning the foam element on page 55.)
NOTE :
• Operating the engine with loose or damaged air
cleaner components could allow unfiltered air
into the engine causing premature wear and
failure.
EVERY 200 HOURS
1. Replacing the fuel filter
(See Checking the fuel filter and fuel lines on page 59.)
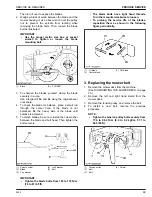
2. Replacing the engine oil filter
WARNING
To avoid serious injury or death:
• Engine oil is a toxic substance. Dispose of used
oil properly. Contact your local authorities for
approved disposal methods or possible
recycling.
• Be sure to stop the engine and remove the key
before changing the oil and the oil filter
cartridge.
EVERY 100 HOURS
PERIODIC SERVICE
Z400
63
Summary of Contents for Z411
Page 3: ...OPERATOR S MANUAL 1SFRT00108A01 READ AND SAVE THIS MANUAL MODELS Z411 Z421 Z421T ...
Page 9: ...4 Z400 ...
Page 16: ...SAFETY LABELS SAFE OPERATION Z400 11 ...
Page 17: ...SAFE OPERATION 12 Z400 ...
Page 18: ...SAFE OPERATION Z400 13 ...
Page 19: ...SAFE OPERATION 14 Z400 ...
Page 20: ...SAFE OPERATION Z400 15 ...
Page 53: ...PERIODIC SERVICE CHART LABEL MAINTENANCE PERIODIC SERVICE CHART LABEL 48 Z400 ...


