background image

15

OPERATING THE ENGINE

B

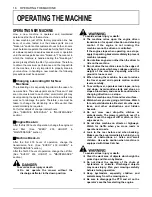
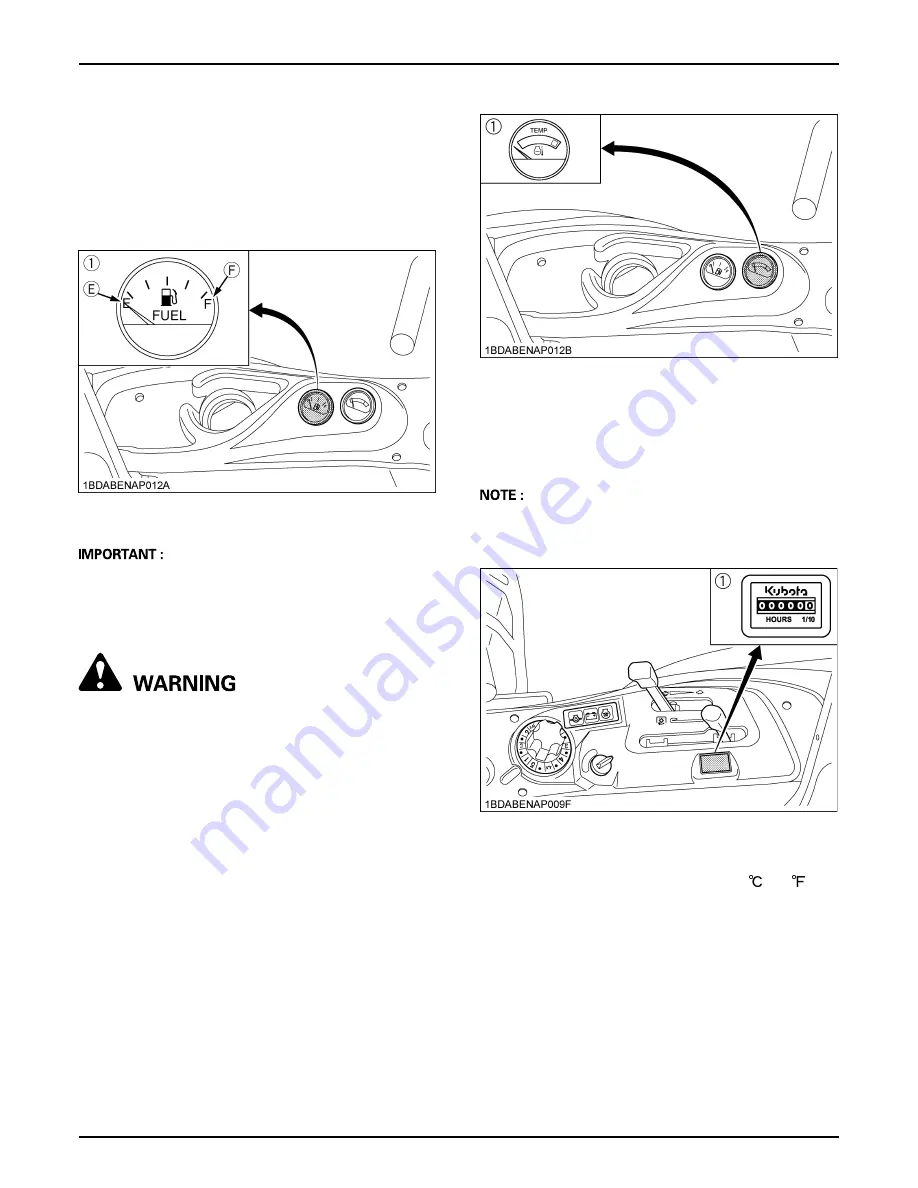
Fuel Gauge

Be careful not to empty the fuel tank. Otherwise air may
enter the fuel system.
If this should happen, the fuel system must be bled. (See
"SERVICE AS REQUIRED" in "MAINTENANCE"
section.)

A

Do not refuel over "F". Fill the tank only to the bottom
of the filler neck in the fuel tank.

B

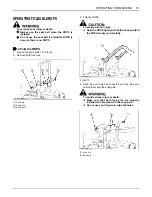
Coolant Temperature Gauge

To avoid serious injury or death:

A

Do not remove radiator cap until coolant
temperature is well below its boiling point.
Then loosen cap slightly to the stop to relieve
any excess pressure before removing cap
completely.

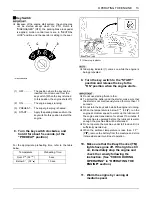
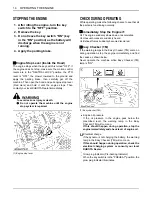
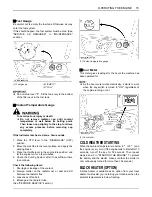
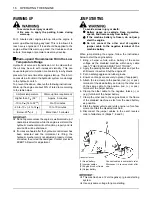
If the indicator reaches red zone, horn sounds.

1. Place the PTO lever in the "DISENGAGE" (OFF)

position.

2. Move the machine to the level surface, and apply the

parking brake.

3. Place the throttle lever in the engine idle position, and

let the engine run for a few minutes.

4. Check the Cooling System, after it has sufficient time

to cool down.

Check the following items:

1. Shortage or leakage of the coolant.
2. Foreign matter on the radiator net or dust and dirt

between the radiator fins.

3. Looseness of fan belt.
4. Blockage in the radiator tube.
(See "PERIODIC SERVICE" section.)

B

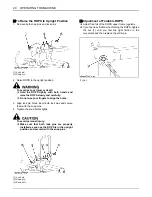
Hour Meter

This meter gives readings for the hours the machine has
been operated for.

A

As the hour meter works electrically, it starts to work
when the key switch is turned to "ON", regardless of
the engine running or not.

COLD WEATHER STARTING

When the ambient temperature is below -5

 (23

) and

the engine is very cold. (If the engine fails to start after 10
seconds, turn off the key for 30 seconds. Then repeat
steps 8 and 9 in "STARTING THE ENGINE". To protect
the battery and the starter, make sure that the starter is
not continuously turned for more than 10 seconds.)

BLOCK HEATER (OPTION)

A block heater is available as an option from your local
dealer. It will assist you in starting your machine when the
ambient temperature is below freezing.

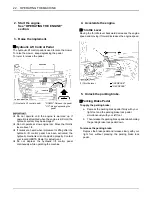
(1) Fuel gauge

(E) "EMPTY"
(F) "FULL"

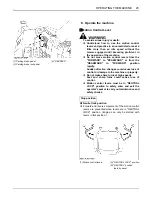
(1) Coolant temperature gauge

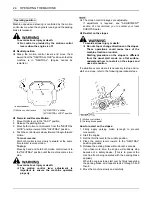
(1) Hour meter

Summary of Contents for ZD1011-AU

Page 1: ...PRINTED IN U S A 1BDABENAP1160 eps OPERATOR S MANUAL READ AND SAVE THIS MANUAL ZD1011 AU 1BDABENAP1160 MODEL English Australia Code No K3414 7126 1 KUBOTA Corporation 2019 Z D 1 0 1 1 A U AX I 1 1 AK ...

Page 2: ...ective Structures Revolutions Per Minute Revolutions Per Second Society of Automotive Engineers KUBOTA Corporation is Since its inception in 1890 KUBOTA Corporation has grown to rank as one of the major firms in Japan To achieve this status the company has through the years diversified the range of its products and services to a remarkable extent until today 30 plants and 35 000 employees produce ...

Page 3: ...ou long satisfactory service To obtain the best use of your machine please read this manual carefully It will help you become familiar with the operation of the machine and contains many helpful hints about machine maintenance It is KUBOTA s policy to utilize as quickly as possible every advance in our research The immediate use of new techniques in the manufacturing of products may cause some sma...

Page 4: ...e if 14 Easy Checker TM 14 Fuel Gauge 15 Coolant Temperature Gauge 15 Hour Meter 15 COLD WEATHER STARTING 15 BLOCK HEATER OPTION 15 WARMING UP 16 Warm up and Transmission Oil in the Low Temperature Range 16 JUMP STARTING 16 OPERATING THE MACHINE 18 OPERATING NEW MACHINE 18 Changing Lubricating Oil for New Machines 18 Engine Break in 18 Machine Break in 18 OPERATING FOLDABLE ROPS 19 To Fold the ROP...

Page 5: ...PERATOR S SEAT 36 HOW TO TILT UP THE MACHINE 37 HOW TO OPEN THE LEVER GUIDE 38 LIFT UP POINT 38 Front side 38 Rear side 39 DAILY CHECK 39 LUBRICANTS FUEL AND COOLANT 41 Checking Engine Oil Level 43 Checking Amount of Fuel and Refueling 43 Checking Transmission Fluid Level 44 Checking Coolant Level 44 Checking and Cleaning Radiator Screen and Hood Screen 45 Checking Tire Pressure 46 Inflation Press...

Page 6: ...t and Secondary Element 64 EVERY 1500 HOURS 64 Checking Fuel Injection Nozzle Injection Pressure 64 EVERY 2000 HOURS or EVERY 2 YEARS 65 Flushing Cooling System and Changing Coolant 65 Anti freeze 66 EVERY 3000 HOURS 67 Checking Injection Pump 67 EVERY 1 YEAR 67 Checking Fuel Lines 67 Checking Radiator Hose and Clamp 67 Checking Hydraulic Hose 67 Checking Intake Air Line 68 Checking Engine Breathe...

Page 7: ... LEVEL MOWER DECK Side to Side 74 LEVEL MOWER DECK Front to Rear 75 GENERAL TORQUE SPECIFICATION 76 TIGHTENING TORQUE CHART 77 STORAGE 78 MACHINE STORAGE 78 REMOVING THE MACHINE FROM STORAGE 78 TROUBLESHOOTING 79 ENGINE TROUBLESHOOTING 79 BATTERY TROUBLESHOOTING 80 MACHINE TROUBLESHOOTING 80 MOWER TROUBLESHOOTING 81 INDEX 83 ...

Page 8: ...ne safety labels before attempting to start and operate the machine 3 Pay special attention to the safety labels on the machine itself 4 The ROPS is an integral and effective safety device KUBOTA recommends the use of a Roll Over Protective Structures ROPS and seat belt in almost all applications This combination will reduce the risk of serious injury or death should the machine be upset The machi...

Page 9: ... and keep safety devices in place and in proper working condition Do not operate unless they are functioning properly 18 Do not modify the machine Unauthorized modification may affect the function of the machine which may result in personal injury 19 Use only implements approved by KUBOTA Use proper ballast to front or rear of machine to reduce the risk of upsets Follow the SAFE OPERATION procedur...

Page 10: ...if the operator is not alert to the presence of children Children are attracted to the machine and mowing activity Never assume that children will remain where you last saw them 1 Keep children out of the mowing area and under the watchful care of another responsible adult 2 Be alert and turn machine off if children enter the area 3 Before and when backing look behind and down for small children 4...

Page 11: ...slope 7 Never freewheel Do not let the machine travel downhill with motion control levers at neutral lock position or in neutral 8 Do not operate machine without the mower deck installed C Stopping 1 Park the machine on level ground 2 Make sure that the machine and all attachments have come to a complete stop before you get off 3 Before you get off apply parking brake place the motion control leve...

Page 12: ... from battery and fuel tank Never fill containers inside a vehicle or on a truck or trailer bed with a plastic liner Always place containers on the ground away from your vehicle before filling Remove equipment from the truck or trailer and refuel it on the ground If this is not possible then refuel such equipment with a portable container rather than from a fuel dispenser nozzle Keep the nozzle in...

Page 13: ...s a coolant recovery tank add coolant there instead of the radiator 11 Do not attempt to mount a tire on a rim unless qualified to do so and all proper safety precautions are followed Never allow untrained personnel to service machine 12 Always maintain the correct tire inflation pressure Do not inflate tires above the recommended pressure shown in the Operator s Manual 13 Provide adequate support...

Page 14: ... or other products Someone particularly children may drink them by mistake 26 Securely support machine or any machine elements with stands or suitable blocking before working underneath For your safety do not rely on hydraulically supported devices they may leak down suddenly drop or be accidently lowered 27 See your local Recycling Center or KUBOTA Dealer to learn how to recycle or get rid of was...

Page 15: ...SAFE OPERATION 8 7 DANGER WARNING AND CAUTION LABELS ...

Page 16: ... 9 SAFE OPERATION ...

Page 17: ...SAFE OPERATION 10 ...

Page 18: ... 11 SAFE OPERATION ...

Page 19: ...nger warning and caution labels with new labels from your local KUBOTA Dealer 4 If a component with danger warning and caution label s affixed is replaced with new part make sure new label s is are attached in the same location s as the replaced component 5 Mount new danger warning and caution labels by applying on a clean dry surface and pressing any bubbles to outside edge 8 CARE OF DANGER WARNI...

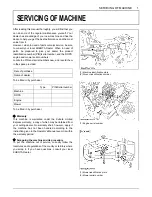
Page 20: ... be filled in by purchaser To be filled in by purchaser C Warranty This machine is warranted under the Kubota Limited Express warranty a copy of which may be obtained from your selling dealer No warranty shall however apply if the machine has not been handled according to the instruction given in the Operator s Manual even it is within the warranty period C Scrapping the machine and its procedure ...

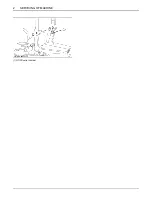
Page 21: ...SERVICING OF MACHINE 2 1 ROPS serial number ...

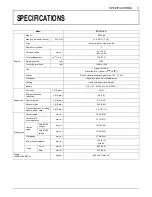
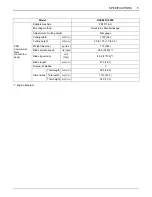
Page 22: ...ication by trochoidal pump Cooling Liquid with pressurized radiator Battery 51R 12 V RC 80 min CCA 430 A Capacities Fuel tank L U S gals 23 6 Engine crankcase with filter L U S qts 2 8 3 0 Engine coolant L U S qts 2 7 2 85 Recovery tank L U S qts 0 25 0 26 Transmission case including Rear axle gear case L U S qts 7 5 7 9 3 Dimensions Overall length mm in 2230 87 8 Overall width w o mower deck mm i...

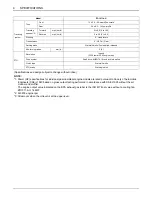
Page 23: ...TA 10 tooth involute spline Clutch type Wet multi disks PTO brake Wet single disk Specifications and design subject to change without notice NOTE 1 Power HP specifications for individual gasoline diesel engine models are rated pursuant to Society of Automobile Engineers SAE J1940 based on gross output testing performed in accordance with SAE J1995 without the air cleaner and muffler The engine out...

Page 24: ... Adjustment of cutting height Dial gauge Cutting width mm in 1372 54 Cutting height mm in 25 to 127 1 0 to 5 0 Weight Approx kg lbs 119 262 Blade spindle speed r s rpm 58 0 3480 1 Blade tip velocity m s fpm 86 9 17100 1 Blade length mm in 475 18 7 Number of blades 3 Dimensions Total length mm in 925 36 4 Total width mm in 1710 67 3 Total height mm in 340 13 3 ...

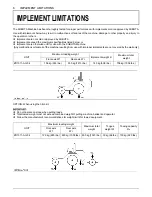
Page 25: ... the machine resulting from use with improper implements are not covered by the warranty OPTION When using the hitch kit A Do not operate on slope when pulling loads A Total towed weight must not exceed combined weight of pulling machine ballast and operator A Follow the manufacturer s recommendations for weight limits for towed equipment UNIT Maximum loading weight Implement weight W Maximum tota...

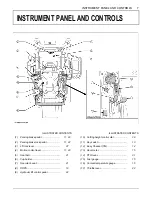
Page 26: ...g height control dial 29 2 Parking brake lock pedal 11 22 11 Key switch 13 3 Lift lock lever 27 12 Easy Checker TM 14 4 Motion control lever 11 23 13 Hour meter 15 5 Seat belt 21 14 PTO lever 31 6 Cup holder 15 Fuel gauge 15 7 Operator s seat 21 16 Coolant temperature gauge 15 8 ROPS 19 17 Throttle lever 22 9 Hydraulic lift control pedal 22 ...

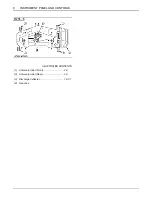
Page 27: ...INSTRUMENT PANEL AND CONTROLS 8 ILLUSTRATED CONTENTS 1 Anti scalp roller Front 29 2 Anti scalp roller Rear 29 3 Discharge deflector 18 31 4 Gear box ...

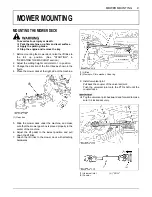
Page 28: ...ure 4 Place the mower deck at the right side of the machine 5 Slide the mower deck under the machine and make sure that the mower gear box is placed properly in the center of the machine 6 Adjust the lift pedal to the lowest position and pull down the lift links 7 Attach the lift links to the mower deck with attaching hardwares 8 Install universal joint Pull back the coupler of the universal joint...

Page 29: ...mower check the mower level If necessary adjust the mower level and anti scalp rollers ADJUSTING THE MOWER See OPERATING THE MOWER and ADJUSTMENT section DISMOUNTING THE MOWER DECK For dismounting the mower deck reverse the above procedures ...

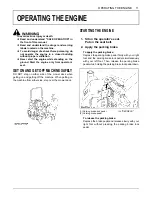
Page 30: ...on either side of the mower deck when getting on and getting off the machine When getting on the machine from either side step over the mower deck STARTING THE ENGINE To apply the parking brake Depress the parking brake pedal firmly with your right foot and the parking brake lock pedal simultaneously with your left foot Then release the parking brake pedal while holding the parking brake lock peda...

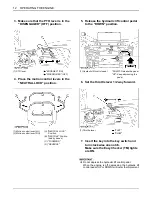
Page 31: ...n control levers in the NEUTRAL LOCK position 1 Motion control lever LH 2 Motion control lever RH A NEUTRAL LOCK Position B NEUTRAL Position held by hands C FORWARD D REVERSE 5 Release the hydraulic lift control pedal to the DOWN position 1 Hydraulic lift control pedal DOWN Release the pedal UP Keep depressing the pedal 6 Set the throttle lever 1 2 way forward 1 Throttle lever FAST SLOW 7 Insert t...

Page 32: ...ed A Do not operate the machine under full load until it is sufficiently warmed up A When the ambient temperature is less than 15 5 remove the battery from the machine and store it somewhere warm until next operation 1 OFF The position where the key can be inserted into or removed from the key switch When the key is turned to this position the engine shuts off 2 ON The engine keeps running 3 PREHE...

Page 33: ...ed BEasy Checker TM If the warning lamps in the Easy Checker TM come on during operation stop the engine immediately and find the cause as shown below Never operate the machine while Easy Checker TM lamp is ON Engine oil pressure If the oil pressure in the engine goes below the prescribed level the warning lamp in the Easy Checker TM will come on If this should happen during operation stop the eng...

Page 34: ...fficient time to cool down Check the following items 1 Shortage or leakage of the coolant 2 Foreign matter on the radiator net or dust and dirt between the radiator fins 3 Looseness of fan belt 4 Blockage in the radiator tube See PERIODIC SERVICE section BHour Meter This meter gives readings for the hours the machine has been operated for A As the hour meter works electrically it starts to work wh...

Page 35: ...arettes sparks and flames away from battery A If the machine battery is frozen do not jump start the engine A Do not connect the other end of negative jumper cable to the negative terminal of the machine battery When jump starting the engine follow the instructions below to start the engine safely 1 Bring a helper vehicle with a battery of the same voltage as the disabled machine within easy cable...

Page 36: ...ATING THE ENGINE A Use of a higher voltage source on a machine could result in severe damage to the machine electrical system Use only matching voltage source when jump starting a low or dead battery condition ...

Page 37: ...charge deflector in the down position To avoid serious injury or death A The machine relies upon the engine driven transmission for speed direction and steering control If the engine is not running the machine cannot be driven or controlled If the engine stops when operating on a slope apply the parking brake immediately to prevent machine runaway A Do not allow any person other than the driver to...

Page 38: ...turns 2 Remove both lock pins 3 Fold the ROPS To avoid personal injury A Hold the ROPS tightly with both hands and fold the ROPS slowly and carefully 4 Align lock pin holes and insert both lock pins and secure them with the snap pins To avoid serious injury or death A Make sure that both lock pins are properly installed and secured with the snap pins A Do not use your fingers to align the holes 1 ...

Page 39: ...h lock pins and secure them with the snap pins 4 Tighten the knob bolts slightly To avoid personal injury A Make sure that both lock pins are properly installed as soon as the ROPS is in the upright position and secured with the snap pins BAdjustment of Foldable ROPS A Adjust free fall of the ROPS upper frame regularly A If you feel less friction when folding the ROPS tighten the nut 1 until you f...

Page 40: ...released C Suspension adjustment Turn the suspension adjust knob to achieve the optimum suspension setting C Arm rest Arm rest may be set at upright position if desired C Arm rest angle adjustment Turn the arm rest angle adjuster to the desired angle A After adjusting the operator s seat be sure to check to see that the seat is properly locked BSeat Belt To avoid serious injury or death A Always u...

Page 41: ... lift control pedal continuously while operating the machine BThrottle Lever Moving the throttle lever backward decreases the engine speed and moving it forward increases the engine speed BParking Brake Pedal To apply the parking brake To release the parking brake Depress the brake pedal and release slowly with your right foot without pressing the parking brake lock pedal 2 Start the engine See OP...

Page 42: ...ntrol or damage to the machine or property A Do not make sharp turns at high speeds Fast and sharp turns could cause loss of control A Motion control levers must be in NEUTRAL LOCK position to safely enter and exit the operator s seat or to carry out maintenance and safety checks C Neutral lock position A Forward and reverse movement of the motion control levers are prevented when levers are in NE...

Page 43: ...stable If adjustment is required see ADJUSTMENT section We recommend you to contact your local KUBOTA Dealer C Re start on the slopes To avoid serious injury or death A Do not stop or change directions on the slopes These operations could cause loss of the machine traction or control Starting procedure on the slopes is different from the usual start mode on a flat surface understand how to re star...

Page 44: ...ight motion control lever further forward than the left motion control lever For forward travel to the left GENERAL RIGHT TURN A Push left motion control lever further forward than the right motion control lever For forward travel to the right SHARP ZERO LEFT TURN A Push right motion control lever forward and pull left motion control lever rearward at the same time SHARP ZERO RIGHT TURN A Push lef...

Page 45: ...ke as the emergency brake and immediately stop the unit 1 Move both motion control levers to the NEUTRAL position to stop the machine 2 Apply parking brake 3 Move both motion control levers to NEUTRAL LOCK position 4 Throttle lever in slow position and shift PTO lever to the DISENGAGE OFF position 5 Lower all implements to the ground 6 Turn off the engine and remove the key FIXING FRONT AXLE To av...

Page 46: ...tion A Apply parking brake A Lower all implements to the ground A Shut off the engine A Remove the key A Place the motion control levers in the NEUTRAL LOCK position If necessary to park on an incline be sure to chock the wheels on the downhill side to prevent accidental rolling of the machine TRANSPORTING 1 Transport the machine on a suitable trailer A To prevent the hood from opening by wind whi...

Page 47: ...stance transit make sure to lift the mower by the hydraulic lift control pedal and move the lift lock lever in the TRANSPORT LOCK position 4 Follow all federal and local regulations for securement OPTION A For the operation and precautions of option kit obey the instructions of the manuals attached in the option kit 1 Lift lock lever LOCK UNLOCK ...

Page 48: ...toward trees posts or other obstacles on the first trip around the obstacle 4 Most lawns should be mowed to keep the grass approximately 50 to 80 mm 2 to 3 in high Best results are obtained by cutting often and not too short To keep a green lawn never mow more than 1 3 of the height of the grass or a maximum of 25 mm 1 in in 1 mowing For extremely tall grass set the cutting height at maximum cutti...

Page 49: ...hydraulic lift control pedal This lowers the mower deck from the TRANSPORT position to the OPERATING position 5 Adjust the anti scalp rollers height as recommended below for normal operating condition To minimize gouging and roller damage or wear the anti scalp rollers will maintain the ground clearance of 19 mm 0 75 in A Never allow roller to contact the ground continuously as premature roller we...

Page 50: ...he PTO lever to the ENGAGED ON position 1 If you get off the seat while the PTO is running the engine will stop automatically Operator presence control 2 Before starting the engine pull the PTO lever to the DISENGAGED OFF position If it is at the ENGAGED ON position the engine will not start A These safety features are built in Cutting height inch mm Position of bolts Ref Ground clearance between ...

Page 51: ...h or pull the motion control levers to move forward or backward A Never attempt to move the machine with the parking brake ON A Keep the engine running at full throttle for best results Control travel speed with the motion control levers A During heavy duty use operate the machine at a slower ground speed or go over the area twice A Keep the mower deck in the raised position when the mower is dise...

Page 52: ...ure Though the inflation pressure is factory set to the prescribed level it naturally drops slowly in the course of time Thus check it and inflate as necessary WHEELS A When attaching rear tires tighten the bolts and the nuts to the following torques then recheck after traveling 200 m 200 yards changing directions several times A There are 2 types of wheel One has ribs inside of the star shape The...

Page 53: ...remove the nylon sleeve 5 Remove the wheel from assembly yoke C Installing 1 Install the replacement wheel 2 Install the nylon sleeve with the wheel bolt and the lock nut 3 Tighten the nut A Insert the wheel bolt from the outside of the yoke A Tighten the nut gradually until wheel bearing play is eliminated and wheel turns freely by hand Reference 4 Lower machine 1 Lock nut 2 Wheel bolt 3 Yoke Tig...

Page 54: ...unning A Never open the step while the engine is running A Do not touch muffler or exhaust pipes while they are hot Severe burns could result BHood To open the hood pull the lever sideward and then open BFront Cover To open the front cover pull the bottom edge of the front cover BStep To open the step pull the grip 1 Lever 2 Hood A RELEASE 1 Hood 1 Front cover 1 Step 2 Grip A PULL ...

Page 55: ...ising 2 Pull the latch lever on the seat panel frontward 3 Raise the operator s seat to the LOCK position C Lower To avoid serious injury or death A Do not drop the seat to close it A Watch your hands Do not place your hands under the seat when closing 1 Pull up the seat support and release the LOCK 2 Lower the seat slowly to lock 3 Slide the seat to proper position 1 Latch lever A PULL 1 Operator...

Page 56: ...L pins from center to both sides hole of the front axle to position the front wheels 4 Unfold the handle and turn it clockwise to raise the front axle to the stop 5 Remove the L pin of the raised wheel and insert it to the outside hole of the frame with the snap pin C Return to the normal position Reverse to the above procedure A To ensure equal oscillation of the axle and prevent loss of parts be...

Page 57: ...2 Tighten the screws A If the lever guide is out of alignment with the motion lever move the lever guide to align it with the motion lever LIFT UP POINT To avoid serious injury death or machine damage A Do not work under the machine unless it is secured by safe stands or suitable blocking BFront side Lift the front axle with nylon slings A When you use nylon slings make sure to block rear wheels w...

Page 58: ... machine on a level surface with the engine shut off the key removed and the parking brake securely set or chock the rear wheels 1 Rear frame 2 Nylon sling 3 Bottom plate 4 Jack 5 Chock No Check item Ref Page Walking around the machine 1 Tire pressure wear and damage 33 46 2 Oil and water leak 3 Fuel level 43 4 Engine oil level 43 5 Transmission fluid level 44 6 Coolant level in the radiator and t...

Page 59: ... tension pivot 46 While sitting in the operator s seat 1 Motion control lever 71 2 Parking brake 57 Turning the key switch ON 1 Performance of the Easy Checker TM light 14 Starting the engine 1 Color of the exhaust fumes 14 2 Engine start system OPC system If either of these do not operate properly contact your local KUBOTA Dealer immediately 51 52 3 Check for abnormal noise and vibration 14 Other...

Page 60: ...API service Classification CF CF 4 CG 4 CH 4 or CI 4 Above 25 SAE30 SAE10W 30 or 15W 40 77 0 to 25 SAE20 SAE10W 30 or 15W 40 32 to 77 Below 0 SAE10W SAE10W 30 or 15W 40 32 Transmission case with filter hose Rear axle gear case RH LH 7 5 L 7 9 U S qts KUBOTA SUPER UDT 2 fluid 2 Mower gear box 0 4 L 0 42 U S qts Gasoline engine oil API Service Category SH or higher SAE10W 30 Greasing No of greasing ...

Page 61: ...ion fluid Super UDT 2 is a proprietary KUBOTA formulation that deliveries superior performance and protection in all operating conditions Regular UDT is also permitted for use in this machine A Indicated capacities of water and oil are manufacturer s estimate A Refer to the following table for the suitable API classification engine oil according to the engine type with internal EGR external EGR or...

Page 62: ...uel carefully If the engine is running do not fill the fuel tank If engine is hot let engine cool several minutes before adding fuel Do not smoke while filling the fuel tank or servicing the fuel system Fill fuel tank only to bottom of filler neck Check the fuel level Take care that the fuel tank does not become empty A Use Diesel Fuel Only 1 Use No 2 diesel fuel 2 Use No 1 diesel fuel if the temp...

Page 63: ...ator and the recovery tank before starting engine 1 Remove the radiator cap and check to see that the coolant level is just below the fill port 2 Check to see that the coolant level is between the FULL and LOW marks of recovery tank 3 When the coolant level drops due to evaporation add water only up to just below the fill port of the radiator and the full level of the recovery tank In case of leak...

Page 64: ... or radiator decrease cooling performance 1 Remove the radiator screen and the hood screen and remove all foreign material 2 Remove the dust from between the fins and the tube 3 Tighten the fan drive belt as necessary For this refer to EVERY 100 HOURS in MAINTENANCE section 4 If the scale forms in the tube clean with the scale inhibitor or its equivalent 5 Each time the hood screen is covered with...

Page 65: ...n Pressure Though the inflation pressure is factory set to the prescribed level it naturally drops slowly in the course of time Thus check it and inflate as necessary BLubricating All Grease Fittings To avoid serious injury or death A Be sure to stop the engine and remove the key before greasing Grease the following location Tire sizes Recommended Inflation Pressure ZD1011 AU Front 13 x 5 0 6 Smoo...

Page 66: ...shings every 50Hr 53 5 Throttle Cable Oil every 50Hr 54 6 Greasing mower link bushings pivot every 100Hr 58 7 Air cleaner primary element Clean every 100Hr 55 2 Replace every 1000Hr or 1 year 64 3 Secondary element Replace every 1000Hr or 1 year 64 3 8 Fuel filter element Check every 100Hr 55 Replace every 400Hr 64 6 9 Fan belt Adjust every 100Hr 56 10 Parking brake Adjust every 100Hr 57 9 11 Batt...

Page 67: ...ar 67 4 9 Replace every 4 years 68 6 24 Radiator hose and clamp Check every 1 year 67 4 9 Replace every 4 years 68 9 25 Hydraulic hose Check every 1 year 67 4 9 Replace every 4 years 68 6 26 Intake air line Check every 1 year 68 4 9 Replace every 4 years 68 9 27 Engine breather hose Check every 1 year 68 4 6 Replace every 4 years 68 6 28 Mower gear box oil seal Check every 1 year 68 4 6 Replace ev...

Page 68: ...UBOTA Dealer for this service 7 When the battery is used for less than 100 hours per year check the battery condition by reading the indicator annually 8 The initial 100 hours should not be an adjustment cycle 9 If you feel you are unable to make the following service correctly and safely contact your local KUBOTA Dealer A The items listed above marked are registered as emission related critical p...

Page 69: ...50 MAINTENANCE PERIODIC SERVICE CHART LABEL 1 Part No K3411 6552 5 ...

Page 70: ... The engine must not crank Test 3 OPERATOR ON THE SEAT 1 Securely set the parking brake 2 Shift the PTO lever to DISENGAGE OFF position 3 Hold the motion control levers and move then inward from NEUTRAL LOCK position to NEUTRAL position and then release the levers 4 Turn the key switch to START position 5 The engine must not crank Test 4 OPERATOR ON THE SEAT 1 Securely set the parking brake 2 Shif...

Page 71: ...t the parking brake 3 Shift the PTO lever to ENGAGE ON position 4 Stand up Do not get off the machine 5 The engine must shut off A If the engine remains running in Test 1 or 2 consult your local KUBOTA Dealer to have the unit checked before operation BChecking Gear Box Oil Level To avoid serious injury or death A Always stop the engine and remove the key before checking oil 1 Park the machine on a...

Page 72: ... serious injury or death A Be sure to stop the engine and remove the key before greasing Grease the following locations 1 King pin LH RH 2 Center pin 3 Front wheel LH RH 1 Front lift arm LH RH 1 Parking brake lock pedal 1 Handle joint ...

Page 73: ...MAINTENANCE 54 BOiling 1 Machine universal joint 1 Seat adjuster 1 Lift control cable oil 1 Throttle cable oil 1 Throttle cable oil ...

Page 74: ...n MAINTENANCE section C Evacuator Valve Open the evacuator valve once a week under ordinary conditions or daily when used in a dusty place to get rid of large particles of dust and dirt BChecking Fuel Filter To avoid serious injury or death A Be sure to stop the engine and remove the key when attempting to make the following checks and changes A Never fail to check the fuel lines periodically The ...

Page 75: ...e engine may overheat To adjust loosen bolts and move the alternator outward to tighten the belt After adjustment securely tighten the bolts Moderate belt tension The belt must deflect approx 10 mm 0 4 in when the center of the belt is depressed with finger pressure of 98N 10kgf 22 lbs 1 Pipe clamps 2 Fuel line 3 Fuel filter 4 Fuel pump 1 Tension bolt 2 Alternator 3 Adjusting bolt A 10 mm 0 4 in ...

Page 76: ...g brake to the lock position 3 Loosen the lock nuts 4 Adjust the spring length to the recommendation 5 Lock the nuts 6 Check the brake spring play to the recommendation If there is no play adjust the brake spring play again See Adjustment of brake spring play below 7 Adjust the other side spring to the same dimension C Adjustment of brake spring play 1 Place the motion control lever to the NEUTRAL...

Page 77: ... To avoid serious injury or death A When the battery is being activated hydrogen and oxygen gases in the battery are extremely explosive Keep open sparks and flames away from the battery at all times especially when charging the battery To avoid serious injury or death A Batteries battery posts terminals and related accessories contain lead and lead compounds and other chemicals known to the State...

Page 78: ... charging the battery To avoid serious injury or death A When disconnecting the cable from the battery start with the negative terminal first When connecting the cable to the battery start with the positive terminal first A Never check battery charge by placing a metal object across the posts Use a voltmeter or hydrometer 1 To slow charge the battery connect the battery positive terminal to the ch...

Page 79: ...once every 6 months in cold seasons EVERY 150 HOURS BChanging Gear Box Oil To avoid serious injury or death A Be sure to stop the engine and remove the key before changing the oil 1 To drain the used oil remove the drain plug and oil inlet plug with gauge at the gear box and drain the oil completely into the oil pan 2 After draining reinstall the drain plug 3 Remove the oil level check plug 4 Fill...

Page 80: ... BReplacing Engine Oil Filter To avoid serious injury or death A Be sure to stop the engine and remove the key before changing the oil and the oil filter A Allow engine to cool down sufficiently oil can be hot and may cause burns 1 The oil filter must be changed every 200 service hours 2 Apply a slight coat of oil onto the rubber gasket of new filter 3 Tighten the filter quickly until it contacts ...

Page 81: ... Add fluid to proper level Check for oil leaks around filter gasket A To prevent serious damage or premature failure to the hydraulic system use only a KUBOTA genuine filter BAdjusting Front Axle Pivot If the front axle pivot pin adjustment is not correct vibration in the front wheel can occur C Check and Adjustment of the Front Axle End Play 1 Lift up and securely block the front of the machine 2...

Page 82: ...RH LH 2 After draining reinstall the drain plugs 3 Fill with UDT or SUPER UDT hydrostatic transmission fluid or its equivalent up to the upper line of the gauge A It takes time to send the oil from the transmission case to the rear axle case RH LH Pour the regulated amount of oil slowly 4 After running the engine for a few minutes stop it and check the oil level again add oil to the prescribed lev...

Page 83: ...for this service EVERY 800 HOURS BAdjusting Engine Valve Clearance Consult your local KUBOTA Dealer for this service EVERY 1000 HOURS or EVERY 1 YEAR Replace every 1000 hours or every 1 year whichever comes faster BReplacing Air Cleaner Primary Element and Secondary Element See Cleaning Air Cleaner Primary Element in EVERY 100 HOURS in MAINTENANCE section A To prevent serious damage to the engine ...

Page 84: ... Fill with clean water and cooling system cleaner 5 Follow directions of the cleaner instruction 6 After flushing fill with clean water and anti freeze until the coolant level is just below the fill port on the radiator Install the radiator cap securely 7 Fill with coolant up to the FULL mark on the recovery tank 8 Start and operate the engine for a few minutes 9 Stop the engine and let cool 10 Ch...

Page 85: ... radiator with fresh water and empty it again Repeat this procedure 2 or 3 times to clean up the inside 3 Mixing the LLC Premix 50 LLC with 50 clean soft water When mixing stir it up well and then fill into the radiator 4 The procedure for the mixing of water and anti freeze differs according to the make of the anti freeze and the ambient temperature Refer to SAE J1034 standard more specifically a...

Page 86: ... swollen hardened or cracked then replace them immediately BChecking Hydraulic Hose If you feel you are unable to make the following service correctly and safely contact your local KUBOTA Dealer To avoid serious injury or death A Be sure to stop the engine and remove the key before checking and replacing the hydraulic hose A Allow the transmission case to cool down sufficiently oil can be hot and ...

Page 87: ...ocal KUBOTA Dealer for this service BReplacing Engine Breather Hose Consult your local KUBOTA Dealer for this service BReplacing Radiator Hose If you feel you are unable to make the following service correctly and safely contact your local KUBOTA Dealer See Checking Radiator Hose and Clamp in EVERY 1 YEAR in MAINTENANCE section BReplacing Mower Gear Box Oil Seal Consult your local KUBOTA Dealer fo...

Page 88: ...e inside of the belt cover because otherwise the belt life will be reduced C Checking the blade The blade cutting edges should be kept sharp at all times 1 Sharpen the cutting edges if they look like the blade B 2 Replace the blades if they look like the blade C C Replacing 1 Dismounting the mower deck See DISMOUNTING THE MOWER DECK in MOWER MOUNTING section Then turn it over to expose the blades ...

Page 89: ... bolts have Right hand threads Turn them counterclockwise to loosen A To prolong the service life of the blades reposition them as shown in the figure below periodically BReplacing Mower Belt 1 Remove the mower deck from the machine according to the procedure DISMOUNTING THE MOWER DECK 2 Remove the left and right hand shield from the mower deck 3 Clean around the gear box 4 Remove the belt from th...

Page 90: ...inked A If you feel you are unable to make the following adjustments correctly and safely contact your local KUBOTA Dealer A Right and left motion control levers can be adjusted independently BHST NEUTRAL 1 Lift up and secure with jack stands or blocking the rear of the machine frame 2 Remove both rear wheels 3 Set the engine speed maximum 4 Place the motion control lever in the NEUTRAL LOCK posit...

Page 91: ... damper nut 3 Install the lever guide See HOW TO OPEN THE LEVER GUIDE in PERIODIC SERVICE section BMOTION CONTROL LEVER ALIGNMENT C Check the alignment Check the gap and space between the levers at the maximum forward position If positions of the control levers are unequal an adjustment is necessary To avoid serious injury or death A Park the machine on a firm and level surface A Stop the engine r...

Page 92: ... roller adjustments each time the mower deck cutting height is changed It is recommended that all the anti scalp rollers be kept off the ground to minimize scuffing 1 Check the machine tire pressure Inflate tires to the correct pressure See TIRES AND WHEELS section 2 Start the engine 3 Raise up the mower deck to the transport position Also the top end of the lift 4 Turn the cutting height control ...

Page 93: ...etween on the concrete and ground 6 Check that the left side blade is same height The difference between both measurements must be less than 3 mm 0 12 in 7 If the Side to Side adjustment is not within the given tolerance adjustment necessary C Adjusting level Side to Side 1 Raise up the mower deck to the transport position Also the top end 2 Turn the cutting height set dial to the 3 in cutting hei...

Page 94: ...ide blade has the same dimension The difference between both measurements must be less than 6 mm 0 24 in Front side must be lower than rear side 8 If the Front to Rear adjustment is not within the given tolerance adjustment is necessary C Adjusting level Front to Rear 1 Raise up the mower deck to the transport position Also the top end 2 Turn the cutting height set dial to the 3 in cutting height ...

Page 95: ...23 5 27 5 2 4 2 8 21 7 25 3 29 4 34 3 3 0 3 5 1 2 lbf ft N m kgf m 80 96 108 5 130 2 11 07 13 29 110 132 149 2 179 0 15 22 18 27 M10 lbf ft N m kgf m 35 5 41 2 48 1 55 9 4 9 5 7 44 9 52 1 60 8 70 5 6 2 7 2 9 16 lbf ft N m kgf m 110 132 149 2 179 0 15 22 18 27 160 192 217 0 260 4 22 14 26 57 M12 lbf ft N m kgf m 57 2 66 5 77 5 90 2 7 9 9 2 76 0 86 8 103 117 10 5 12 0 5 8 lbf ft N m kgf m 150 180 20...

Page 96: ... 8 2 6 0 2 M10 14 or 17 35 4 41 2 38 3 2 9 48 1 55 9 52 0 3 9 4 9 5 7 5 3 0 4 M12 17 or 19 57 1 66 5 61 8 4 7 77 5 90 2 83 9 6 3 8 0 9 2 8 6 0 6 M14 19 or 22 91 1 108 5 99 8 8 7 123 6 147 0 135 3 11 7 12 6 15 0 13 8 1 2 A Figure 7 on the top of the bolt indicates that the bolt is of special material A Before tightening check the figure on the top of bolt ...

Page 97: ...e machine indoors in a dry area that is protected from sunlight and excessive heat If the machine must be stored outdoors cover it with a waterproof tarpaulin 9 Jack the machine up and place blocks under the front and rear axles so that all 4 tires are off the ground Keep the tires out of direct sunlight and extreme heat A When washing the machine be sure to stop the engine Allow sufficient time f...

Page 98: ...ne charge and store it indoors Install it on the machine only when the machine is going to be used Insufficient engine power A Insufficient or dirty fuel A The air cleaner is clogged A Check the fuel system A Clean the element Engine stops suddenly A Insufficient fuel A Refuel A Bleed the fuel system if necessary Exhaust fumes are colored Black A Fuel quality is poor A Too much oil A Engine is ove...

Page 99: ... Battery was used too much without recharging A Charge battery sufficiently A Charge the battery properly Recharging is impossible A Battery life expired A Replace battery Terminals are severely corroded and heat up A Poor terminal connection A Clean the terminal and tighten securely A Keep the terminal clean and tight Apply grease and treat with anti corrosives Battery electrolyte level drops rap...

Page 100: ...A Engine rpm too low A Mow at full throttle check and reset engine rpm A Grass too long A Cut grass twice A Blades dull or damaged A Replace blades or have blades sharpened A Debris in mower deck A Clean mower deck Uneven cut A Mower deck not level A Level mower deck A Ground speed too fast A Slow down A Blades dull A Have blades sharpened A Blades worn or damaged A Replace blades A Low tire infla...

Page 101: ...ys A Replace pulleys A Pulleys out of alignment A Consult your KUBOTA Dealer A Blades out of balance A Have blades balanced Mower loads down machine A Engine rpm too low A Mow at full throttle check and reset engine rpm A Ground speed too fast A Slow down A Debris wrapped around mower spindles A Clean mower A Front of deck too low A Adjust mower deck See MOWER DECK LEVEL in ADJUSTMENT section Trou...

Page 102: ...l Pedal 22 Immediately Stop the Engine if 14 Inflation Pressure 33 Inflation Pressure 46 Injection Pump 67 Intake Air Line 68 Intake Air Line 68 Key Switch 13 LEVEL MOWER DECK Front to Rear 75 LEVEL MOWER DECK Side to Side 74 Lubricating All Grease Fittings 46 Lubricating Oil for New Machines 18 Machine Break in 18 MAXIMUM SPEED FORWARD 71 Motion Control Lever 23 MOTION CONTROL LEVER ALIGNMENT 72 ...

Reviews: