background image

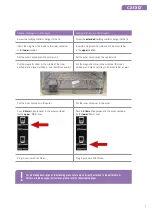
Cleaning of tall objects (> 70 mm height)

Cleaning of flat objects (< 70 mm height)

Screw the building platform hanger to the lid 

Screw the 

extended

 building platform hanger to the lid

Insert the plug from the inside to the inner container  
in the 

lower

 position  

Insert the plug from the inside to the inner container  
in the 

upper

 position

Set the outer container on the control unit 

Set the outer container on the control unit 

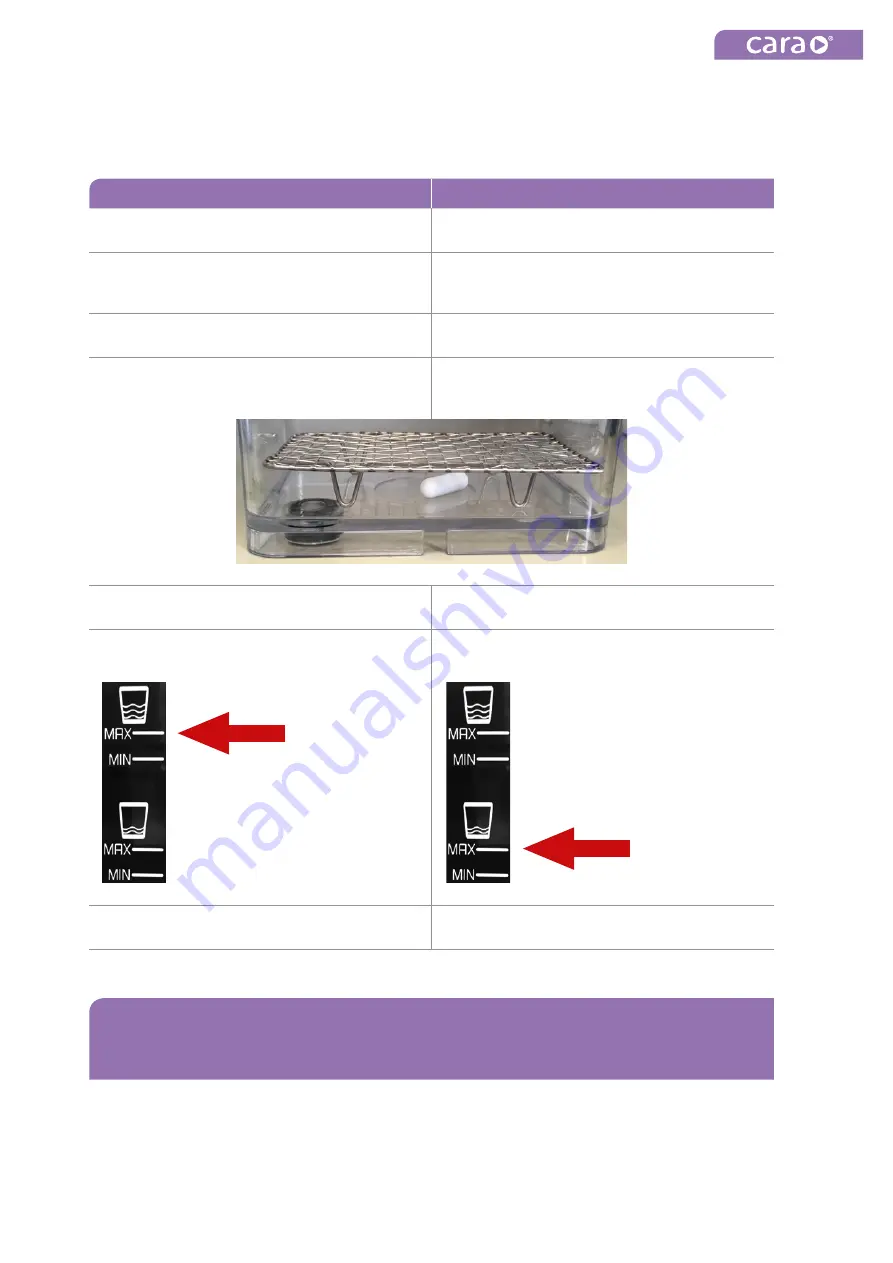
Put the magnetic stirrer in the middle of the inner 
container and place part tray in inner container as well

Put the magnetic stirrer in the middle of the inner 
container and place part tray in inner container as well

Put the magnetic stirrer in the middle of the inner container  

and place part tray in inner container as well 


Put the inner container in the outer

Put the inner container in the outer

Pour 

2 liters

 of isopropanol in the outer container 

(to the 

upper

 “MAX” line)

Pour 

1.3 liters

 of isopropanol in the outer container 

(to the 

lower

 “MAX” line)

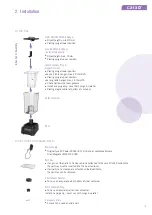
Plug in your cara Print Clean 

Plug in your cara Print Clean

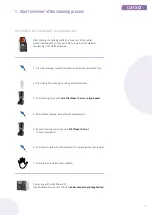
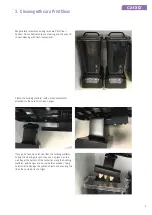
For a detailed description of the cleaning process for objects directly attached to the build table or 
objects printed on support structures, please refer to the following pages.

!

5

Summary of Contents for CARA Print Clean

Page 1: ...years cara DISCOVER DIGITAL Application Guide cara Print Clean Application Guide Version 06 2019 Giving a hand to oral health...

Page 2: ...3 Cleaning with cara Print Clean 6 4 Cleaning process for dima Print Stone model material 7 4 1 Manual pre cleaning 7 4 2 Cleaning process 8 5 Cleaning process for dima Print Gingiva Mask 10 6 Cleani...

Page 3: ...g Pre cleaning by rinsing with isopropanol 3 First cleaning cycle with cara Print Clean 3 min in isopropanol 4 Mid process blowing blow off with compressed air 5 Second cleaning cycle with cara Print...

Page 4: ...ttom of container Outer Container Base Power Supply Original type XP Power VER24US 120 JA and acceptable alternate Triad Magnetics WSX120 2000 Part tray If any one of the parts to be cleaned is not at...

Page 5: ...nner container as well Put the magnetic stirrer in the middle of the inner container and place part tray in inner container as well Put the magnetic stirrer in the middle of the inner container and pl...

Page 6: ...platform with printed objects still attached to the cara Print Clean hanger If any parts become detached from the building platform during the cleaning process they can be placed on the part tray at...

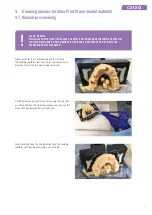
Page 7: ...ove any extra monomer using compressed air This optimizes the cleaning process and reduces the amount of isopropanol that you will need Next carefully rinse the printed object and the building platfor...

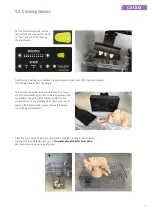
Page 8: ...should be blown dry with compressed air and then carefully removed from the platform using the plastic spatula provided in the accessories kit If any additional resin flows out or can be seen on the...

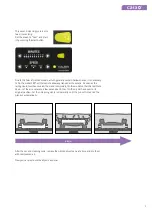
Page 9: ...down Let the air evapurate a few seconds and then flip the model back over to its original position Let then cleaning clycle run normally until the pre set time ends the process automatically 2 min Th...

Page 10: ...ct does not need to be flipped during the second cleaning cycle 1 Remove residual monomer liquid with compressed air 3 First cleaning step for 3min with objects attached to build table and blow dry 5...

Page 11: ...d hanger according to the size of objects 3 Carefully blow with compressed air 4 Pre rinse with isopropanol 5 Cleaning cycle 1 3min 6 Carefully blow with compressed air leave on building platform and...

Page 12: ...2019 Kulzer GmbH All Rights Reserved W22134 EN 06 2019 ORT kulzer com cara print Contact in Germany Kulzer GmbH Leipziger Stra e 2 63450 Hanau Germany cara service kulzer dental com Notes...

Reviews: