8
3.
If you are installing your outside air vent through the wall, use a 3” hole saw or reciprocating saw
to cut the hole through the wall.
BE SURE TO CHECK FOR OBSTRUCTIONS IN THE
WALL
.
STEP 4: INSTALLING THE HEARTH
1.
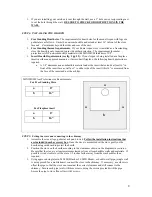
Free Standing Hearth size
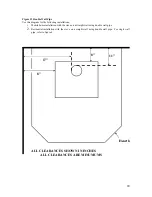
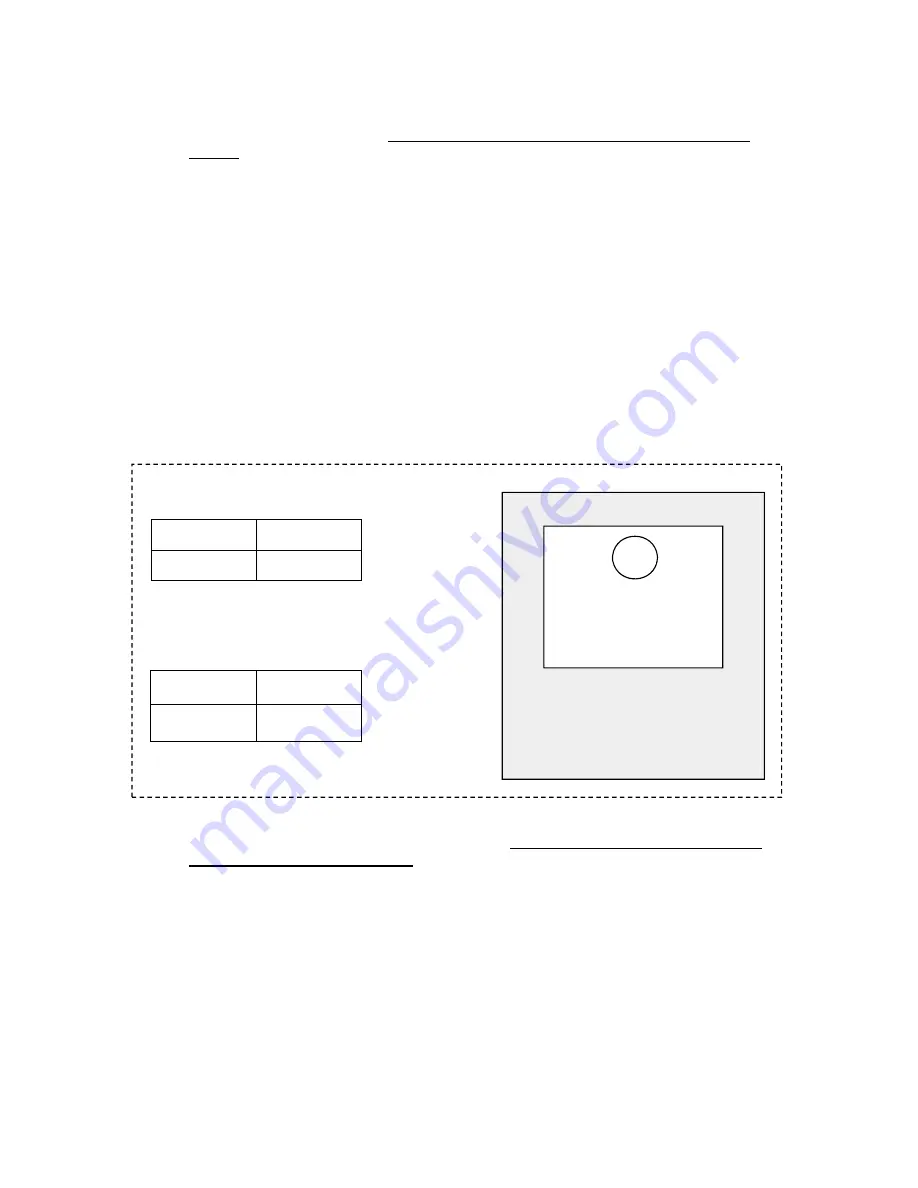
: The requirements for hearth size for the model Aspen with legs or a
pedestal are as follows: It must be non-combustible and extend at least 16” in front of the stove
face and
6” minimum beyond the sides and rear of the unit.
2.
Free Standing thermal requirements
: If your Kuma Aspen stove is installed as a freestanding
stove the hearth is only required to provide ember protection. The requirement for ember
protection is ANY non-combustible material with a MINIMUM thickness of 3/8”.
3.
Insert Hearth Requirements (see fig. 5 pg. 22):
If your Aspen is being installed as a fireplace
insert in either an approved masonry or factory-built fireplace, the following hearth protection is
required:
a.
A 3/8” minimum non-combustible material under the insert that extends at least 16” in
front of the insert face as well as 6” to either side of the insert (this 16” is measured from
the face of the insert and not the ash lip).
MINIMUM Floor Protection size Requirements.
For Free Standing Stove.
For Fireplace insert
STEP 5: Setting the stove and connecting to the chimney
1.
Assemble the stove (legs, pedestal, ash pan, blower).
Follow the installation instructions that
are included in each accessory box.
Once the stove is assembled set the stove gently on the
hearth using cardboard to protect the hearth.
2.
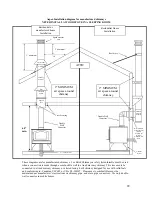
Position the stove on the hearth according to the clearances shown on the diagrams in section 6.
Be sure that the stove is at least minimum clearance from all combustible walls and materials. If
possible it is advisable to set the stove 1-2 inches further away from the combustibles than
required.
3.
Using approved single (min. 24 MSG Black or 26 MSG Blued)- or double-wall pipe, (single wall
is not approved for a mobile home) connect the stove to the chimney. If necessary, use elbows to
offset the pipe so that the stove can remain at the correct clearance and still connect to the
chimney. Secure each pipe joint with three screws, using the screws provided with the pipe.
Secure the pipe to stove flue collar with 3 screws.
a 6”
b 16”
a 6”
b 16”
a
a
b
a


