background image

28

паспорт технического изделия

русский

холодильник nrB 17761

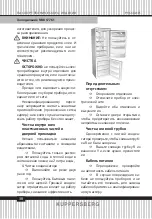
2g 


  L 


. (


).

2h


L   


.

2i 


.

2l


  , 


-

 D.

2m


 S   


-


.


-


-

:


-

    .  .,   


-


-


.


-


.


-


-


-

.


-


-


.

Summary of Contents for NRB 17761

Page 1: ...Technical passporT REFRIGERATORS NRB 17761...

Page 2: ...ANCE 6 REMOVING THE TRANSPORT PROTECTION DEVICES 6 INSTALLATION IN THE TALL UNIT HOUSING 8 CONNECTING THE APPLIANCE TO THE MAINS SUPPLY 9 DESCRIPTION OF THE APPLIANCE 9 USING THE FRIDGE COMPARTMENT 9...

Page 3: ...been given supervision or instruction concerning use of the appliance in a safe way and understand the hazard involved Children shall not play with the appliance Cleaning and user maintenance shall no...

Page 4: ...on retail applications This product complies with current European safety standards governing electrical appliances It has been subjected to thorough and meticulous testing to assess its safetyand rel...

Page 5: ...d Electronic Equipment WEEE Make sure that the product is disposed of in a correct manner The user is obliged to contribute towards preventing any negative consequences for health and the environment...

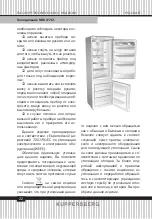
Page 6: ...al functions correctly To remove the protection lightly pull one end while rotating it outwards 2 Remove the glass shelf locking devices These plastic elements prevent the shelves from moving during t...

Page 7: ...acteria free environment and as a result extending food preservation ATTENTION CLEAN THE ANTIBACTERIALFILTERAPPROXIMATELY EVERY 3 MONTHS SEE CLEANING CHAPTER WARNING DO NOT INSTALL THE APPLIANCE NEAR...

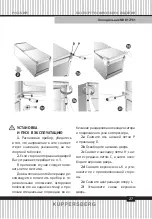
Page 8: ...Re t the lower door 2l Insert pin P and spacer D 2m Remove the door opening closing elements S and reassemble them on the opposite side INSTALLATION IN THE TALL UNIT HOUSING The dimensions of the tal...

Page 9: ...wn the device 0 and adjust the freezer compartment S SUPER function activation button START UP Connect the plug to the mains supply Press the fridge button F I an acoustic signal 1 BEEP con rms its tu...

Page 10: ...after the door has been opened and closed again Note The distance between the shelves andtherearinternalwalloftherefrigerator ensures that air circulates freely Do not place food in direct contact wi...

Page 11: ...er After the freezer has been started approximately 3 hours are required for it to reach the correct temperature for storing frozen food SETTING THE TEMPERATURE The freezer compartment can also operat...

Page 12: ...gher than 12 Example 11 To silence the audible alarm press the super button S The visual alarm will deactivate automatically when the temperature returns to 12 WARNING The rst time the appliance is sw...

Page 13: ...has not been stored correctly and may already have started to defrost Always purchase frozen foods last and use insulated bags containers for their transport On returning home place the frozen food in...

Page 14: ...packaging of frozen food products ICE CUBE PRODUCTION Fill the ice tray 3 4 full with water Place it in the sliding drawer where tted in the freezer compartment GENERAL ADVICE Make sure that the pack...

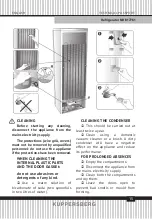
Page 15: ...t do not use abrasives or detergents of any kind Use a warm solution of bicarbonate of soda two spoonfuls in two litres of water CLEANING THE CONDENSER This should be carried out at least twice a year...

Page 16: ...y replace the lter every 2 years Remount it in the speci c seat and place back the cover g1 POWER SUPPLY CABLE Periodically inspect the power cable to check its condition If the cable is damaged do no...

Page 17: ...o plug attached it must be connected to the electricity supply by installing a switch which is directly connected to the mains This switch must ensure omnipolar disconnection under overvoltage categor...

Page 18: ...the mains electricity supply and repeat the operation after one hour If the appliance is not working properly or not working at all before calling the Technical Assistance Service check that The plug...

Page 19: ...19 english Technical passporT refrigerator nrB 17761 NOTES...

Page 20: ...20 nrB 17761 21 25 26 27 29 31 31 34 38 40 41...

Page 21: ...21 nrB 17761 100 46 90...

Page 22: ...22 nrB 17761 2002 96 WE...

Page 23: ...23 nrB 17761 R600a 12...

Page 24: ...24 nrB 17761...

Page 25: ...25 nrB 17761 1 2 3 4 5 6 7 8 9 10 11 12...

Page 26: ...26 nrB 17761 24 1 2...

Page 27: ...27 nrB 17761 1 2 3 2 D 2 2 2d 2 L 2f...

Page 28: ...28 nrB 17761 2g L 2h L 2i 2l D 2m S D...

Page 29: ...29 nrB 17761 5 53 3d...

Page 30: ...30 nrB 17761 3d 3f g 3h...

Page 31: ...31 nrB 17761 1 On off super2 2 3 4 5 super 6...

Page 32: ...32 nrB 17761 10 S2...

Page 33: ...33 nrB 17761 0 5 1 1 4 S2 S6 12 C S2 S3 S4 1 4 S2 S3 S4 S5 SUPER S5 1 S5...

Page 34: ...34 nrB 17761 NO FROST SUPER SUPER 1 S5 SUPER 27 1...

Page 35: ...35 nrB 17761 SUPER 65 25 12 11 S6 3...

Page 36: ...36 nrB 17761...

Page 37: ...37 nrB 17761 2 SUPER 3 24 8 24 12 12...

Page 38: ...38 nrB 17761 2 1 R R V...

Page 39: ...39 nrB 17761...

Page 40: ...40 nrB 17761 1 2 3 4 5 N 6 V R...

Page 41: ...41 nrB 17761 6...

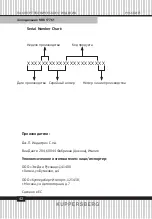
Page 42: ...42 nrB 17761 Serial Number Chart 284 60044 141400 4 125438 7...

Page 43: ...43 nrB 17761 NOTES...

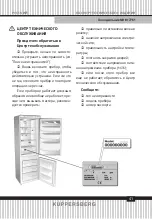
Page 44: ...44 7 495 236 90 67 Kuppersberg 8 800 250 17 18 9 00 18 00 Kuppersberg http kuppersberg ru 1 2 Kuppersberg 10 2 3 4 5 6 19 2...

Page 45: ...45 7 1 2 3 4 5 6 7 8 9 10 11 12 13 1 2 3 4 1 Kuppersberg 2 3 4...

Page 46: ...46 NOTES...

Page 47: ...47 NOTES...

Page 48: ...Kuppersberg www kuppersberg ru info kuppersberg ru...

Reviews: