background image

Bedienungsanleitung

Instructions Booklet

Mode d’emploi

Libretto Istruzioni

Manual de instrucciones

ES

IT

FR

GB

DE

IKD 9650.0 E

IKD 9650.0 E

IKD 9650.0 E

IKD 9650.0 E

IKD 9650.0 E

Summary of Contents for IKD 9650.0 E

Page 1: ...Bedienungsanleitung Instructions Booklet Mode d emploi Libretto Istruzioni Manual de instrucciones ES IT FR GB DE IKD 9650 0 E IKD 9650 0 E IKD 9650 0 E IKD 9650 0 E IKD 9650 0 E...

Page 2: ...ecommendations contained in this Instruction Manual your appliance will give you constant high performance and will remain efficient for many years to come RECOMMENDATIONS AND SUGGESTIONS 17 CHARACTER...

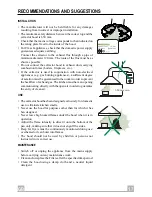
Page 3: ...t degree of aeration must be guaranteed in the room in order to prevent the backflow of exhaust gas The kitchen must have an opening communicating directly with the open air in order to guarantee the...

Page 4: ...18 GB CHARACTERISTICS Dimensions 370 898 75 890 min 890 max 1170 650 min 509 96 144...

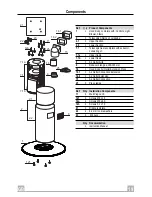
Page 5: ...h extractor consisting of 7 1a 1 Upper frame 7 1b 1 Lower frame 8 1 Air Outlet Grill 9 1 Reducer Flange 150 120 mm 14 1 Hood Body Air Outlet Extension Piece 14 1 1 Air Outlet Connection Extension 14 2...

Page 6: ...marked For concrete ceilings drill for plugs appropriate to the screw size For hollow brick ceilings with wall thickness of 20 mm drill 10 mm immediately insert the Dowels 11 supplied For wooden beam...

Page 7: ...two screws and fasten the other two screws provided before locking the screws completely it is possible to adjust the frame by turning it making sure that the screws do not come out of their housing i...

Page 8: ...ontally and vertically aligned with the chimney outlet If this is not the case remove the lower Chimney Stack and adjust the position of Extension 14 replace the elements as described above Before fix...

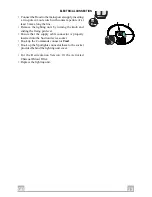
Page 9: ...lighting unit by turning the knob and sliding the fixing pin lever Ensure that the supply cable connector is properly inserted into the Suction device socket Hook up the Commands connector Cmd Hook up...

Page 10: ...ation It can be disabled by pressing the button T4 Flashing POWER function maximum suction power Press T4 for approximately 3 seconds to enable the Power function maximum suction power which is indica...

Page 11: ...Comfort Panel using the knobs provided Disconnect the panel from the hood canopy by sliding the fixing pin lever The comfort panel must never be washed in a dishwasher Clean the outside using a damp c...

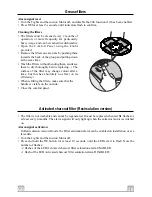
Page 12: ...olour after a time but this has absolutely no effect on its efficiency When refitting the filters make sure that the handle is visible on the outside Close the comfort panel Activated charcoal filter...

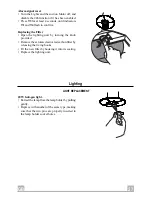
Page 13: ...the lighting unit by turning the knob provided Remove the saturated activated carbon filter by releasing the fixing hooks Fit the new filter by hooking it into its seating Replace the lighting unit Li...

Reviews: