background image

The KHS6D controller is designed to learn and store IR codes for virtually any piece of audio/video

equipment.  This enables the individual programming and use of multiple functions for all of your source

components.

Programming Individual Functions

1) Press the “learn” button on the controller. The left, red “Clone/Learn” LED will begin flashing.

2) Press the source device button to be programmed.

3) Press the numeric or function key you wish to program on the right side of the controller.  The red

“Clone/Learn” LED will stop flashing and glow continuously.

4) Hold the source remote control IR emitter 1” to 2” from the “IR Sensor” on the controller and press

the corresponding function key on the source remote.  After a short period of time, the right, green “OK”

LED will glow indicating the acceptance of that command.  At this point the controller will return to a

flashing red LED.  It is now ready to be taught the next command for that source. (A solid red and green

LED simultaneously indicates an error with that command. Should this occur, clear it and try reentering

that function.)

5) Repeat steps 2-4 for the next desired function.

6) When all the desired functions for a particular source have been programmed, we suggest you “reset”

the keypad.

7) Repeat steps 1-6 for the remaining functions.

(All of the numeric and function keys will learn any ir code. Functions programmed into the controller

are solely at the discretion of the installer.)

Cloning

The  has a cloning feature that will allow you to down load the information stored in one controller to

up to five additional controllers within an installation.
Once one of the controllers is programmed, go to the other controllers and press the “Clone RX” button.

Then return to the programmed controller and press the “Clone/TX” button. The green LED will remain

lit while the cloning process is in progress. When the process is complete, the green LED will turn off.

This should take about 8 minutes. It is a good idea to then “reset” all of the controllers.
Now all the controllers share identical information. The nonvolatile memory will remain regardless of

whether the controllers are plugged into the system. Using the “Clear” button will clear the controller

memory. To erase an entire page of memory, simply press the ”Clear” button and then a “Source Device”

 button.  By pressing a source device button, the “Clear” button and one of the programmed function

buttons will erase a single function. Once cleared, a controller or individual function can be reprogrammed.

NOTE:

It is important to avoid issuing any IR commands or allowing any external IR interference during the

cloning process. This will result in corrupted information being sent to the receiving controllers.

Should a controller’s programming be corrupted, it may be necessary to completely clear a controller

to factory condition. This is done by cloning an unprogrammed controller to the corrupted controller.

Once this is done, that controller can then be re-cloned.

Page 9

PROGRAMMING THE KHS6D CONTROLLERS

All manuals and user guides at all-guides.com

Summary of Contents for KHS-6640

Page 1: ...your phone system and built in front and back door chimes A party mode allows you to select music source and volume for all zones from one location A built in IR routing system allows you to operate C...

Page 2: ...rts and vinyl covering may be cleaned with a damp rag 14 Care should be taken so that objects do not fall and liquids are not spilled into the unit through the ventilation ports or any other openings...

Page 3: ...r the unit controlling or being controlled by additional equipment H Infrared IR Section This is the IR section It provides outputs for the IR emitters I AC Power Cord This is where the AC power cord...

Page 4: ...blade Jeweler s screwdriver to easily make this connection These speaker outputs are rated at 20 watts RMS a side into an 8 ohm load Stay within that ohm rating This will be more than adequate power f...

Page 5: ...disengaged the music will return to the previous level Even zones that are not currently on will open and allow the announcement to be made Inside the unit is a master DIP type switch which allow the...

Page 6: ...AM FOR REMOTE ROOM CONTROLLERS TO KHS6S 6D DATA LINE C DATA LINE B DATA LINE A 5 VOLT D C GROUND IR SIGNAL CLONE STANDBY TO KHS6640 1 2 3 4 5 6 7 8 8 7 6 5 4 3 2 1 RJ 45 PLUG RJ 45 PLUG CLIP CLIP Use...

Page 7: ...KHS6640 INSTALLATION MANUAL All manuals and user guides at all guides com...

Page 8: ...All manuals and user guides at all guides com...

Page 9: ...d the STANDBY LED S lit on the KHS6640 6 Now attach the zone 1 controller to the zone 1 controller input on the KHS6640 7 Now go to zone 1 controller If the source 1 equipment is playing you should se...

Page 10: ...all of these connections 1 Page Doorbell Status Paging The 6640 has two ways to allow external paging to be amplified through it The jacks labeled Audio Input will accept any audio signal and will mu...

Page 11: ...ing is on Set to off if you don t wish to have sources muted when doorbell or page is activated such as a nursery etc Audio disables doorbell and page audio Factory setting is on If you want one zone...

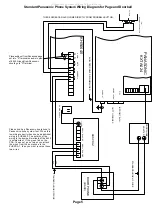
Page 12: ...G ALTERNATE WIRING DOORBELL BUTTON Standard Channel Vision TE 200 Phone System Wiring Diagram for Page When is struck audio will go out to the front door only When 5 is struck audio will go out to the...

Page 13: ...Panasonic page out into S terminal on audio in pins of 6640 Ground from Panasonic should go to G terminal Standard Panasonic Phone System Wiring Diagram for Page and Doorbell Please hook up Panasonic...

Page 14: ...power status of the system Lighted the system is on and ready Off the system is not engaged 5 Mute Button This button will instantly stop the audio through the system It is used for temporarily muting...

Page 15: ...ntroller into a ready to transmit commands mode This is the teaching mode When setting up the system initially place one controller in this mode and use it as a master controller to teach the other lo...

Page 16: ...ogrammable button It may be reprogrammed to any function you want depending on the source 21 Power On This button will turn on the source power switch from whatever zone you are in It can be programme...

Page 17: ...staller Cloning The has a cloning feature that will allow you to down load the information stored in one controller to up to five additional controllers within an installation Once one of the controll...

Page 18: ...er the CD1 source button The following selections are made on the right side of the KHS6D dual controller See diagram page 7 1 Press PWR button 2 Press the button programmed for disc select 3 Enter 1...

Page 19: ...utton on the KHS6S Controller you wish to program into the wireless remote 6 The wireless remote should then accept the KHS6S command 7 Once you have programmed the source number volume up and down an...

Page 20: ...orbell and page features The doorbell and page can be wired with simple two conductor doorbell wire or standard twisted pair wire such as Cat 5 or Cat 3 The doorbell can be lined off of the existing d...

Page 21: ...he 6D did not store all the commands properly Try repeating IR commands with the source remote through the IR window of the controller If the commands pass through the system then go back to the contr...

Page 22: ...__________________________ Installer s Phone ___________________________ Source 1 ______________________________________ Source 2 ______________________________________ Source 3 ______________________...

Page 23: ...Additional Notes Page 15 All manuals and user guides at all guides com...

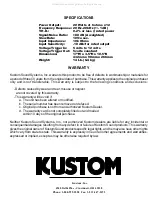
Page 24: ...ar misuse or neglect are not covered by this warranty This warranty will be void if a The unit has been altered or modified b The serial number has been removed or defaced c Original purchase is not f...

Reviews: