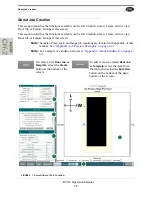
About Job Creation
2-9
KVAL Operation Manual
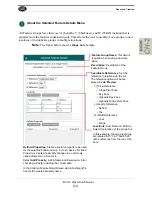
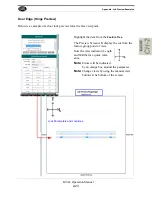
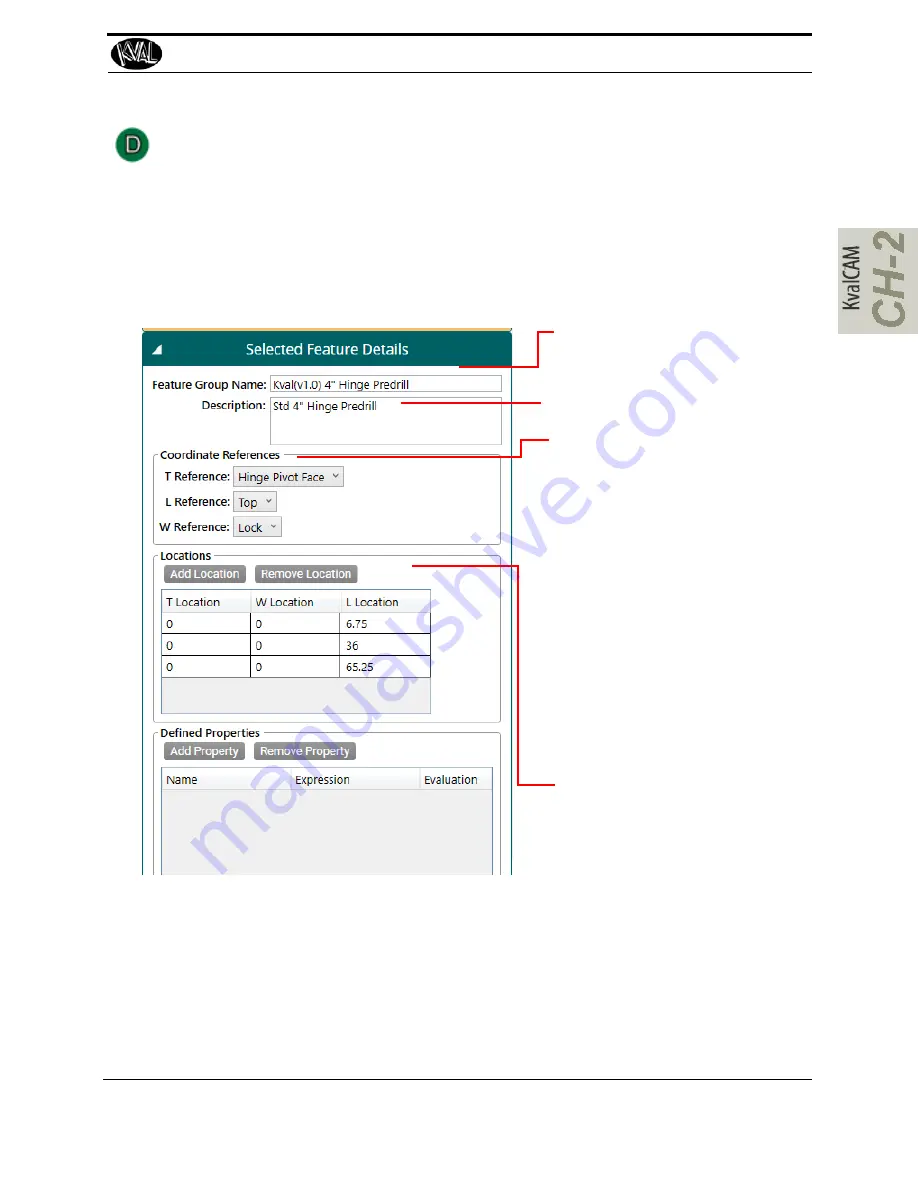
About the Selected Feature Details Menu
All Feature Groups have their own L (Length), T (Thickness), and W (Width) location that is
separate from the features contained inside. This allows the user to quickly move groups to new
locations or to duplicate groups in multiple locations.
Note:
The figure below shows a
Hinge Cut
example.
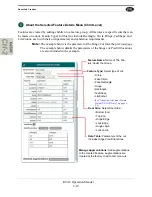
Feature Group Name:
This field is
required when saving a new tem-
plate.
Description:
Description of the
Feature Group
Locations:
Add, Remove, Edit the
Select the location of the Group Cut
In this example, the hinge locations
are located 6.75”,36.0” and 65.25”
with a reference from the top of the
door.
Coordinate References:
Set the
reference in relation with the cut.
The reference option will be dis-
played in
Job Preview.
T (Thick) Reference:
• Hinge Pivot Face
• Key Face
• Opposite Key Face
• Opposite Hinge Pivot Face
L (Length) Reference:
• Bottom
• Top
W (Width) Reference:
• Lock
• Hinge
Defined Properties:
Create a custom property to be used
for the selected Feature Group. In most cases, a Defined
Property is created to simplify changes in a commonly
used parameter in a Door Job.
Select
Add Property.
Add a Name and Expression. Error
checking will help in adding the correct data.
In the Children Feature Detail Screen, add a hashtag (#) in
front of the created property name.
Summary of Contents for EFX
Page 10: ...KVAL EFX Manual Table of Contents ...
Page 32: ...Safety Sign Off Sheet KVAL Operation Manual 1 22 ...
Page 66: ...About the LiteCutout Feature Detail DL NCD Only KVAL Operation Manual 2 34 ...
Page 95: ...Appendix About Backing up the Data 3 29 KVAL Operation Manual ...
Page 112: ...Step 4 Calibrate the Face Axes KVAL Operation Manual 4 17 X Y Z X Y Z Y ...
Page 121: ...Routers How to Isolate and Calibrate a Specific Router KVAL Operation Manual 4 26 ...
Page 136: ......
Page 138: ...Index 1 2 Kval EFX ...
Page 139: ......

