


Replacing the Self Lubricator
3-37
KVAL Service Manual
Replace the Lubricator Well
The lubricator kit part number is
“Wit Lubricating Kit”.
It contains, lubricator well,
hose (with oil) and its connectors, bracket, and sensor. Follow the instructions on the
next page.
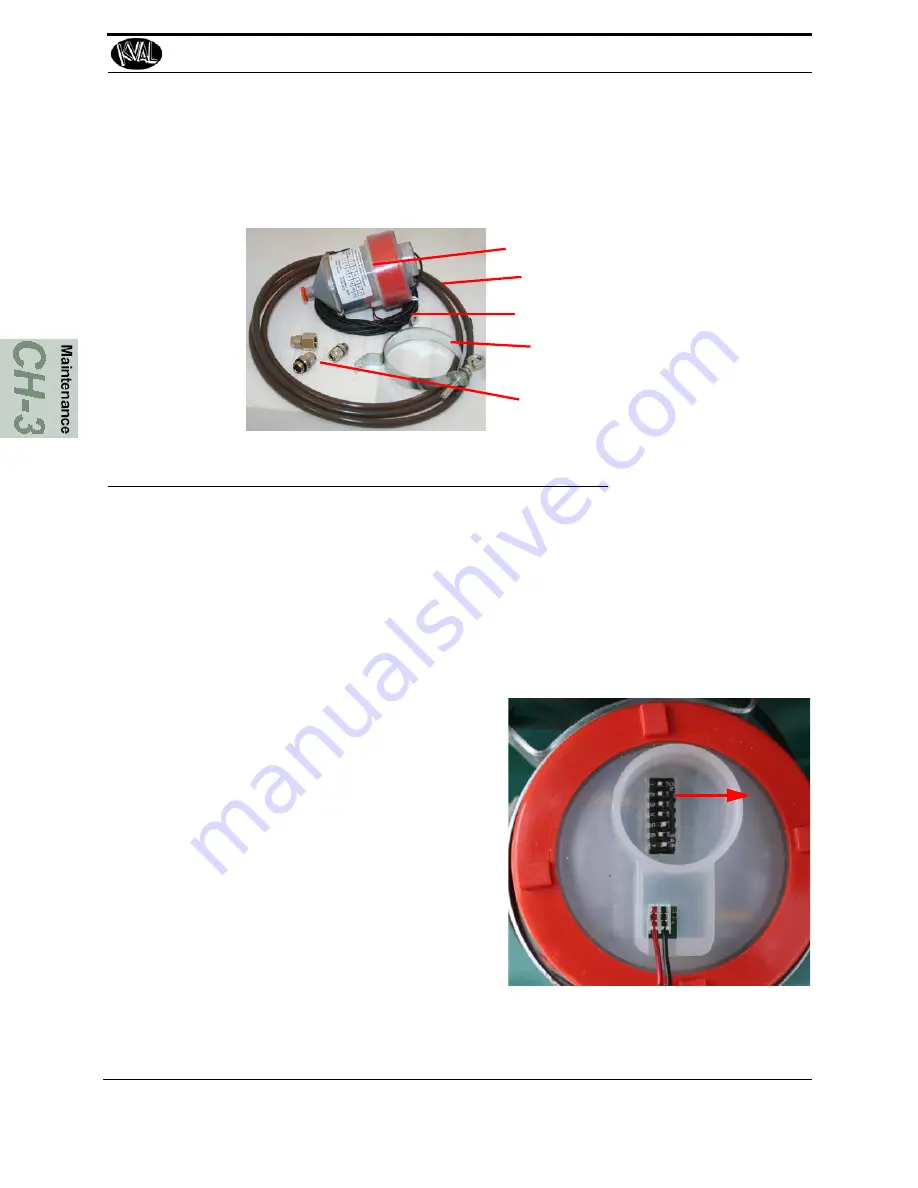
FIGURE 3- 21.
Wit Lubricating Kit
1.
Shutdown the machine and follow the Lockout Tagout procedure, in Chapter 1.
2.
Prepare to gain access to the X axis motor gear and gear applicator, by removing the
grate below the heads.
3.
If needed, cut the hose included in the kit to match the one on the machine.
4.
Attach the 2 hose connectors to the ends of the new hose.
5.
On the new lubricator well, set the dip switches.
6.
Disconnect the black and red wires from the machine connector with a small screw-
driver.
Well
Hose
Sensor
Hose Connectors
Clamp
• Remove the protective top from lubri-
cator well. Dip switch is located on
the top.
• Set the number 5 switch to the “ON”
position. This sets Lubricator to a
yearly flow cycle.
• Set the number 7 switch to the “ON”
position. This turns the Lubricator
“ON”
• Ensure the remaining switches are set
to “OFF”
ON
Summary of Contents for EFX
Page 4: ...KVAL EFX System Service Manual ...
Page 6: ...KVAL EFX System Service Manual ...
Page 11: ...Notes ...
Page 31: ...Safety Sign Off Sheet KVAL Service Manual 1 20 ...
Page 35: ...About Backing up the Data KVAL Service Manual 2 4 ...
Page 75: ...Collet Torque Values KVAL Service Manual 3 40 ...
Page 76: ...Notes ...
Page 103: ......
Page 106: ......
Page 107: ......


