background image

54-0287

9.8

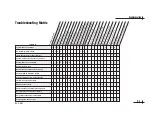
Receiver Locked Up

Since your receiver is a computing component, it is
susceptible to erratic changes in power and/or signal,
like any other computer, and these sudden changes
can cause it to become “confused.” To clear this
condition, try pressing the remote control’s SAT
button before trying to control the receiver. If that
doesn’t work, press the SAT and MUTE buttons
together and try again.
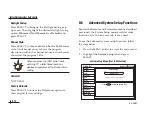
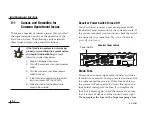
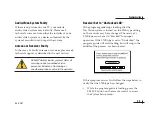
If that doesn’t work,
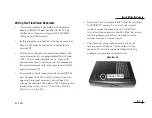
turn off vehicle/vessel
power or the receiver’s
rear panel power
switch for 30 seconds,
then turn it back on.

RF Converter Too Close to Receiver

The RF converter must be placed at least three feet
away from the receiver. Placing the RF converter
closer to the receiver may result in interference,
causing the remote control to operate intermittently
or not at all.

Remote Control Batteries Dead

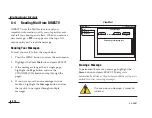
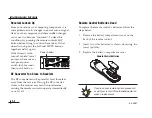
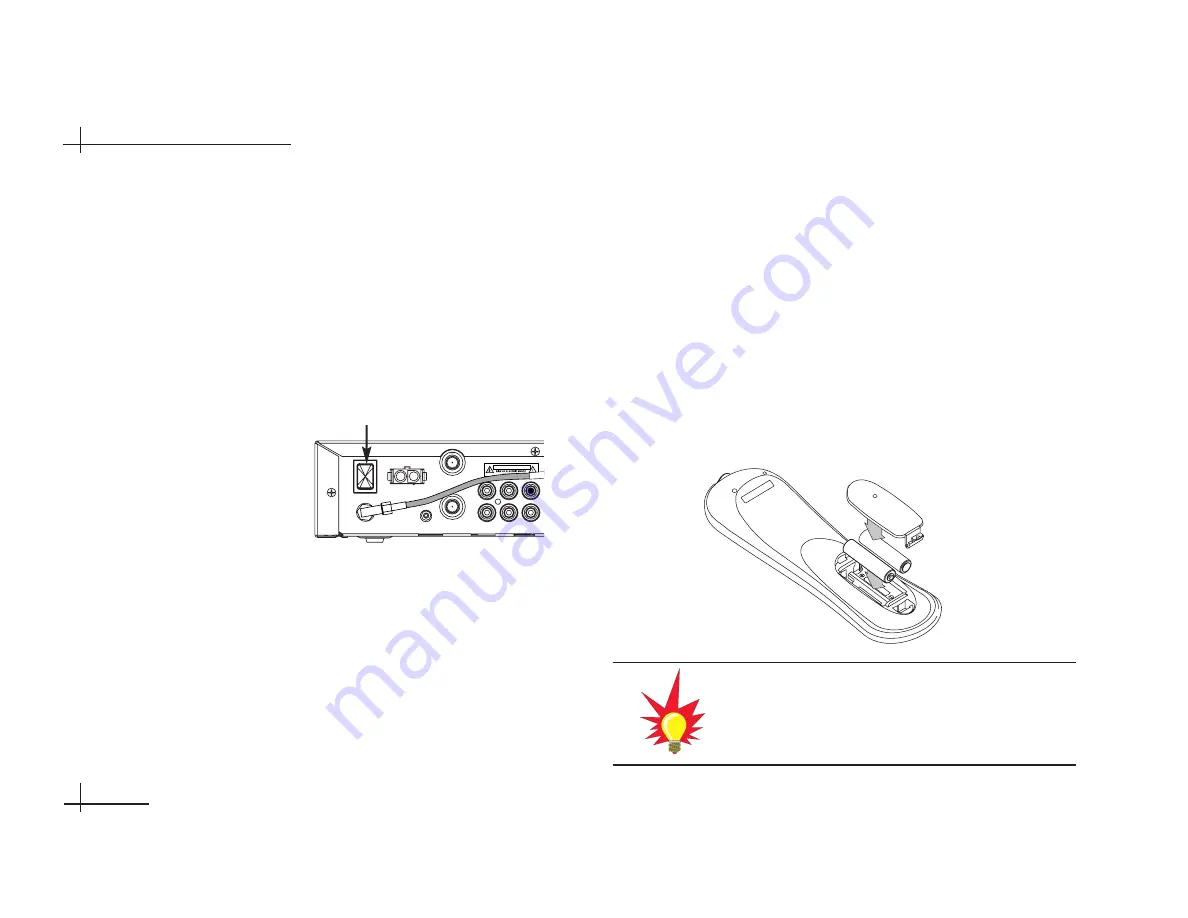
To replace the remote control’s batteries, follow the
steps below.

1.

Remove the battery compartment cover on the
back of the remote control.

2.

Insert two AAA batteries as shown, observing the
correct polarity.

3.

Replace the battery compartment cover.

TracVision Receiver User’s Guide

C AU T I O N

POWER

VEHICLE POWER

(10-16 VDC)

VHF ANTENNA

IN

AUDIO R

AUDIO L

VIDEO

RF 
REMOTE
INPUT

OUT TO TV

TUNER

SATELLITE IN

Remote Control Batteries

If you lose your remote control, please call
or visit your local KVH authorized dealer to
order a replacement.

Power Switch

Summary of Contents for antenna system

Page 1: ...TracVision 12 Volt Receiver for DIRECTV Service User s Guide...

Page 2: ...digital quality TV and music to enjoy traveling will never be the same This User s Guide provides all of the basic information you need to use the system s receiver and receive the DIRECTV satellite e...

Page 3: ...ghes Electronics Corporation Some features are patent pending WatchWizard PreSelect TurboTune and OneLine Guide are trademarks of Hughes Network Systems NFL the NFL Shield and NFL SUNDAY TICKET are re...

Page 4: ...er all servicing needs to qualified service personnel Servicing is required when a unit has been damaged in any way or does not operate normally Evidence of tampering or unauthorized repairs will void...

Page 5: ...d in accordance with the instructions may cause harmful interference to radio communications However there is no guarantee that interference will not occur in a particular installation If this equipme...

Page 6: ...ll provide an access card number receiver ID number Hughes serial number and model number Enter these numbers in the associated boxes on the red Activation Card Technical Support The TracVision system...

Page 7: ...0287 vi TracVision Receiver User s Guide Send Us Your Comments About This Manual If you have any comments regarding this manual please e mail them to manuals kvh com Your feedback is greatly appreciat...

Page 8: ...t Panel Buttons 3 9 3 3 Programming the Remote Control to Operate Other Components 3 10 3 4 Controlling Multiple Receivers 3 11 3 5 Installing the Remote Control Batteries 3 12 4 Overview of Onscreen...

Page 9: ...1 Adjusting Audio Settings 8 3 8 2 Adjusting Video Settings 8 5 8 3 Using the Program Director to Schedule Future Programs 8 7 8 4 Reading Mail from DIRECTV 8 10 8 5 Setting System Preferences 8 11 8...

Page 10: ...section provides a basic overview of this manual and the TracVision system It also explains the three essentials for good satellite TV reception Contents 1 1 Using this Manual 1 3 1 2 System Overview...

Page 11: ...use Indicates the most commonly used functions listed in Section 3 1 Remote Control Functions Format Conventions This manual uses the following typographical conventions to help clarify instructions...

Page 12: ...pointed directly at the receiver for the signal to be received RF Converter The RF converter receives RF commands from the remote control converts them to digital signals and sends them to the receiv...

Page 13: ...ixed position above the Earth s equator and beams TV signals down to North America To receive TV signals from the satellite you must be located within the satellite s coverage area which encompasses m...

Page 14: ...cally rotates toward the southern sky and tilts to the proper elevation ensuring you re always pointed at the satellite and receiving the satellite entertainment you want A map showing the DIRECTV sat...

Page 15: ...on instructions so you can quickly start using your TracVision system It also briefly explains how the system works Contents 2 1 Turning On the Antenna 2 3 2 2 Changing Channels 2 5 2 3 Turning Off th...

Page 16: ...e TV will show the following CAUTION POWER VEHICLE POWER 10 16 VDC VHF ANTENNA IN AUDIO R AUDIO L VIDEO S VIDEO PHONE JACK RF REMOTE INPUT OUT TO TV TUNER SATELLITE IN This device complies with Part 1...

Page 17: ...eive satellite TV signals Once the antenna locks onto the satellite the receiver starts downloading the program guide This may take up to 60 seconds Once the program guide has loaded you can start enj...

Page 18: ...utton then select any of the following options Press the CHANNEL CH button to tune to the next or previous channel or Using the numeric keypad enter the channel number or Press the GUIDE button to bri...

Page 19: ...er switch must be turned on Normally this switch should remain on at all times 2 The receiver beeps two or three times and sends power to the antenna 3 The antenna powers up and searches for the satel...

Page 20: ...a Is OFF 1 The receiver beeps once and removes power from the antenna The receiver s crescent shaped front panel Antenna Power light stays off 2 The antenna stops tracking the satellite and shuts down...

Page 21: ...enna s internal motors operate 4 The antenna finds and starts tracking the DIRECTV satellite The antenna should become relatively quiet while tracking the satellite 54 0287 2 8 TracVision Receiver Use...

Page 22: ...ht goes out 3 The antenna stops tracking the satellite and shuts down Getting Started 54 0287 2 9 Antenna OFF CH VOL DVD VCR AUX TV GUIDE MENU INFO CLEAR TURBO FAV MUTE CH PREV DIRECTOR PROG SEARCH AU...

Page 23: ...program the remote to work with other components and replace the remote control batteries Contents 3 1 Remote Control Functions 3 3 3 2 Receiver Front Panel Buttons 3 9 3 3 Programming the Remote Cont...

Page 24: ...trol GUIDE MENU INFO CLEAR TURBO FAV ONELINE GUIDE SELECT Program Guide TurboTune Favorites Clear Joystick NOT USED Main Menu Information Select 3 1 Remote Control Functions Your system comes with an...

Page 25: ...ighlighted to display the Category Filter menu See Section 5 Using Program Guides on page 5 1 for details Press the MENU button to bring up the main menu The menu system allows you to access all syste...

Page 26: ...ides scheduling information about the highlighted program Use the joystick to move up down left or right through the onscreen displays If you are currently watching a program press the joystick up or...

Page 27: ...t button is selected The remote control must be programmed to operate your TV for the MUTE button to work see Section 3 3 Programming the Remote Control to Operate Other Components on page 3 10 Press...

Page 28: ...ector to Schedule Future Programs on page 8 7 for details Press the SEARCH button to bring up the WatchWizard which allows you to search for programs using criteria such as rating showtime language an...

Page 29: ...be selected first The remote control must be programmed to operate your VCR DVD player for the VCR control buttons to work see Section 3 3 Programming the Remote Control to Operate Other Components o...

Page 30: ...u items from the receiver s front panel The crescent shaped Antenna Power light is lit if the antenna is turned on CH VOL PWR DVD VCR AUX TV SAT GUIDE MENU INFO CLEAR TURBO FAV MUTE CH PREV P A G E ON...

Page 31: ...utton DVD VCR AUX TV or SAT Then use the remote control buttons that apply to that component For example the VOLUME VOL and MUTE buttons apply only to a TV the VCR control buttons apply only to a VCR...

Page 32: ...st turn off the rear panel power switch on the receiver you do not wish to change 2 Turn on the receiver you want to change 3 Press the MENU button to access the main menu 4 From the main menu highlig...

Page 33: ...7 Press and hold the SAT button 8 At the same time press the MUTE button for two seconds 9 Release both buttons The SAT button should remain lit If it doesn t repeat Steps 7 9 10 Enter the desired ID...

Page 34: ...ys 4 Overview of Onscreen Displays This section introduces the three types of onscreen displays the Channel Banner the Program Guide and the Menu System Contents 4 1 The Channel Banner 4 3 4 2 The Pro...

Page 35: ...ram The channel banner disappears from the screen after a few seconds Or press the CLEAR button to remove the channel banner immediately All Channels 6 00AM to Thu 6 00AM 100 Movie Catch previews of D...

Page 36: ...ate time Icons may appear below the date time to indicate system status or details about the program currently highlighted If the picture in guide feature is enabled video of the currently selected ch...

Page 37: ...p up menu when you press SELECT Series of Boxes Multiple screens will appear in a series requesting that you enter numbers and or letters for the particular feature when you press SELECT Menu Elements...

Page 38: ...item or execute an action To exit a menu or cancel an action Press the CLEAR button to exit a menu or cancel an action The following pages list all of the functions accessible from the menu system The...

Page 39: ...e 6 9 Fav List Select a specific channel list Fav A Fav B Fav C 6 4 Family or New Channels to be an active program guide Fav Setup Create and edit a channel list Fav A Fav B Fav C Family 6 3 or New Ch...

Page 40: ...our monitor up down and right left Color scheme onscreen display translucency and color balance Caller ID Caller ID NOT USED Program Director Schedule Automatically tune to programs at a specific date...

Page 41: ...g 7 5 Limits Set viewing times and maximum viewing hours 7 6 View Mail Mail Read messages from DIRECTV 8 10 System Setup Install NOT USED Signal NOT USED Info Display receiver information 8 13 Feature...

Page 42: ...select a program guide style use the different guide features and set guide preferences Contents 5 1 Program Guide Styles 5 3 5 2 Using the Program Guide 5 5 5 3 Using the OneLine Guide 5 6 5 4 Using...

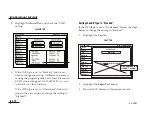
Page 43: ...lect Guide Options from the main menu 2 Highlight the Options tab 3 Highlight the Guide Style button 4 Press the SELECT button to toggle between Grid and Logo guide styles 5 Press the CLEAR button to...

Page 44: ...selecting specific programs Only current programming can be selected from the logo guide The current program title and description appear above the logo grid as you highlight each channel Grid Guide A...

Page 45: ...a full page of guide entries at a time To jump to a specific channel listing Use the numeric keypad to enter the channel number to go directly to the listing for a specific channel To view a program s...

Page 46: ...o the right to show future programming Move the highlight up down to display the next or previous channel To show the OneLine Guide for a specific channel Use the numeric keypad to enter the channel n...

Page 47: ...can highlight an occupied box instead to overwrite its set channel with your new selection 3 Using the joystick or the CHANNEL CH button choose the desired channel in the setup box shown below and pre...

Page 48: ...d Channel and press SELECT to add the channel you are watching to the TurboTune guide Selecting a Channel from TurboTune To tune to a channel in TurboTune follow the steps below 1 Press the TURBO butt...

Page 49: ...ess SELECT 4 Once you ve entered the desired name highlight the OK button and press SELECT To redo the entry highlight the Clear button and press SELECT To cancel the change press the CLEAR button or...

Page 50: ...and the picture in guide feature is turned on video of the currently selected program zooms in to the small screen when the program guide is selected If turned off the zooming animation from full scre...

Page 51: ...e either temporary or persistent If temporary the filters you apply are active only while the program guide remains onscreen once you exit the program guide all filters are cleared If persistent the f...

Page 52: ...ns how to set up lists of favorite channels filter the program guide by category and time and search for programs based on content Contents 6 1 Using Favorite Channel Lists 6 3 6 2 Filtering the Progr...

Page 53: ...ight the Guide Options or Lock Limits tab from the main menu and press SELECT 3 Highlight the Fav Setup tab and press SELECT to open the Favorite List Setup pane The four columns of small boxes are ca...

Page 54: ...annel lists use the remote control s FAV button to cycle through them quickly and easily Each press of the FAV button brings up the next favorite channel list You can also select a list by highlightin...

Page 55: ...t the Cancel button and press SELECT Generating an Auto Set List The Auto Set function generates a complete list of viewable channels To generate an Auto Set list follow the steps below 1 At the Favor...

Page 56: ...ck mark indicates that the channel is included in the selected favorite channel list An empty tag box indicates that the channel is excluded from the list Finding New Channels Occasionally new channel...

Page 57: ...he Program Guide is currently displayed press the GUIDE button just once 2 Highlight the Theme tab 3 Highlight a category other than All and press SELECT 4 A subcategory menu appears allowing you to f...

Page 58: ...the selected category and subcategory In this example the guide would only display channels featuring Action Adventure movies CATEGORY FILTER Fav List Theme Times Main Menu Wed Sep 18 4 20PM Fav Setup...

Page 59: ...UIDE button just once 2 Highlight the Times tab 3 Highlight the AM PM button and press SELECT to toggle between AM and PM 4 Highlight the day you want the guide to begin and press SELECT GUIDE TIMES F...

Page 60: ...ht one of the eight search buttons and press SELECT 4 A search menu appears where you can enter your search criteria Narrow your search results by combining multiple criteria To choose a criteria high...

Page 61: ...ired text highlight the OK button and press SELECT WATCHWIZARD RESULTS Wed Oct 27 1 11 PM Watch TV WWSetup WWResult Main Menu WatchWizard Result Channels Result 2 Searching Today Search 1 3 00PM 100 P...

Page 62: ...rom the list and press SELECT 5 A subcategory menu appears allowing you to further refine your search To choose a subcategory highlight the subcategory and press SELECT A list of channels offering the...

Page 63: ...ccess Controls This section explains how to lock and unlock the system using a passcode It also explains how to set rating and time limits Contents 7 1 Locking Unlocking the System 7 3 7 2 Setting Rat...

Page 64: ...tab and press SELECT 3 Highlight the Lock tab to display the Parental Lock pane 4 Highlight the Lock button and press SELECT PARENTAL LOCK Ratings Lock Fav Setup Limits Watch TV Main Menu Enforce rati...

Page 65: ...that the system is locked Overriding the System Lock When the system is locked inaccessible channels will show a limit exceeded message To temporarily override the system lock follow the steps below 1...

Page 66: ...is unlocked all limits and restrictions are removed 7 2 Setting Ratings Limits Ratings help you to determine whether a program s content is appropriate for a particular audience To select the maximum...

Page 67: ...ead of setting a specific limit RATINGS LIMITS Ratings Lock Fav Setup Limits Watch TV Main Menu Sat Oct 5 7 17PM Children Not Rated Allow All Movies Allow TV 14 Allow TV 14 Allow TV 14 Block All Allow...

Page 68: ...y Friday Sunday 24 00 24 00 24 00 24 00 24 00 9 30 24 00 Hours Hours Hours Hours Hours Hours Hours allowed allowed allowed allowed allowed allowed allowed Saturday Saturday Viewing Time Limit From Thr...

Page 69: ...tings schedule future programs and change system settings Contents 8 1 Adjusting Audio Settings 8 3 8 2 Adjusting Video Settings 8 5 8 3 Using the Program Director to Schedule Future Programs 8 7 8 4...

Page 70: ...e alternate audio is available for that particular program You will hear the default audio language all the time if that language is being transmitted and an alternate language has not been activated...

Page 71: ...the steps below 1 If the icon appears below the date and time in a program s description press the joystick left or right while you are viewing that program 2 An alternate language option based on yo...

Page 72: ...are supposed to be as though you had speakers all around you To toggle TruSurround on off highlight the SRS TruSurround button and press SELECT 8 2 Adjusting Video Settings From the Video Adjustment...

Page 73: ...or scheme Indigo Ice Sky Forest or Merlot and press SELECT Translucency Press SELECT to bring up the translucency pop up menu Use the joystick to adjust the amount of menu translucency from solid to 1...

Page 74: ...ark appears next to your selection At the start date time of the scheduled program the receiver will automatically tune to that program Scheduling an Event from the Program Director To schedule a prog...

Page 75: ...on in hours and minutes 8 Highlight the Frequency column and use the joystick to select when or how often the event occurs Today Tomorrow Every Mon Every Tue Every Wed Every Thu Every Fri Every Sat Ev...

Page 76: ...ress SELECT 3 Highlight the event you want to cancel and press SELECT 4 Highlight the Cancel button from the Schedule Options pop up menu and press SELECT If the program you want to cancel is a one ti...

Page 77: ...T 3 If the message is longer than a single page highlight the Page button and use the CHANNEL CH button to step through the pages 4 If you have more than one message in your mailbox highlight the Mess...

Page 78: ...tton on off If you have a VCR connected to the system keep the Input Key set to On Menu Language Press SELECT to choose either English default or Spanish for the menu language The text in all onscreen...

Page 79: ...l factory settings 8 6 Advanced System Setup Functions Besides the Remote and Preferences menus described previously the System Setup menu provides other functions all of which are rarely if ever used...

Page 80: ...The Test function performs a simple diagnostics test on the system When complete a report shows system information and indicates whether the Signal Tuning and Front Panel functions passed the test New...

Page 81: ...ptoms along with their possible causes and solutions It also explains what the system status lights indicate and how to get technical support Contents Troubleshooting Matrix 9 3 9 1 Causes and Remedie...

Page 82: ...p R e c e i v e r p o w e r s w i t c h t u r n e d o f f L o o s e c a b l e c o n n e c t o r s R e c e i v e r n o t a c t i v a t e d P r o p e r c o m p o n e n t b u t t o n n o t p r e s s e d...

Page 83: ...er to ensure that it is clear of debris and the connectors are tight Do not replace the fuse with a larger amperage fuse Receiver Power Switch CAUTION POWER VEHICLE POWER 10 16 VDC VHF ANTENNA IN AUDI...
Page 84: ...re signal quality Rain clouds heavy rain and snow can also affect satellite signal reception For more details about satellite blockage see Section 1 3 Receiving Satellite TV Signals on page 1 5 In add...

Page 85: ...3288 Be sure the TracVision system is turned on has a clear view of the southern sky and is tuned to the DIRECTV preview channel before you call The system will need to receive a signal from the sate...

Page 86: ...l s FAV button to cycle through the lists See Section 6 1 Using Favorite Channel Lists on page 6 3 for details Remote Control Not Programmed If you cannot operate a component with the remote control f...

Page 87: ...er must be placed at least three feet away from the receiver Placing the RF converter closer to the receiver may result in interference causing the remote control to operate intermittently or not at a...

Page 88: ...acVision system is turned on the LNB type setting on the receiver may have changed The receiver s LNB type must be set to Stacked for proper operation If the LNB type is set to Unstacked the program g...

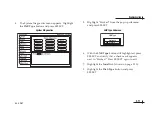
Page 89: ...to change the setting to Stacked Setting the LNB Type to Stacked If the LNB type is set to Unstacked follow the steps below to change the setting to Stacked 1 Highlight the Test tab 2 Highlight the B...

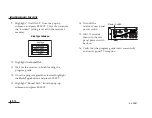
Page 90: ...ss SELECT 6 With the LNB Type button still highlighted press SELECT and verify that a check mark appears next to Stacked Press SELECT again to exit 7 Highlight the Install tab shown on page 9 10 8 Hig...

Page 91: ...T 13 Highlight Round Dish from the pop up submenu and press SELECT 14 Turn off the receiver s rear panel power switch 15 Wait 10 seconds then turn the rear panel power switch back on 16 Verify that th...

Page 92: ...an authorized dealer installer is not located nearby contact KVH Technical Support directly Phone 401 847 3327 E mail techs kvh com Internet www kvh com help Please have your antenna and receiver seri...

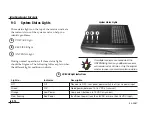
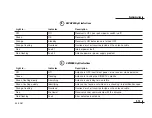
Page 93: ...sion Receiver User s Guide System Status Lights Light is Indicates Description Off Off Receiver is OFF rear panel power switch is off or no power input Green OK Good power between 10 18 VDC at receive...

Page 94: ...lashing Overload Overload or short circuit detected on the antenna cable Red No Comm Receiver cannot communicate with the antenna Red flashing Fault Error detected in antenna ANTENNA Light Indications...

Page 95: ...endices This section provides wiring diagrams for typical TracVision installations and a map showing the DIRECTV satellite s elevation angle off the horizon Contents A System Wiring Diagrams A 3 B Sat...

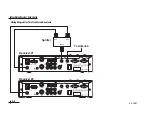
Page 96: ...ion receiver and one non TracVision receiver for marine use only Multiple TracVision and or non TracVision receivers for marine use only A TracVision receiver is required in all configurations since i...

Page 97: ...UDIO L VIDEO S VIDEO PHONE JACK RF REMOTE INPUT OUT TO TV TUNER SATELLITE IN CAUTION This device complies with Part 15 of the FCC rules Operation is subject to the following two conditions 1 This devi...

Page 98: ...e included with the system Connector Function Vehicle Power Connect to input power 12 VDC applies to a vehicle or a vessel RF Remote Input Connect to RF converter VHF Antenna In Not applicable for sat...

Page 99: ...rds TO SATELLITE IN TO KVH ANTENNA DIAGNOSTICS PORT 1 DIAGNOSTICS PORT 2 To Antenna Receiver 1 Splitter Receiver 2 OUT OUT INPUT POWER VEHICLE POWER 10 16 VDC VHF ANTENNA IN AUDIO R AUDIO L VIDEO S VI...

Page 100: ...If you order a replacement remote control KVH part number 19 0335 and you want to use it to operate the second receiver you will need to change the remote s ID code to 002 Refer to the instructions i...

Page 101: ...erference and 2 This device must accept any interference received including interference that may cause undesired operation Tested to comply with FCC Standards TO SATELLITE IN TO KVH ANTENNA DIAGNOSTI...

Page 102: ...a special stacked signal which the TracVision receiver is configured to decode However all standard non TracVision DIRECTV receivers are configured to decode unstacked signals instead Therefore a des...

Page 103: ...the following two conditions 1 This device must not cause harmful interference and 2 This device must accept any interference received including interference that may cause undesired operation Tested...

Page 104: ...the necessary amplification A dual output destacker is needed to modify the TV signal for connection to a multiswitch You can connect multiple TracVision and or non TracVision receivers to the multisw...

Page 105: ...Appendix B Satellite Elevation Map 54 0287 A 13 Satellite Elevation Map 30 30 35 35 40 45 50 55 55 50 45 40 Satellite at Equator...

Page 106: ...remote control 3 13 beeping receiver 2 6 blockage 1 6 9 5 brightness 8 6 buttons receiver 3 9 buttons remote control 3 3 3 8 C cabling diagrams A 3 Caller ID tab 4 6 Category Filter 6 7 6 8 caution 3...

Page 107: ...8 10 F Family list 6 4 7 3 FAV button 3 5 favorite channel lists 6 3 6 6 filtering the program guide 6 7 6 8 footprint satellite 1 5 fuse 9 4 future programs viewing 6 9 G grid guide 5 4 GUIDE button...

Page 108: ...con 8 10 noise antenna 2 6 number buttons 3 7 O OneLine Guide 5 6 operating other components 3 10 ordering a receiver 3 11 ordering a remote control 3 9 overriding lock 7 4 P passcode 7 4 picture in g...

Page 109: ...setting the system 9 4 RF converter connection to receiver A 4 description 1 4 distance from receiver 9 8 S S Video A 5 safety warning 3 3 A 3 SAT button 3 4 satellite coverage area 1 5 9 5 elevation...

Page 110: ...ng the system 7 5 Unstacked LNB 9 9 V VCR control 3 8 3 10 VCR control buttons 3 8 vehicle power A 5 VHF antenna A 5 video adjustments 8 5 8 6 VIDEO button 3 7 viewing a program description 2 5 viewin...

Page 111: ...letown RI 02842 5279 U S A Phone 401 847 3327 Fax 401 849 0045 E mail info kvh com www kvh com Copyright 2005 KVH Industries Inc DIRECTV is a registered trademark of DIRECTV Inc KVH and TracVision are...

Reviews: