6
Consider the following ADCU installation
guidelines:
• Select an ADCU mounting location in a dry,
well-ventilated area belowdecks, away from
any heat sources or salt spray.
• Be sure the ADCU’s front panel will be easily
accessible to the user.
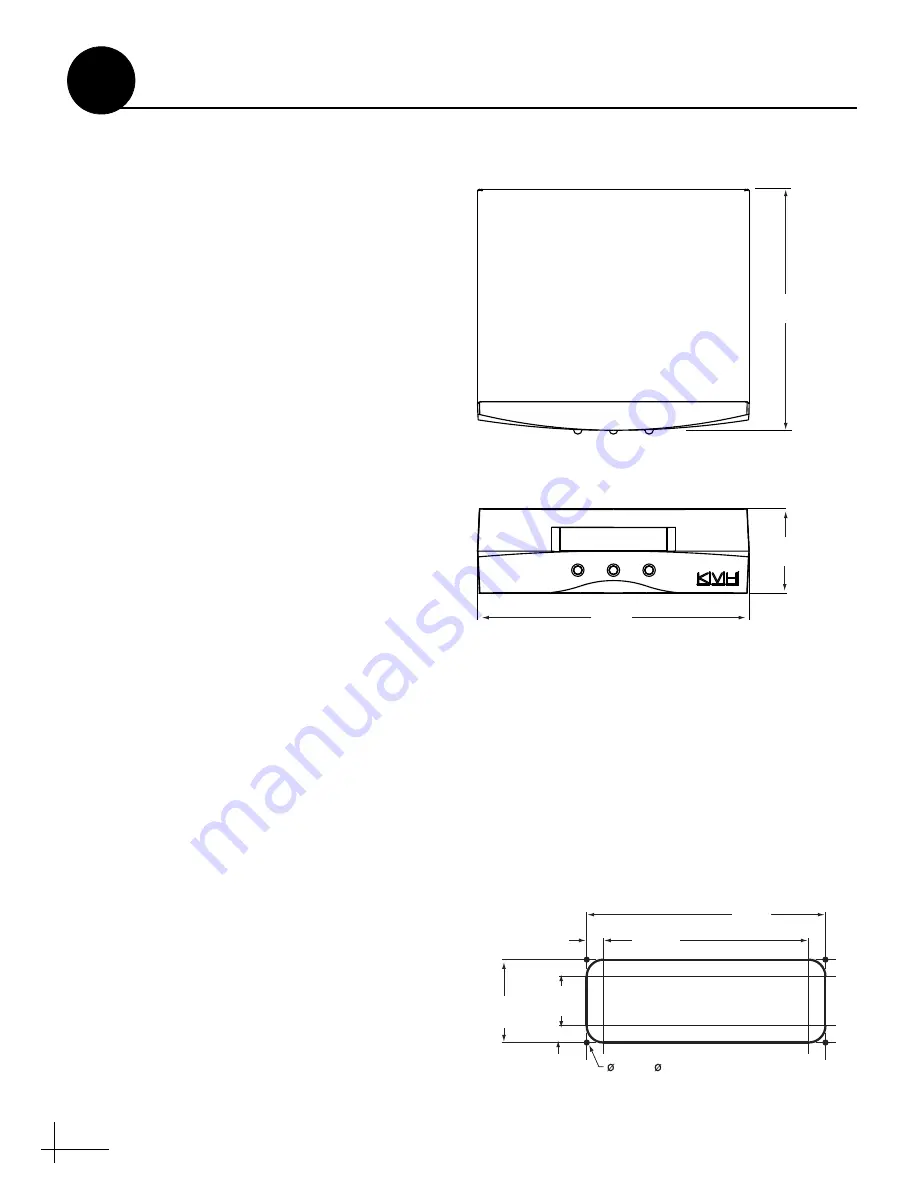
• Be sure to leave enough room at the ADCU’s
rear panel for connecting the cables (see
Figure 7 for ADCU dimensions).
• Consider the lengths of the connecting cables.
The ADCU must be located close enough to
the antenna and the GyroTrac sensor so that
you can connect the supplied cables, while
allowing adequate slack for a service loop.
The antenna data cable is 50 ft (15 m); the
GyroTrac sensor cable is 30 ft (9 m).
• (Circular and Sky Mexico only) The
grounding block should be located within
45 ft (13 m) of the antenna, within 5 ft (1.5 m)
of the primary receiver, and within 25 ft
(7.6 m) of a suitable vessel AC ground.
• The kitpack contains parts for mounting the
ADCU either to a horizontal surface (using
Velcro) or to a vertical surface (using the
supplied flush mount bracket).
Prepare the ADCU Mounting Site
(Flush Mount only)
NOTE: Skip this step if you plan to mount the ADCU
to a horizontal surface instead; proceed to page 7.
a. Using the ADCU flush mounting template
provided at the end of this manual, mark and
cut out a hole in the mounting surface to
accommodate the flush mount bracket (see
b. Using the same template, mark the locations
for the four ADCU mounting holes.
c. Using a #29 drill bit, drill a 0.136" (3.45 mm)
hole at the four mounting hole locations.
Later, you will mount the ADCU using four
#8 screws.
8.2"
(20.8 cm)
7.3"
(18.5 cm)
2.6"
(6.6 cm)
Figure 7: ADCU Dimensions
Front View
Top View
8.87"
(225 mm)
7.62"
(194 mm)
.63"
(16 mm)
3.08"
(78 mm)
1.83"
(46 mm)
.63"
(16 mm)
.136" ( 3.45 mm)
Mounting Hole (x4)
Figure 8: ADCU Mounting Holes Layout
Plan the ADCU Installation
4


