10
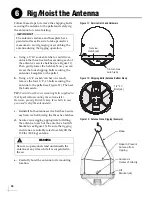
Follow these steps to remove the shipping bolts
securing the antenna to the pallet and safely rig
the antenna for crane hoisting.
a.
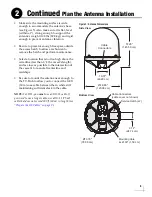
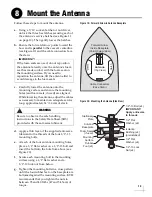
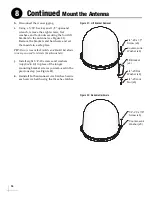
Using a 7/16" socket/ratchet or nut driver,
unlock the three hex latches securing each of
the antenna’s service hatches (see Figure 11).
Then gently lower the hatches. Now you can
access the four shipping bolts securing the
antenna’s baseplate to the pallet.
b.
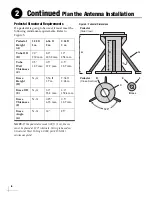
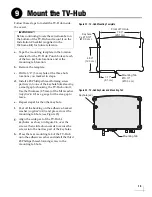
Using a 3/4" socket/ratchet or wrench,
remove the four 1/2"-13 bolts securing the
antenna to the pallet (see Figure 12). Then set
the bolts aside.
TIP:
You will use the new mounting bolts supplied in
the kitpack when mounting the antenna later.
However, you might wish to keep these bolts in case
you need to ship the antenna later.
c.
Reinstall both antenna service hatches. Secure
each service hatch using the three hex latches.
d.
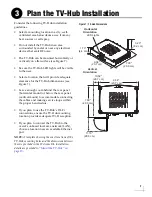
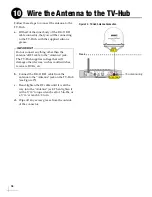
Secure crane rigging appropriate for lifting
the antenna to each of the antenna’s four lift
brackets (see Figure 13). Be sure the rigging
and crane are suitably rated to safely lift the
198 lbs (89.8 kg) antenna.
e.
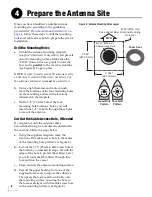
Carefully hoist the antenna to its mounting
location.
WARNING
Be sure no personnel stand underneath the
antenna at any time while it is suspended in
the air.
The antenna’s radome and baseplate have
painted surfaces. Be sure to take protective
measures to avoid gouging or scratching the
antenna during the rigging operation.
IMPORTANT!
Figure 11: Service Hatch and Hardware
Service
Hatch (x2)
1/4-turn Hex
Latch (x6)
Figure 12: Shipping Bolts (Antenna Bottom View)
1/2"-13
Bolt (x4)
Figure 13: Antenna Crane Rigging (Example)
Lift
Bracket (x4)
Rope to Prevent
Antenna from
Tipping
Rope
Antenna’s
Center of Gravity
Rig/Hoist the Antenna
6
Summary of Contents for TracVision TV10
Page 1: ...TracVision TV10 Installation Guide ...
Page 53: ......


