


4 | kvm-tec
kvm-tec | 5
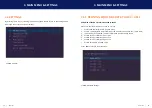
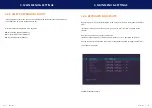
Table of conTenT
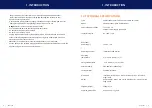
congratulations on the purchase of your new media4Kconnect DP1.2 KVM extender.
You have bought a high quality extender. These instructions are part of this product.
They contain important information regarding safety, use and disposal for every user
of the media4Kconnect DP1.2 extender. Please familiarise yourself with the
information within prior to using your product. Use the product only in the manner as
described and for the areas of application as stated. following proper use and
maintenance, your media4Kconnect KVM extender will bring you
joy for many years to come.


