background image


Einbauhinweise / Installation Instructions


Hinweis Nr./ 

Instruction No. 

685 10 184


Erstellt am/ 

Date 

15.10.2010 

Seite / Page 2 

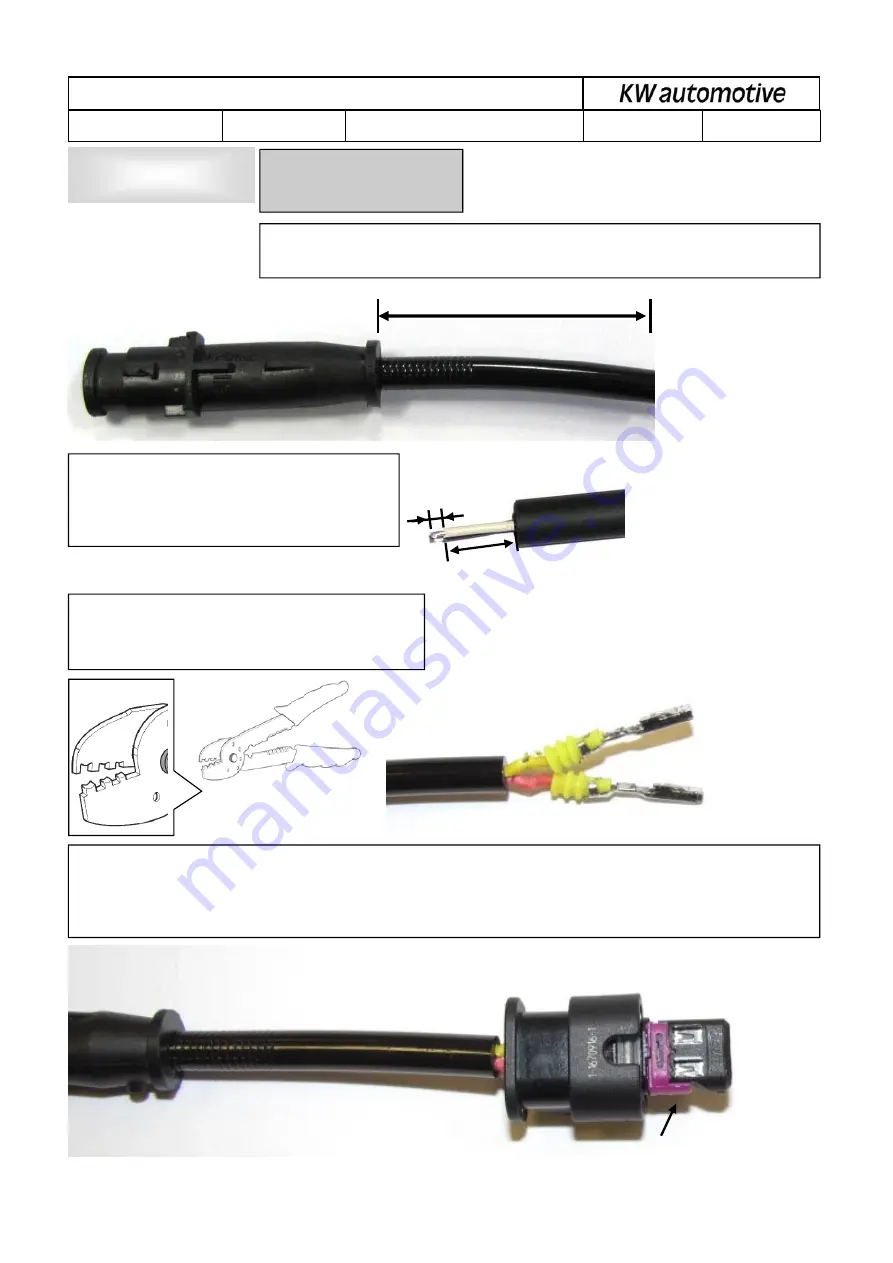
2. 15 mm von der Ummantelung der Leitung entfernen und 
die Adern 4 - 5 mm abisolieren.  
 
2. Remove 15 mm / 0,6 inch of the cable insulation and 4-5 
mm / 0,16 - 0,2 inch of the wire insulation.  

Vorbereitung 

Preparation: 

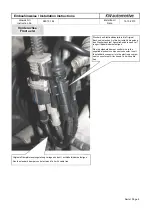
1.Steuerleitung vom Originaldämpfer bei 50mm abtrennen. 
 
1.Cut off the standard damper wire at 50mm / 2,0 inch. 


0,5 mm² 

4. Steckersicherung öffnen. Fertig montierte Leitung mit Abdichtungen in das Gehäuse ganz einschieben und einrasten. Pinposition / Ka-
belfarbe ist nicht relevant.  Anschließend Steckergehäuse verriegeln.  
 
4. Open the connector lock. Insert the completted wire with sealings into the connector until to the lock. The pinposition / cable colour is not 
relevant. After this lock the connector. 

5 mm /  

0,2 inch 

15 mm /  

0,6 inch 

3. Kontakt und Dichtungen mit einem geeignetem Werkzeug 
montieren. 
 
3. Install the supplied pin contact with a correct tool. 

50mm / 2,0 inch 

Sicherung / Lock 

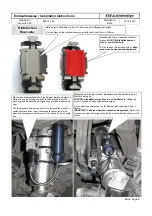
Nur bei der Vorderachse 
 
Only at the front axle 

Summary of Contents for 685 10 184

Page 1: ...inweise Installation Instructions Hinweis Nr Instruction No 685 10 184 Erstellt am Date 15 10 2010 Seite Page 1 685 10 184 EINBAUHINWEISE Stilllegungssatz 685 10 184 INSTALLATION INSTRUCTIONS Cancellation kit ...

Page 2: ...0mm 2 0 inch 0 5 mm 4 Steckersicherung öffnen Fertig montierte Leitung mit Abdichtungen in das Gehäuse ganz einschieben und einrasten Pinposition Ka belfarbe ist nicht relevant Anschließend Steckergehäuse verriegeln 4 Open the connector lock Insert the completted wire with sealings into the connector until to the lock The pinposition cable colour is not relevant After this lock the connector 5 mm ...

Page 3: ...läche muss Staub und Fettfrei sein Fix the tape on the installed holder Adhe rend must be cleaned and degreased Stilllegung am Dämpfer mit dem Klebeband und Kabelbinder 4 8mm x 290mm befestigen WICHTIG Klebefläche muss Staub und Fettfrei sein Stilllegung muss in Richtung Fahrzeugheck seite zeigen Fix the electronic component on the damper with cable ties 4 8mm x 290mm IMPORTANT Adherend must be cl...

Page 4: ...riegelung des Steckers achten Anschließend die neue Lei tung mit Kabelbinder befestigen Run the standard damper control wire to the supplied electronic component connector Insert the standard connector into the electronic compo nent connector until it locks and fix it with cable ties Originale Dämpfersteuerungsleitung verlegen und evtl mit Kabelbinder befestigen Run the standard damper control wir...

Page 5: ... Auf die korrekte Verriegelung des Steckers achten Anschlie ßend originale Dämpfersteuerungsleitung mit Kabelbinder befes tigen Run the standard damper control wire to the supplied electronic component connector Insert the standard connector into the electronic component connector until it locks and fix it with cable ties Stilllegung am Dämpfer mit dem Klebeband und Kabelbinder 4 8mm x 290mm befes...

Reviews: