background image

2-1/8"

54 mm

1-1/2"

38 mm

actual 

size

T

What is the diameter of the hole in the door?

Install exterior keypad and mounting plate.

Insert cylinder into keypad.

A

B

C

Diameter is 2-1/8" 

(54 mm)

Diameter is 1-1/2"

(38 mm)

or

“D” is required for installation. 
Install “D” on “F”.

“D” is not needed for 
installation. Discard “D”.

Cable goes 
 underneath  latch.

Locate screws 
and keep them 
within reach. 

 Support exterior assembly 

during mounting plate installation.

Route cable through 
center hole, then push 
cable into side hole. 

Insert key and 
test latch. If latch 
does not extend or 
retract smoothly, 
adjust screws (T). 

Remove key when 
finished and make 
sure the latch bolt 
is fully extended.

Keep parallel to 

edge of door.

Tighten 

screws evenly.

a

d

b

c

e

D

D

F

F

T

G

(2x)

W

F

T

E

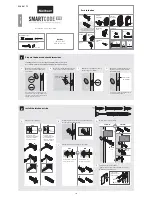
Install the exterior keypad

Remove battery cover.

Remove battery pack.

Make sure the turnpiece is in the vertical position.

A

B

C

vertical

M

L

K

L

Do not install 

 batteries 

until step 5.

Note: Turnpiece 
may not rotate 
smoothly until 
after step 5.

Connect cable. Ensure tight cable 
connection.

Lay cable flat against the interior 
housing.

Push turnpiece shaft onto 
torque blade.

Secure interior assembly with 
supplied screws.

D

E

F

G

turnpiece 
shaft

torque 
blade

L

(2x)

actual 

size

U

Install the interior assembly

YES

NO

or

Door handing process 

was successful! Proceed 

to next step after latch 

bolt stops moving.

Remove battery 

pack, wait 15 seconds, 

then attempt the 

process again.

This step will teach your lock the orientation of your door and is crucial to lock operation.

Install 4 AA batteries in battery pack.

Press and HOLD the Lock button 
while installing battery pack.

Hold button until the latch bolt 
starts moving on its own.

Did the latch bolt retract and extend on its 
own when the battery pack was installed?

A

B

C

  Ensure correct polarity. 

For best results, use 
new, non-rechargeable 
Alkaline batteries only.

K

Install the batteries and perform the door handing process

2 / 4

3

4

5

Summary of Contents for SmartCode 909

Page 1: ...and 44 mm thick A A B C D B C D Is the door edge chiseled Are the latch holes centered in the door hole Which latch are you installing Hold the latch in front of the door hole with the latch face flush against the door edge 2 1 8 54 mm 1 1 2 38 mm 1 25 mm YES YES NO NO Use latch A If the latch bolt is not already extended extend the latch bolt as shown No adjustment is required Proceed to next ste...

Page 2: ...osition A B C vertical M L K L Do not install batteries until step 5 Note Turnpiece may not rotate smoothly until after step 5 Connect cable Ensure tight cable connection Lay cable flat against the interior housing Push turnpiece shaft onto torque blade Secure interior assembly with supplied screws D E F G turnpiece shaft torque blade L U 2x actual size U Install the interior assembly YES NO or Do...

Page 3: ...rocedure Beeping sound will only be heard if switch 3 on the lock interior is in the on positon See Switches and Status LED Colors on page 4 Mastercode For enhanced security a mastercode may be used when adding and deleting user codes For more information about the mastercode download the Programming and Troubleshooting Guide on the SmartCode 909 page at www kwikset com 2x One green flash with one...

Page 4: ...ware is available in multiple performance grades to suit the application In order to enhance security and reduce risk you should consult a qualified locksmith or other security professional Important Safeguards 4 4 SmartCode at a Glance Deleting a user code In order to delete a user code you must override the code by adding a different user code in the same position For example if you want to dele...

Page 5: ...del orificio de la puerta con la cara del pestillo al ras con el borde de la puerta If the latch holes are centered in the door hole no adjustment is required Proceed to step 4 If the latch holes are NOT centered adjust latch See Latch Adjustment step 3C Si los orificios del pestillo están centrados con el orificio de la puerta no se requiere ajustarlo Vaya al paso 4 Si los orificios del pestillo ...

Page 6: ...nob with the screw holes is on the interior side of the door slant of latch bolt faces door frame la inclinación del perno queda enfrentada al marco de la puerta door frame marco C 2x wood block bloque de madera slant of latch bolt faces door frame la inclinación del perno queda enfrentada al marco de la puerta door frame marco Remove plates Elimine las placas Install drive in collar Instale el ar...

Reviews: