


15
SECTION: 10
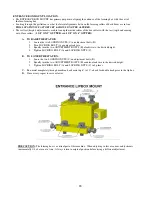
POLYURETHANE DRIVE SYSTEM
The drive train of this machine is in most circumstances maintenance free.
If a material traction problem arises or a roller is replaced, the top roller is adjustable up and down.
CAUTION: DO NOT OVER TIGHTEN DRIVE ROLLERS
The factory setting for the rollers is 1/4 turn past the point of contact.
The
MAXIMUM
amount of drive pressure recommended is 1/4 turn past factory setting.
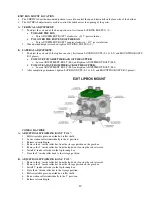
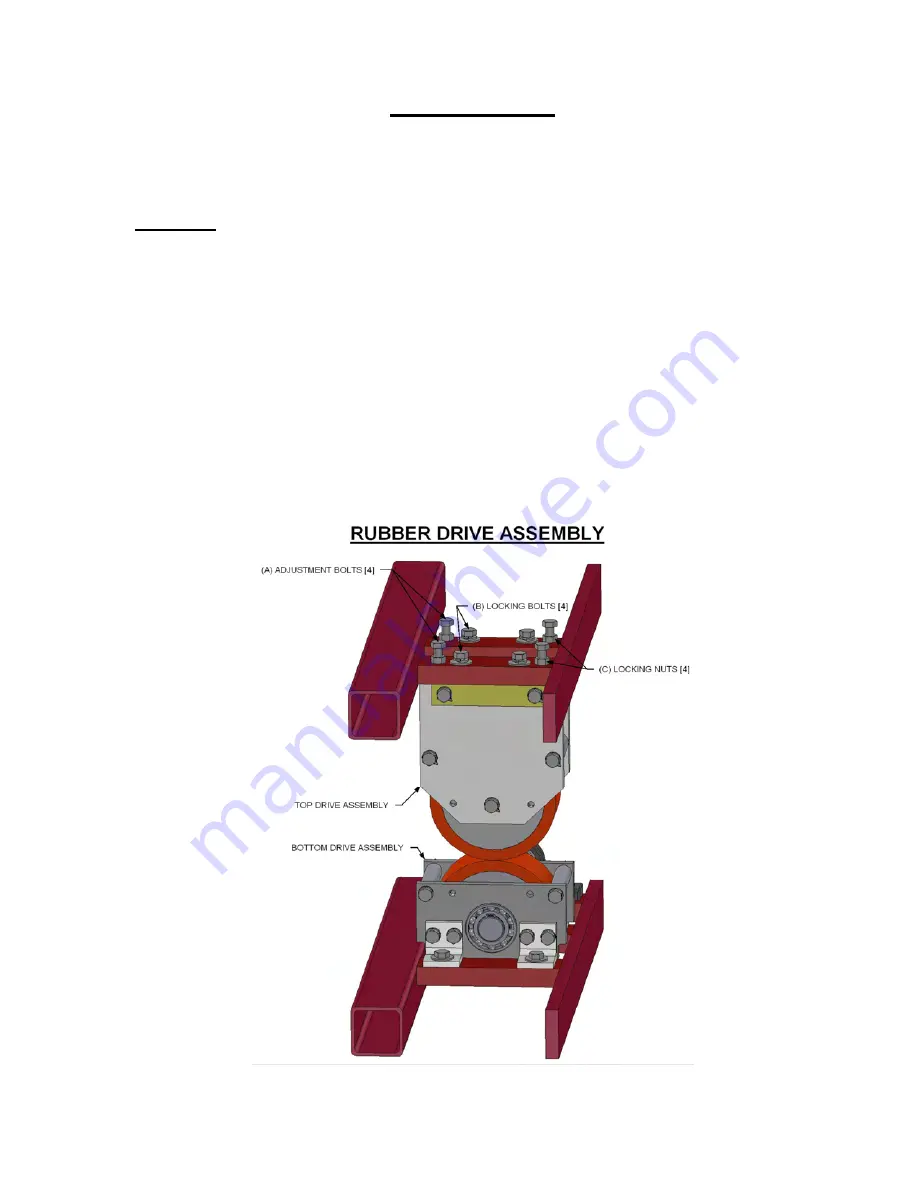
ADJUSTING DRIVE SYSTEM TO ADD TRACTION:
Start with top #1 drive assembly;
COMPONENT LOCATIONS: (SEE PG. 4 for 5” & SEE PG. 6 for 6”)
1.)
Turn locking nuts (C) counter clockwise; loosening the adjustment bolts (A) at all four places.
2.)
Turn locking bolt (B) counter clockwise a 1/4 turn to loosen all four bolts.
Only turn the bolts just enough to break them free.
3.)
Turn adjustment bolts (A) clockwise 1/16 of a turn.
4.)
Tighten locking bolts (B) 4 places.
5.)
Tighten locking nuts (C).
Run machine forward, if more traction is needed repeat the above procedure on top #2 drive assembly.
Run the machine forward, if more traction is needed repeat above procedure on both #1 and #2 drive assemblies
.
NOTE
: If material slippage occurs after material leaves #2 drive assembly while clearing machine, add pressure to #3
drive forming assembly (SEE PG. 19).
CLEANING OF POLYURETHANE:
clean outer surface of rollers using soap & water to remove any dirt or debris.


