13. FUEL INJECTION SYSTEM
13-19
G-DINK 300i
TILT SWITCH
INSPECTION
Support the scooter level surface.
Put the side stand up and engine stop switch
is at “RUN”.
Turn the ignition switch to “OFF”
Remove the screws, washers and tilt switch.
Place the tilt switch vertical as shown, and
turn the ignition switch to “ON”.
Measure the voltage between the following
terminals of the tilt switch connector with
the connector connected.
Terminal Normal
Violet/Red (+) – Green/Pink (-) 5 V (ECU
voltage)
Black/Blue (+) – Green/Pink (-) 0.4
~
1.4 V
Incline the tilt switch 65±10 degrees to the
left or right with the ignition switch turned
to “ON”.
Measure the voltage between the following
terminals of the tilt switch connector with
the connector connected.
Terminal Normal
Violet/Red (+) – Green/Pink (-) 5 V (ECU
voltage)
Black/Blue (+) – Green/Pink (-) 3.7
~
4.4 V
If repeat this test, first turn the ignition
switch to “OFF”, then turn the ignition
switch to “ON”.
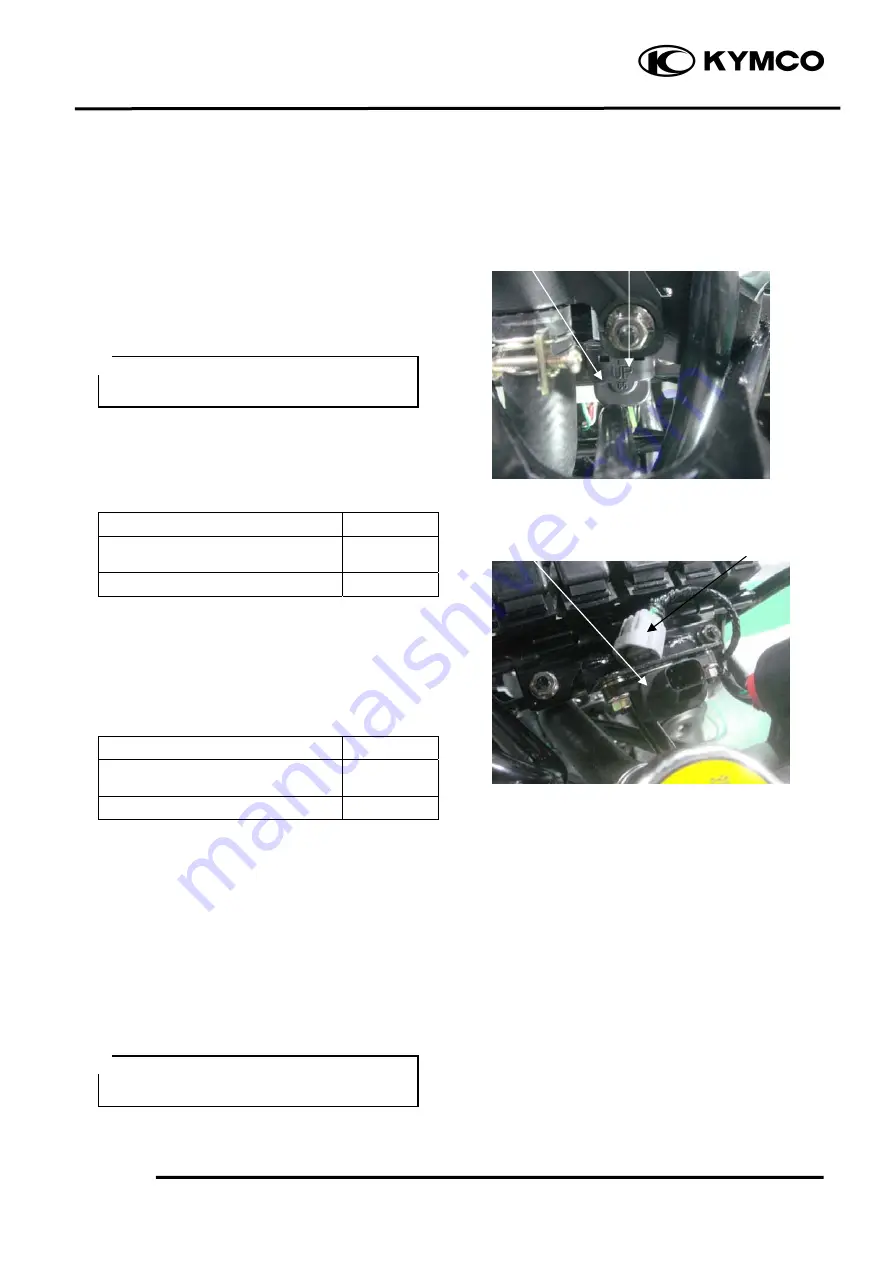
REMOVAL/INSTALLATION
Disconnect the connector and remove two
screws.
Remove the Tilt switch.
Installation is in the reverse order of
removal.
Tighten the mounting screws securely.
Do not disconnect the tilt switch
connector during inspection.
*
Install the tilt switch with its “UP” mark
facing up.
*
Tilt Switch Connector
Tilt Switch “UP” Mark
Summary of Contents for G-DINK 300i
Page 4: ...1 GENERAL INFORMATION 1 1 G DINK 300i Identification Numbers Record ...
Page 11: ...1 GENERAL INFORMATION 1 8 G DINK 300i TORQUE VALUES ...
Page 12: ...1 GENERAL INFORMATION 1 9 G DINK 300i TORQUE VALUES ...
Page 13: ...1 GENERAL INFORMATION 1 10 G DINK 300i TORQUE VALUES FRAME ...
Page 43: ...3 INSPECTION ADJUSTMENT 3 2 G DINK 300i MAINTENANCE SCHEDULE ...
Page 55: ...4 LUBRICATION SYSTEM 4 1 G DINK 300i LUBRICATION ...
Page 72: ...6 CYLINDER HEAD VALVES 9 1 G Dink 300i 6 1 ...
Page 89: ...7 CYLINDER PISTON 10 1 G Dink 300i SCHEMATIC DRAWING 7 1 ...
Page 114: ...9 FINAL REDUCTION 9 1 G DINK 300i SCHEMATIC DRAWING ...
Page 123: ...10 A C GENERATOR STARTER CLUTCH 10 1 G Dink300i SCHEMATIC DRAWING ...
Page 130: ...11 CRANKCASE CRANKSHAFT 11 1 G DINK 300i SCHEMATIC DRAWING ...
Page 138: ...12 COOLING SYSTEM 12 1 G DINK 300i SCHEMATIC DRAWING ...
Page 210: ...15 REAR BRAKE REAR FORK REAR WHEEL REAR SHOCK ABSORBER 15 1 G DINK 300i SCHEMATIC DRAWING ...
Page 217: ...15 REAR WHEEL REAR BRAKE REAR SUSPENSION G DINK 300i 15 8 ...


