background image

Indicators and Messages

5-11

Message

Corrective Action

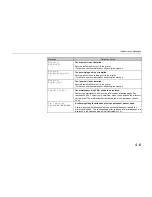
Warning

Low memory

The printer’s internal memory is running low.

Remove any unnecessary download fonts and/or macros.  You can check the
amount of user memory currently available by printing a status page.

Toner low DP-2800

There is not enough toner inside the toner container.

There is not enough toner. Prepare a new toner container.  (See Chapter 4.)

Replace Toner

Clean printer

There is no more toner in the toner container.

The printer has stopped because there is no more toner. Replace with a new
toner kit. After replacing, be sure to clean the printer. (See Chapter 4.)

Option interface

Error

A failure has occurred with the option interface.

Check the option interface installed on the printer.

HARDDISK error20

Install the harddisk unit into the OPT2 slot.

This message is displayed when the optional harddisk unit is accidentally
installed into the OPT1 slot.  Be sure to install the harddisk unit in the OPT2
slot.  Be sure to turn off the printer’s power before removing the incorrectly
installed harddisk.

RAM DISK error ##

Press CONTINUE

Check the error code displayed in the place of ## and refer to the
appropriate description below.

01:

 Abnormal format. Try turning the power off and on again.

02:

 RAM DISK mode is 

Off

. Turn RAM DISK mode 

On

.

03:

 Cannot write to the disk system because it is write protected. Remove

the write protection.

04:

 No disk space. Clean up files.

05:

 Specified file not on disk.

06:

 No memory for use by disk system. Expand printer memory.

10:

 Cannot format disk because host data is spooled there.

Format the disk after 

Ready

 is displayed.

(Continued on next page)

Summary of Contents for DP-2800

Page 1: ...he DP 2800plus in this photograph is equipped with two optional paper feeders ST 1000 and an optional document finisher F 8118 Please read the instruction handbook before using the printer Keep it clo...

Page 2: ...fficient attention to or incorrect compliance with the related points Symbols The D symbol indicates that the related section includes safety warnings Specific points of attention are indicated inside...

Page 3: ...l any copyrightable subject matter without the prior written consent of our company is prohibited Any copies made of all or part of this manual any copyrightable subject must contain the same copyrigh...

Page 4: ...copies or portions merged into other programs IBM retains title to the Programs IBM owns or has licensed from the owner copyrights in the Programs 1 License Under this license you may use the Programs...

Page 5: ...limitation of remedies also applies to any developer of Programs supplied to IBM IBM s and the developer s limitations of remedies are not cumulative Such developer is an intended beneficiary of this...

Page 6: ...th the following items 1 Ownership As the Sublicensee you own the Printer in which FONTWARE TrueDoc is originally installed but BITSTREAM retains title to and ownership in the software program of FONT...

Page 7: ...this equipment does cause harmful interference to radio or television reception which can be determined by turning the equipment off and on the user is encouraged to try to correct the interference b...

Page 8: ...Conforming to the Class B limits ST 1000 Paper Feeder 500 sheets EF 100 Envelope Feeder UF 100 Universal Feeder AD 31 Duplexer F 8130 Bulk Paper Stacker 3000 sheets AS M8111 Mail Box Sorter F 8118 Do...

Page 9: ...rtified as a Class 1 laser product under the U S Department of Health and Human Services DHHS Radiation Performance Standard according to Radiation Control for Health and Safety Act of 1968 This means...

Page 10: ...TLY WITH OPTICAL INSTRUMENTS Use of controls or adjustments or performance of procedures other than those specified herein may result in hazardous radiation exposure U S A Canada CAUTION Laser radiati...

Page 11: ...e is mandatory for products marketed in the United States A label indicating compliance with the CDRH regulations must be attached to laser products marketed in the United States Ozone concentration T...

Page 12: ...oad P O Box 40008 Fairfield New Jersey 07004 0008 Phone Fax No 973 808 8444 973 882 6000 This device complies with Part 15 of the FCC Rules Operation is subject to the following two conditions 1 This...

Page 13: ...du minist re des Communications du Canada Cet appareil num rique de la classe B est conforme la norme NMB 003 du Canada Safety EMI Requirements IEC IEC950 1991 A1 A2 A3 A4 IEC825 1 1993 Laser requirem...

Page 14: ...oftware Prolonged Non Use and Moving the Printer Prolonged Non use If you ever leave the printer unused for a long period of time remove the power cord from the wall outlet We recommend you consult wi...

Page 15: ...Introduction xiv As an ENERGY STAR Partner Mita Mita Copystar America Inc has determined that this product meets the ENERGY STAR guidelines for energy effiency ENERGY STAR is a U S registered mark...

Page 16: ...s silicon which is environmentally benign The only maintenance regularly needed therefore is to replenish the toner supply in the developer approximately every 25 000 printed pages A4 portrait at a pr...

Page 17: ...0 sheets of paper Scalable printing This printer allows reductions between various paper sizes using the page setup function Bitmapped and scalable typefaces In addition to its 80 internal bitmap font...

Page 18: ...ientation A wide variety of internal symbol sets The printer supports most Hewlett Packard LaserJet 5M compatible symbol sets for both bitmap and scalable fonts Display of printer messages in any of f...

Page 19: ...ipped with 8 MB of memory This can be extended up to 72 MB of memory through optional expansion of memory Expandable interface Equipped with slots for installing optional interfaces the interfaces of...

Page 20: ...36 Expanding Memory 1 41 Chapter 2 Operating the Page Printer 2 1 Control panel 2 2 Operating Procedures 2 11 Mode Selection Menu 2 24 Configuring Interfaces 2 27 Emulation Selection 2 28 Reduction Pa...

Page 21: ...placement 4 2 Cleaning 4 10 Chapter 5 Troubleshooting 5 1 General Guide 5 2 Print Quality Problems 5 4 Indicators and Messages 5 8 Correcting a Paper Jam 5 19 Chapter 6 Symbol Set Tables 6 1 Appendix...

Page 22: ...parts of this printer how to use it its environmental requirements and how to install it CAUTION LABELS 1 2 INSTALLATION PRECAUTIONS 1 3 PRECAUTIONS FOR USE 1 5 Unpacking and Inspection 1 7 Moving th...

Page 23: ...o the printer at the following locations for safety purposes BE SUFFICIENTLY CAREFUL to avoid fire or electric shock when removing a paper jam or when replacing toner Label 1 High temperature inside D...

Page 24: ...onditioned room recommended room temperature around 20 C humidity around 65 RH and avoid the following locations when selecting a site for the printer Avoid locations near a window or with exposure to...

Page 25: ...as an air conditioner fluorescent light copier or shredder because these devices generate electrical noise on the power line If it must share a power circuit with equipment like this a light frequency...

Page 26: ...wer switch OFF O immediately Next remove the power plug from the outlet to avoid the danger of fire or electrical shock Then contact your service representative When adding memory ALWAYS remove the po...

Page 27: ...ical parts such as connectors or printed circuit boards They could be damaged by static electricity DO NOT attempt to perform any operations not explained in this handbook CAUTION Use of controls or a...

Page 28: ...ged contents 1 Place the box containing the printer on a flat stable surface 2 Remove the User s Manual Toner Kit and other items located on top of the spacer and remove the spacer 3 Carefully remove...

Page 29: ...ner Kit toner container cleaning cloth 4 User s manual and CD ROM including the printer drivers and manuals Remove the tape used for packaging as shown in the diagram rather than cutting with a cutter...

Page 30: ...Unpacking and Inspection 1 9 How to Remove the Paper Feeder...

Page 31: ...ter gently keeping it horizontal to prevent toner from soiling the inside of the printer When transporting the printer a long distance contact the your dealer from which you purchased the printer CAUT...

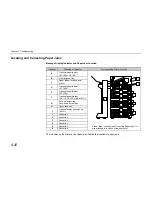
Page 32: ...assette Vent Paper Stopper Connector for Optional Feeder MP Multi Purpose Tray Paper Feeder Side Cover Paper Feeder Face Down Output Tray Power Switch Side Cover Face Up Output Tray To prevent static...

Page 33: ...ainer Release Lever Green Top Cover Drum Unit Release Lever Gray Service use only Lock Lever Green Drum Unit Fuser Unit Cleaning Knob Green Handle for Pulling Out Paper Feed Unit Green Paper Feed Unit...

Page 34: ...cover Page 1 19 5 Adjust the paper guide on the paper feed cassette Page 1 19 6 Add paper Page 1 22 7 Open the paper stopper on the face down tray if required Page 1 24 8 Open the face up output tray...

Page 35: ...ttom of the printer with the positioning pins on top of the paper feeder and slowly lower the printer into place Check that the connector on top of the paper feeder is properly connected to the connec...

Page 36: ...Setup and Connections 1 15 2 Open the top cover Remove the packing tape stuck to the printer and gently lift the top cover as far as it will go Top Cover...

Page 37: ...e the toner container from the toner kit Shake the toner container with the protective seal facing up as shown in the figure five times or more to thoroughly mix the toner inside 2 Carefully peal off...

Page 38: ...leased as shown in the figure If not positioned to the right slide them to the right until they stop 4 Align the ends of the toner container with the grooves to the left and right inside the printer a...

Page 39: ...is installed in the correct position and push forcefully on the top of the toner container 6 After the toner container is installed set the two toner container release levers to the left position fixe...

Page 40: ...used to supply standard paper from A5 size up to ledger size by adjusting its paper guide and paper stopper position The paper feed cassette is shipped from the factory set to A4 or letter The positi...

Page 41: ...de of the cassette While holding down the lever green on the paper guide slide the paper stopper to the desired paper size 4 Adjust the position of the paper guides located at the front and rear of th...

Page 42: ...Setup and Connections 1 21 Paper Feed Cassette Paper Limit Indicator Paper Stopper Paper Guide 1 2 3 4 Do not touch the rubber part of the paper feed unit...

Page 43: ...r please refer to Appendix B Paper Selection 1 Square the edges of the paper and insert into the paper feed cassette as shown in the figure Be sure that the paper does not exceed the paper limit indic...

Page 44: ...tte Paper is added to the second paper feed cassette in the same way 4 Size indicator plates are also supplied Place these on the front of the cassette according to the paper size inside to make it ea...

Page 45: ...pper on the face down tray 8 Open the face up output tray when the tray is being used Use the face up output tray when you wish paper to be stacked with the printed side facing up reverse order The fa...

Page 46: ...ector IOIOI are located on the rear side of the printer For pin connections please refer to Appendix C Parallel Interface Connector Serial Interface RS 232C RS 422A Connector IOIOI CAUTION Before perf...

Page 47: ...INTER For details please refer to the hardware manual for the computer Serial Interface Connection The printer is shipped from the factory with its serial interface set to RS 232C mode but it can also...

Page 48: ...__ Only use the power cord supplied with the printer 1 Plug the power cord into the power cord connector on the rear side of the printer 2 Connect the other end of the power cord into a power outlet C...

Page 49: ...will display the message Please wait for about five minutes until it becomes ready for printing Ready Note that the printer is not broken An error message of the form XXX Open will be displayed in th...

Page 50: ...the computer screen ECHO R STAT EXIT PRN If this causes the printer to print a status page a page on which current printer settings are printed then the printer and computer are properly connected If...

Page 51: ...n Windows For each of these operating systems the printer driver is located in the folder on the CD ROM The steps for installing this driver are given below Read this in conjunction with the manual su...

Page 52: ...he printer to be connected will appear Select the most appropriate printer and click on Next 6 Next Click the manufacturer and model of your printer screen will appear At this point select Have Disk l...

Page 53: ...screen instructions to install Once the driver has been properly installed the printer icon will be added to the printers folder Note__________________________________________________________________...

Page 54: ...Setup and Connections 1 33 Installing Under Windows 3 1 1 Insert the supplied CD ROM into the CD ROM drive of the computer 2 Double click on the Control Panel 3 Double click on Printers 4 Click on Add...

Page 55: ...Chapter 1 Safeguards and installing the Page Printer 1 34 5 A screen for List of Printers will appear From the choices click on Install Unlisted or Updated Printer 5 4...

Page 56: ...Install 7 The install printer menu will appear Enter CD ROM Drive Name and click on OK 8 Select Mita DP 2800plus from the printers displayed and click on OK Once the driver has been installed close th...

Page 57: ...eets of paper can be continuously fed For details on paper which can be used with this printer please refer to Appendix B If first mode is set with the multi purpose tray as the current cassette print...

Page 58: ...he multi purpose tray as shown in the figure 2 Open the sub tray and adjust the paper guides according to the width of the paper to be fed Multi purpose tray Paper guides Sub tray Note The paper guide...

Page 59: ...hen press the ENTER key so you can set the paper size or type to be fed from the multi purpose tray See Mode Select Menu at the end of this manual The manner in which paper is fed in each of these mod...

Page 60: ...ay is changed by pressing the and keys Display Cassette and then press the ENTER key MP tray mode Cassette 4 Press the EXIT key 5 Insert the paper so that it is aligned straight in the tray as far as...

Page 61: ...t Menu Insert the envelopes in the tray as far as they will go Do not load envelopes above the paper limit mark For details on suitable envelope paper quality and shape see Appendix B Be sure to use s...

Page 62: ...xpansion memory Memory Required by the Printer Environment It may be necessary to extend memory depending on the operating environment of the printer Please refer to the table below for minimum memory...

Page 63: ...nemy of SIMMs loaded with many semiconductor chips Pay attention to the following things before installation to protect memory chips against damage from static electricity Do not remove the SIMMs from...

Page 64: ...gn substances such as metal chips or liquid get inside the printer during the installation process Operation of the printer during the presence of a foreign substance may lead to fire or electric shoc...

Page 65: ...power and disconnect the power cord and all cables connected to the printer 2 Remove the six screws on the printer s rear cover and remove the rear panel There are two sockets for installing SIMMs lo...

Page 66: ...fully push the board upright until it snaps into place Make sure that the catches at the ends of the socket fit into the holes at the ends of the SIMM board Note_______________________________________...

Page 67: ...outwards and tilt the SIMM as shown then pull the SIMM out of the socket 4 After the SIMMs have been installed reattach the rear cover on the printer and tighten all six screws securely After SIMMs ha...

Page 68: ...o light and the message display to read Ready and press the STATUS key 3 If installation has been performed properly a status page will be printed Check the Available Memory Item in the upper right In...

Page 69: ...ting Procedures 2 11 Mode Selection Menu 2 24 Configuring Interfaces 2 27 Emulation Selection 2 28 Reduction Page Set 2 29 RAM DISK 2 32 Virtual Mail Box VMB 2 34 Memory Card 2 40 Setting the Paper Ty...

Page 70: ...ded within the printer and are not lost even if power is turned off The previous operational mode is therefore restored when the printer s power is turned on again CONTINUE FORM FEED ENTER STATUS EXIT...

Page 71: ...nted The length of time depends on the form feed timeout setting The printing will begin immediately when the Form Feed key is pressed If a memory card is being used this can indicate the printer is w...

Page 72: ...RS 232C RS 422A OPT1 Optional interface 1 OPT2 Optional interface 2 These indicators will flash while the printer is receiving data and continue flashing until the interface is released even if data...

Page 73: ...A3 29 7 42 cm C4 ISO C4 22 9 32 4 cm A4 ISO A4 21 29 7 cm C5 ISO C5 16 2 22 9 cm A5 ISO A5 14 8 21 cm b5 ISO B5 17 6 25 cm A6 ISO A6 10 5 14 8 cm EX Executive 7 1 4 10 1 2 inches B4 JIS B4 25 7 36 4...

Page 74: ...it indicates when printed pages are delivered to the face down output tray Face up tray indicator Flashing Indicates that paper is jammed near the face up output tray Lit indicates when printed pages...

Page 75: ...hat the printer is printing in duplex mode when the optional duplex printing unit AD 31 is installed ON LINE On line indicator Lit indicates that the printer is on line The printer prints received dat...

Page 76: ...by LED This LED indicates the status of the cassettes as follows depending on whether it is on off or flashing LED Status Meaning Flashing quickly Paper feed from this cassette is jammed Flashing slow...

Page 77: ...es off See page 2 62 STACK key This key selects whether to output paper face down printed side down or face up printed side up It can also select optional output locations when corresponding options a...

Page 78: ...ange setting values while making settings with the MODE key Holding either key down activates an auto repeat function causing menus to continuously change FORM FEED and 4key 1 This key is used to forc...

Page 79: ...ng and unplugging the power plug from the power outlet even when power is turned off Do not plug or unplug the power cord or printer cables while the printer s power is turned on Be sure that the prin...

Page 80: ...display indicates Ready The printer is now ready to print Note______________________________________________________________________ If an error is detected while the printer is warming up the ATTENTI...

Page 81: ...sed This printer is shipped from the factory with emulation set to HP LJ 5M 5Si 2 Use the MODE key to select the font to use and paper direction 3 Use the FEED key to select paper feeding from the cas...

Page 82: ...cause paper to be stacked with the printed surface facing down Normally it is more convenient to use the face down output tray When the message Ready or Add paper appears in the message display the ou...

Page 83: ...onal feeder is installed upper cassette Cassette 4 Displayed when an optional feeder is installed lower cassette Cassette 5 Displayed when a second optional feeder is installed upper cassette Cassette...

Page 84: ...nter to stop after the page currently being printed is finished During processing means anytime the messages Processing Waiting or FormFeed TimeOut are being displayed in the message display The print...

Page 85: ...1 only when an optional interface is installed Option 2 only when an optional interface is installed 6 Selecting the interface to cancel using the or key and then press the ENTER key Printing from th...

Page 86: ...print jobs Notes_____________________________________________________________________ Canceling data from the computer using the CANCEL key will restore temporary settings to their default values The...

Page 87: ...E indicator lit and that the message Ready is displayed in the message display 2 Press the STATUS key The message display will read Processing and a status page will be printed After it is finished pr...

Page 88: ...Chapter 2 Operating the Page Printer 2 20 Sample Status Page 4 5 6 2 3 7 8 9 1...

Page 89: ...d resolution and number of copies 4 Memory usage This information shows the amount of total memory installed in the printer and the amount of currently available memory 5 Installation Options This sho...

Page 90: ...nterface The figure on page 2 20 shows default settings The font is set to 1 Courier bitmap font This also shows font information similar to the column below if an optional interface is installed 9 KI...

Page 91: ...ish printing immediately 1 Check if the message display reads Waiting 2 Press the FORM FEED key The message display will now read Processing and the last page will print Note__________________________...

Page 92: ...key shows the next menu while the key shows the previous one Change levels by using the 3and 4keys The 4key moves to lower levels sub menus while the key moves to higher levels Mode Selection Menu Lis...

Page 93: ...RAM DISK mode The following settings can be made from sub menus when the total printer memory is 12 MB or more no optional hard disk installed and this mode is set to On Off MEMORY CARD The following...

Page 94: ...page 2 29 Carriage return setting Display total number of printed pages KIR 2 mode setting Ecoprint Mode setting Page protection mode Resolution setting Resource setting Print density setting Alarm b...

Page 95: ...ote______________________________________________________________________ This interface selection does not select which interface data will be received from The printer automatically selects that int...

Page 96: ...ttings can be made from the sub menu when KC GL emulation is selected Display Description KC GL Pen width The width of pens 1 through 8 can be set in 1 dot increments from 01 to 99 After selecting the...

Page 97: ...uivalent size printing Sometimes the line width of characters may not be consistent or lines may appear in figures or image patterns Landscape feeding while making reductions is possible from the mult...

Page 98: ...n in the following table Source Size Target Size Combinations Source Size Indicator Target Size Indicator Reduction Enlargement Ratio CS CS CS 98 100 98 LG Legal size 8 5 14 inches LG LG 98 100 98 LT...

Page 99: ...Set 2 31 Source Size Indicator Target Size Indicator Reduction Enlargement Ratio A4 21 29 7 cm A4 LT B5 A5 A4 98 100 94 86 70 98 B4 25 7 36 4 cm B4 B5 A4 B4 98 100 70 81 98 A3 29 7 42 cm A3 A4 B4 A3 9...

Page 100: ...e made from the printer s control panel Notes_____________________________________________________________________ The RAM DISK is set from the printer s user memory The printer s printing speed may t...

Page 101: ...ancel the setting 6 Once the desired RAM DISK size is displayed press the ENTER key 7 Press the EXIT key Then turn the printer s power off and on again The setting will be activated after restart RAM...

Page 102: ...ber where the data is stored using the printer s control panel or an optional barcode reader Note ______________________________________________________________________ If all the data in a virtual ou...

Page 103: ...performed at the time data is sent Sent data accumulates in the virtual output trays of the RAM DISK For details on printing accumulated data please see the next item Print Accumulated VMB Data This f...

Page 104: ...pear in the location marked by s Print VMB data Tray 2 Pressing the ENTER key will cause a to flash Print VMB data Tray 3 Each time the or keys are pressed the VMB data display will change Press the C...

Page 105: ...to Ready status Note that the password entered here is reset returns to 00001 when this mode is exited Print VMB Accumulated Data List This feature prints a list of VMB data accumulated in the RAM DI...

Page 106: ...e virtual mail box list A mark is shown with the bin number for virtual output trays which contain data If a password is set for a virtual output tray there is no barcode shown for that virtual output...

Page 107: ...code for Output 1 in the upper right using the barcode reader and then select the barcode for the virtual output tray you want to print If you want to delete the data in a tray select Delete 2 also in...

Page 108: ...mory card conforming to JEIDA Ver 4 2 can be written or formatted by this printer It is possible to set the partitions on the memory card which you wish to execute for the printer at power on by using...

Page 109: ...ower is off when inserting or removing a memory card Do not insert a memory card into the slot with undue force Do not bend a memory card Do not drop a memory card or subject them to shock Do not spla...

Page 110: ...ter when the printer s power is turned on The operation described here is performed while the message display reads Ready 1 Check that the font card is inserted into the memory card slot Bring up the...

Page 111: ...________________________________________________________ Macro data on a memory card has no effect on printer memory 1 Check that the memory card containing macro data is inserted Bring up the menu Re...

Page 112: ...ons from a Memory Card Specified data partitions on a memory card can be read into printer memory 1 Bring up the menu Read data on the message display This display only appears if there is data on the...

Page 113: ...tition list Check that the memory card can be written that write protection is released 1 Bring up the menu Write data on the message display 2 Press the ENTER key will appear 3 Pressing the ENTER key...

Page 114: ...out can be used to check the name partition name under which data was written and confirm that it was written properly Slot number Slot name for the memory card only A is supported Data type Data type...

Page 115: ...this operation 4 Press ENTER key while the data name you wish to delete is shown The message display will change to Processing and the printer will automatically print a partition list Use this to ch...

Page 116: ...ry card formatting information example below after initialization is finished Use this to check that the memory card has been formatted properly Slot number Slot name for the memory card only A is sup...

Page 117: ...the memory card inserted in the memory card slot 1 Bring up the menu List of Partitions on the message display 2 Press the ENTER key will appear Press the CANCEL key to cancel printing 3 Pressing the...

Page 118: ...______________________________ Remaining Size in the partition list indicates the amount of remaining memory on the memory card Since the system uses about 70 bytes to write a piece of data on the mem...

Page 119: ...per types The following types of paper can be set For details on paper please see Appendix B Cassette Media Type and Custom Settings Media Type Paper Type MP tray Cassette EF UF Duplex path MP tray av...

Page 120: ...hen use the and keys to display the Cassette 1 type Paper handling Cassette 1 type Plain 2 Pressing the ENTER key will cause a to flash Press the or keys to display Recycled Cassette 1 type Recycled P...

Page 121: ...ect Menu and press the 4 key Then use the and keys to display Custom setup Paper handling Custom setup Custom 2 Pressing the ENTER key will cause a to be displayed Press the or keys to select the pape...

Page 122: ...er thickness Fuser mode Vellum Low Middle default High Sets the temperature for the fusing unit Duplex path only when the paper type is Custom Enable default Disable Selects duplex printing on off whe...

Page 123: ...table below In addition all paper type settings made using Custom setup can be reset to the default values shown in the table below using the Reset custom setup menu Paper Type Plain Trans parency Pr...

Page 124: ...minutes Once the set time arrives the printer will display Sleeping and all indicators will go out This minimizes the amount of energy used Pressing a key on the control panel opening and closing a co...

Page 125: ...to flash 2 Send data to be dumped to the printer while the is flashing 3 Pressing the ENTER key again will print the corresponding pages of dumped data Once the dumped data you require has been outpu...

Page 126: ...ge to find out the current mode Note______________________________________________________________________________ Set the print density to 03 when setting the KIR 2 mode For details on print density...

Page 127: ...tical stripes The KIR 2 mode currently set is too strong Set the KIR 2 mode to Off See the Mode Select Menu at the end of this manual White vertical stripes The KIR 2 mode currently set is too weak Se...

Page 128: ...page so as to save your printing costs The factory setting is off Notes_____________________________________________________________________ Ecoprint status varies depending on the feed direction of...

Page 129: ...ows Resource prot Permanent In this mode the printer stores fonts macros symbol sets etc in memory that were downloaded as permanent PCL resources All temporary resources are lost when the emulation m...

Page 130: ...the 03 setting For details on adjusting the KIR 2 mode see page 2 58 Setting the Audio Warning Buzzer In addition to the message displayed when the paper supply is exhausted or when paper jamming occ...

Page 131: ...rt beeps Clean printer Press CONTINUE short beeps Option stacker path error short beeps Option Stacker paper full short beeps Face down tray paper full short beeps Option tray paper full short beeps R...

Page 132: ...TINUE short beeps HARDDISK error Press CONTINUE short beeps RAM DISK error Press CONTINUE short beeps Opt ROM error Press CONTINUE short beeps Add Staples Press CONTINUE short beeps Set paper Press CO...

Page 133: ...ng manuals accompanying the various optional equipment Notes _____________________________________________________________________ If you wish to cancel the data being processed while the audio alarm...

Page 134: ...er 3 Fonts This chapter describes the types of fonts you can use with the printer including the printer s resident and KPDL fonts and symbol sets Bitmap and Scalable Fonts 3 2 List of Fonts 3 3 Symbol...

Page 135: ...The printer accepts as many downloadable fonts as its user available memory permits Bitmap fonts A bitmap font is made of a fixed bit pattern This pattern is stored in a special format for use in the...

Page 136: ...Resident fonts Bitmap Fonts The printer has 80 resident bitmap fonts Note that all resident bitmap fonts include the letters BM in the typeface name Scalable Fonts The printer has 45 resident scalable...

Page 137: ...Chapter 3 Fonts 3 4 Resident Scalable Fonts 1...

Page 138: ...List of Fonts 3 5 Resident Scalable Fonts 2...

Page 139: ...Chapter 3 Fonts 3 6 KPDL Fonts 1...

Page 140: ...List of Fonts 3 7 KPDL Fonts 2...

Page 141: ...cause the printers the page printer emulates have a number of their own symbol sets for printing in different languages and other purposes Most of those symbol sets are the same regarding the letters...

Page 142: ...D Symbol set 4 0D ISO 60 Norway 9 0I ISO 15 Italian 14 0N ECMA 94 Latin 1 19 0S ISO 11 Swedish 21 0U ISO 6 ASCII 37 1E ISO 4 U K 38 1F ISO 69 France 39 1G ISO 21 Germany 53 1U US Legal 83 2S ISO 17 Sp...

Page 143: ...11 Sweden 21 0U ISO 6 ASCII 37 1E ISO 4 U K 38 1F ISO 69 France 39 1G ISO 21 Germany 53 1U US Legal 78 2N ISO Latin 2 83 2S ISO 17 Spain 173 5M PS math 174 5N ISO Latin 5 180 5T Windows Latin 5 202 6J...

Page 144: ...lue SSET ID Symbol set 309 9U Windows 330 10J PS text 341 10U IBM PC 8 373 11U IBM PC 8 D N 394 12J Macintosh 405 12U IBM PC 850 501 15U Pi font 565 17U PC 852 Latin 2 620 19L Winbalt 629 19U Windows...

Page 145: ...nance This chapter explains how to maintenance the printer This only covers replacing the toner container and cleaning parts such as the main charger unit and paper feed unit Toner Container Replaceme...

Page 146: ...scape feed and with Ecoprint mode turned off the toner container will need replacing approximately once every 25 000 printed pages A4 or letter size 33 000 pages with Toner for DP 28 3600 Series In th...

Page 147: ...to distance items such as floppy disks during toner container replacement Be sure to clean the inside of the printer along with replacing the toner container For details see Cleaning on page 4 10 Use...

Page 148: ...old toner container After removing it take care not to tilt the toner container 3 Cap the old toner container with the cap supplied in the new toner kit Toner Container Release Levers Old Toner Contai...

Page 149: ...atter Note______________________________________________________________________ Although the toner container is made from non harmful flammable material be sure to dispose of this waste according to...

Page 150: ...om the toner kit Shake the toner container five times or more with the protective seal facing up as shown in the figure in order to thoroughly mix the toner inside 6 Carefully remove the protective se...

Page 151: ...eased as shown in the figure If not positioned to the right slide them to the right until they stop 8 Align the ends of the toner container with the grooves to the left and right inside the printer as...

Page 152: ...rect position and push forcefully on the top of the toner container as shown in the figure 10 After the toner container is installed slide the two toner container release levers to the left position f...

Page 153: ...Toner Container Replacement 4 9 11 Close the top cover...

Page 154: ..._ If the toner container has been replaced when the message Replace Toner Clean printer was displayed the message Clean printer Press CONTINUE will be displayed after replacement After cleaning the in...

Page 155: ...according to the following procedure 1 Open the printer s front cover 2 Pull the cleaning knob green located on the main charger unit slowly in and out a few times as shown in the figure This cleans t...

Page 156: ...changed 1 Take the grid cleaner from protective bag in the new toner kit and remove the cap Note ______________________________________________________________________ The grid cleaner pad is impregn...

Page 157: ...grid cleaner slightly lift the main charger unit and repeat the action of slowly pulling the cleaning knob in and out at least five times This will clean the grid inside the main charger unit Main Ch...

Page 158: ...4 Maintenance 4 14 4 When the grid is clean remove the grid cleaner from the printer and dispose of it The grid cleaner is not re usable 5 Close the front cover This ends the charger unit cleaning pr...

Page 159: ...er feed unit becomes dirty Clean the paper feed unit according to the following procedure 1 Open the printer s front cover Fuser Unit Front Cover CAUTION Wait a while after turning off the printer s p...

Page 160: ...r 4 Maintenance 4 16 2 Turn the lock lever counterclockwise as shown in the figure to release the feed unit 3 Grasp the handle on the paper feed unit and slowly pull it out Lock Lever Paper Feed Unit...

Page 161: ...two or three times as shown in the diagram using the cleaning brush housed in the front panel of the paper feed unit Return the cleaning brush after you have finished using it Cleaning Brush Paper Fee...

Page 162: ...the cleaning cloth included in the toner kit Note______________________________________________________________________ Be careful not to touch the transfer roller during cleaning as this may adversel...

Page 163: ...g 4 19 6 When you have finished cleaning the paper feed unit push it back in until you feel it catch in place 7 Turn the lock lever clockwise as shown in the figure to securely lock the feed unit Lock...

Page 164: ...Chapter 4 Maintenance 4 20 8 Close the printer s front cover...

Page 165: ...This chapter explains how to handle printer problems which may occur If a problem cannot be corrected please contact your dealer General Guide 5 2 Print Quality Problems 5 4 Indicators and Messages 5...

Page 166: ...the problem may be power related Look through the items below and check anything that seems appropriate Lit See the appropriate item below Check the print quality of a status page if one can be print...

Page 167: ...e printer prints a status page but data from the computer is not being printed normally Check the interface cable Connect both ends of the interface cable securely Try replacing the printer cable For...

Page 168: ...s such as blank output shown in the table below The troubleshooting procedure for each type of problem is given below If the checks explained in this section do not solve the problem please contact yo...

Page 169: ...rger wire using the green cleaning knob See Chapter 4 Black or white vertical streaks Check the message in the message display If the Toner low DP 2800 message is displayed and the toner indicator is...

Page 170: ...Try setting toner control to high density See Chapter 2 If the Toner low DP 2800 message is displayed and the toner indicator is flashing install a new toner kit See Chapter 4 Clean the charger wire O...

Page 171: ...the paper Check the transfer roller Pull out the paper feed unit and check whether the transfer roller is dirty If so print several pages to eliminate the dirt Check the paper feed unit Pull out the...

Page 172: ...paper cassette or multi purpose tray Add paper to the paper feed source See Chapter 1 Lit This indicates either the current paper feeder or the paper output point Flashing A paper jam has occurred in...

Page 173: ...aximum of three feeders are installed the upper feeder is 1 the middle feeder is 2 and the bottom feeder is 3 Face down tray paper full The face down tray has become full You must remove all printed p...

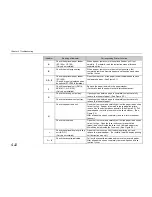
Page 174: ...the paper in the cassette is different to the size specified by the application software or by PRESCRIBE 2e command Put paper of the specified size into the cassette represents the cassette number If...

Page 175: ...nterface installed on the printer HARDDISK error20 Install the harddisk unit into the OPT2 slot This message is displayed when the optional harddisk unit is accidentally installed into the OPT1 slot B...

Page 176: ...imum limit and no more data can be saved Clean up the job or raise the maximum limit 98 MPS There was a page which could not be read out within a job the job is destroyed 99 MPS No job in the virtual...

Page 177: ...in the printer For details see the maintenance kit description manual Install M kit The maintenance kit LY 28 needs to be replaced Replace the maintenance kit since the total number of printed pages...

Page 178: ...onts and or macros or expand the printer s memory Note After this message has been displayed Page protect mode will be on To maintain optimum use of memory during printing display Page protect from th...

Page 179: ...he ready state and the battery of the memory card installed in the printer is low You can still enter the memory card mode but the battery should be changed as soon as possible Battery error MEMORY CA...

Page 180: ...cified Check the data names on the memory card 02 The memory card does not meet specifications This memory card cannot be used by this printer Insert a memory card which can be used by this printer Se...

Page 181: ...s 13 through 18 apply only to a flash memory card Read fonts Failed The font cannot be read due to insufficient memory A download font could not be loaded into printer memory due to insufficient avail...

Page 182: ...when any key is pressed when a timeout occurs or when subsequent data is received Expand printer memory to avoid this error Processing PAR 600 A4 Processing PAR 300 A4 600 dpi processing cannot be per...

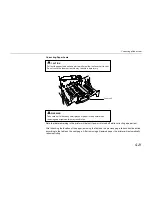
Page 183: ...In this example paper is jammed in the paper feeder C paper feed unit H and in the upper cassette 1 The corrective action to take in cases like this is explained using actual examples beginning from p...

Page 184: ...er feeder ST 1000 E Optional paper feeder ST 1000 F Optional paper stacker F 8118 F 8130 or AS M8111 G Face up output tray Face down output tray H Paper feed unit I Optional duplex printing unit AD 31...

Page 185: ...page take corrective action according to the table on the next page After removing all jammed paper the printer will automatically resume printing Fuser unit CAUTION Pull out the paper feed unit and w...

Page 186: ...of paper See Figure 5 2 Check the face down output tray If printing stops before a page is completely output carefully remove that sheet of paper H Check the paper feed unit Open the front cover and...

Page 187: ...care of this paper jam Notes ____________________________________________________________________ Sometimes the page on which the paper jam occurred will not be re printed depending on the location o...

Page 188: ...Chapter 5 Troubleshooting 5 24 Figure 5 1 Paper jam in paper feeder unit Figure 5 2 Paper jam in face up tray Printer s Side Cover Left Face Up Tray Paper Feeder s Side Cover...

Page 189: ...unit Figure 5 4 Paper jammed at the fuser unit Figure 5 5 Paper jammed inside the fuser unit Registration Roller Paper Feed Unit Grasp the tab green to open Fuser Unit Cover Tab green Open this cover...

Page 190: ...6 1 Chapter 6 Symbol Set Tables The following tables show all the characters included in the most common symbol sets available with the five emulations...

Page 191: ...Chapter 6 Symbol Set Tables 6 2 HP LaserJet 5M Symbol Sets LaserJet 5M HP Roman 8 8U LaserJet 5M ECMA 94 Latin 1 0N...

Page 192: ...et 5M Symbol Sets 6 3 LaserJet 5M US Legal 1U LaserJet 5M IBM PC 8 10U To have the printer print the characters of decimal numbers of 7 through 15 and 27 set the printer to the HP PCL transparent mode...

Page 193: ...0 12U To have the printer print the characters of decimal numbers of 7 through 15 and 27 set the printer to the HP PCL transparent mode ESC p X To have the printer print the characters of decimal numb...

Page 194: ...HP LaserJet 5M Symbol Sets 6 5 LaserJet 5M ISO Latin 6 6N LaserJet 5M PS Math 5M...

Page 195: ...Chapter 6 Symbol Set Tables 6 6 LaserJet 5M PS Text 10J LaserJet 5M Math8 8M...

Page 196: ...HP LaserJet 5M Symbol Sets 6 7 LaserJet 5M Pi font 15U LaserJet 5M MS publishing 6J...

Page 197: ...Chapter 6 Symbol Set Tables 6 8 LaserJet 5M Windows 9U LaserJet 5M Desktop 7J...

Page 198: ...HP LaserJet 5M Symbol Sets 6 9 LaserJet 5M ISO Latin 2 2N LaserJet 5M ISO Latin 5 5N...

Page 199: ...Chapter 6 Symbol Set Tables 6 10 LaserJet 5M WinBalt 19L LaserJet 5M PC775 26U...

Page 200: ...HP LaserJet 5M Symbol Sets 6 11 LaserJet 5M PC 1004 9J LaserJet 5M Windows Latin 1 19U...

Page 201: ...Chapter 6 Symbol Set Tables 6 12 LaserJet 5M Windows Latin 2 9E LaserJet 5M Windows Latin 5 5T...

Page 202: ...HP LaserJet 5M Symbol Sets 6 13 LaserJet 5M PC 852 Latin 2 17U LaserJet 5M PC Turkish 9T...

Page 203: ...Chapter 6 Symbol Set Tables 6 14 Macintosh 12J...

Page 204: ...HP LaserJet 5M Symbol Sets 6 15 LaserJet 5M International Characters...

Page 205: ...A 1 Appendix A Printer Specifications...

Page 206: ...PC 603e 166 MHz Main memory 8 MB expandable up to 72 MB with two SIMM slots Supported operating systems Windows 3 1 Windows 95 98 Windows NT Supported protocols IPX SPX TCP IP DLC Interfaces High spee...

Page 207: ...5 F Humidity 20 to 80 RH Optimum conditions 20 C 68 F 65 RH Altitude Max 2000m 6500 feet Power supply 120 V 60 Hz max 10 A U S A Canada 220 240 V 50 60 Hz max 5 A European countries Max allowable vol...

Page 208: ...B 1 Appendix B Paper Selection...

Page 209: ...re to use copy paper standard paper used in standard dry PPC photocopiers Note ______________________________________________________________________ Some recycled paper does not meet the necessary sp...

Page 210: ...6 inches Squareness of corners 90 0 2 Moisture content 4 to 6 Pulp content 80 or more Note______________________________________________________________________ Consult with your dealer before purchas...

Page 211: ...d to illegible printing misfeeding and paper jams and can shorten the life of the printer Select paper which has as smooth and even a surface as possible Note that use of paper with a surface coating...

Page 212: ...210 mm JIS B4 257 364 mm JIS B5 182 257 mm Ledger 11 17 inches Letter 8 5 11 inches Legal 8 5 14 inches Other sizes of paper can be fed from multi purpose tray The minimum size of fed paper is 80 148...

Page 213: ...oblems with paper jams The proper thickness is 0 086 to 0 110 mm 3 4 to 4 3 mils Moisture Content Moisture content is defined as the percent ratio of moisture to the dry mass of the paper Moisture can...

Page 214: ...other if it is stored unwrapped Paper will curl slightly upward when it passes through the fuser unit Load the paper with its natural curl downward so that it will come out flat Some paper also has a...

Page 215: ...ct again humidity Specially treated paper We recommend that you avoid using paper listed below which has been specially treated even if it meets basic specifications If you wish to use such paper test...

Page 216: ...pose tray or optional envelope feeder EF 100 or Universal Feeder UF 100 Since the composition and quality of special paper vary considerably special paper is more likely than white bond paper to give...

Page 217: ...perature of the printer s fusing process 200 C 392 F and do not use paper with any kind of surface treatment such as the type of paper commonly used for calendars Overhead Projection OHP Film OHP film...

Page 218: ...of even thickness due to their folded construction It therefore may not be possible to print evenly on an envelope surface in some cases Envelopes which are particularly thick may wrinkle as they come...

Page 219: ...r or backing sheet holds the label until use Due to the complexity of its composition adhesive backed label paper is particularly likely to give trouble in printing Top sheet white bond paper Adhesive...

Page 220: ...eam Composite weight 104 to 151 g m2 28 to 40 lbs ream Thickness of top sheet 0 086 to 0 107 mm 3 9 to 4 2 mils Composite thickness 0 115 to 0 145 mm 4 5 to 5 7 mils Moisture content 4 to 6 composite...

Page 221: ...in the laser printer s parallel RS 232C RS 422A interfaces It also lists pin assignments signal functions timings connector specifications and voltage levels The RS 232C RS 422A protocols are also cov...

Page 222: ...__ Use a parallel printer cable that complies with the IEEE1284 standards Nibble high default High speed data communication is used in compliance with the IEEE 1284 standard Ordinarily you should leav...

Page 223: ...ignments Pin In out Description 1 In Strobe nStrobe 2 In Data 0 Data 1 3 In Data 1 Data 2 4 In Data 2 Data 3 5 In Data 3 Data 4 6 In Data 4 Data 5 7 In Data 5 Data 6 8 In Data 6 Data 7 9 In Data 7 Dat...

Page 224: ...Strobe nStrobe Pin 1 A negative going Strobe pulse causes the printer to read and latch the data on the Data 0 1 to Data 7 8 signal lines Data 0 1 to Data 7 8 Pins 2 to 9 These eight signals form the...

Page 225: ...e signals are not used unless enabled by the FRPO command O2 parameter Auto Feed nAutoFd Pin 14 This signal is used in the Epson version of the Centronics interface to receive a carriage return In hig...

Page 226: ...line is not used Power Ready Pin 35 This signal is high when the printer s power is on Select In NSelectIn Pin 36 This signal is used in some versions of the Centronics interface to enable the compute...

Page 227: ...ignal Pin Assignments Pin In out Signal Description 1 FG Frame ground 2 Out TXD Transmit Data 3 In RXD Receive Data 4 Out RTS Request To Send 5 In CTS Clear To Send 6 In DSR Data Set Ready 7 SG Signal...

Page 228: ...er to send each signals with a signal ground 5 V DC Pin 11 This line is connected to the printer s 5 V DC line 5 V 0 5 V 250 mA Parallel and Serial total maximum fused DTR Data Terminal Ready Pin 20 T...

Page 229: ...ipped with an RS 422A serial interface Note______________________________________________________________________ The changing of the main circuit board jumper connector should be carried out only by...

Page 230: ...g the rear panel from the Printer 1 Turn the printer s power off Unplug the printer s power cable and disconnect the printer s interface cable from the computer 2 Remove the six screws from the printe...

Page 231: ...m Referring to the diagram set this jumper in the position which matches the serial interface mode to be used In this example the jumper setting is changed from RS 232C to RS 422A 2 After completion o...

Page 232: ...u at the end of this document and print the service status page 3 Verify whether the setting is corrected by checking the status printed at the bottom of the page The following sample indicates that R...

Page 233: ...signal ground SDA Send Data Inverted Pin 9 SDB Send Data Pin 10 These pins carry asynchronous data sent from the printer to the computer differential output 5 V DC Pin 11 This line is connected to the...

Page 234: ...They are indicated on the status printout They can be changed by the FRPO firmware reprogram command described in the Programming Manual The parameters and their identification codes are given below...

Page 235: ...ogic 2 DTR DSR negative logic 3 XON XOFF 4 ETX ACK 5 XON XOFF recognized only as protocol The factory setting is 0 Note______________________________________________________________________ Since DTR...

Page 236: ...a continuous stream H8 Received data buffer size This is the size of the input buffer specified in units of 10K bytes The factory set value is 6 meaning 60K bytes PRESCRIBE 2e FRPO D0 command The PRES...

Page 237: ...a bare shield wire Solder all these shield wires together into a single bundle 3 Using a section of flat wire about 3 mm wide and 15 mm long connect the bundle of shield wires to the metal facing of...

Page 238: ...it in place 5 Plug the other end of the cable into the computer s RS 232C interface connector 6 Switch on the printer s power 7 The printer s RS 232C parameters are factory set to the following value...

Page 239: ...wing commands C MODE COM1 96 N 8 1 P C MODE LPT1 COM1 To test the interface then enter CTRL P C DIR CTRL P The software settings made by the procedures above are temporary On most computers permanent...

Page 240: ...2 Cleaning knob 4 11 CONTINUE key 2 10 Control keys 2 9 Control panel 2 2 Copy indicator 2 6 D DATA indicator 2 7 Dispose of the old toner container 4 5 Dumping received data 2 57 E Ecoprint 2 60 5 6...

Page 241: ...selection menu list 2 24 MP Multi purpose tray 1 36 O OHP film B 10 ON LINE indicator 2 7 ON LINE key 2 9 Online offline 2 16 Optional interface 2 4 Options vii Output tray 2 14 P Paper B 1 Paper feed...

Page 242: ...ector 1 25 C 13 Setup and connections 1 13 SIMM 1 41 Size reduction 2 25 2 29 Sleep timer 2 56 Source size 2 30 Special paper B 9 S RAM card 2 40 STACK key 2 9 STATUS key 2 10 Status page 2 20 Sub tra...

Page 243: ...tting can be changed 5 Press the and key to select the desired setting 6 Press the ENTER key If you want to re enter a setting press the CANCEL key before pressing the ENTER key 7 Press the EXIT key T...

Page 244: ...serJet 5M KC GL Pen width Emulation KC GL KC GL Page set Pen 1 width 01 dot s Pen 1 width 01 dot s 2 On Print KPDL errs Off 2 1 Depending on the emulation selected various code sets are available 2 Th...

Page 245: ...orresponding error message is displayed When this is set to On printing is performed even if the actual paper size differs from the paper size given for the data 7 This menu is displayed only when Cus...

Page 246: ...increments up to 495 seconds 9 This is the total number of pages printed by the printer up to the present time 10 Although Auto is the default setting and this menu does not usually appear page prote...

Page 247: ...nus are for service personnel They should not be operated by the user Continued from previous page Perm Temp Off Permanent Buzzer On Resource prot Off Drum Print Status Page Developer Service 12 Print...

Page 248: ...This machine has passed all quality controls and final inspection...

Page 249: ...825 West Story Road TEL 973 808 8444 Irving Texas 75038 5299 FAX 973 882 4401 TEL 972 550 8987 FAX 972 570 4704 Midwestern Region 225 Spring Lake Drive Dallas Parts Distribution Center Itasca Illinois...

Reviews: