Setup and Connections
1-
13
Setup and Connections
Set up the printer according to the following steps.
1.
Install the printer on the paper feeder. ............................................................................ Page 1-14
2.
Open the top cover. ........................................................................................................ Page 1-15
3.
Install the toner container. .............................................................................................. Page 1-16
4.
Close the top cover. ........................................................................................................ Page 1-19
5.
Adjust the paper guide on the paper feed cassette. ....................................................... Page 1-19
6.
Add paper. ...................................................................................................................... Page 1-22
7.
Open the paper stopper on the face-down tray (if required). .......................................... Page 1-24
8.
Open the face-up output tray (when the tray is being used). .......................................... Page 1-24
9.
Connect the printer to the computer. .............................................................................. Page 1-25
10.
Attach the power cord. .................................................................................................... Page 1-27
11.
Test the printer. ............................................................................................................... Page 1-28
12.
Test the interface with the computer. .............................................................................. Page 1-29
13.
Install the printer driver. .................................................................................................. Page 1-30
Summary of Contents for DP-2800
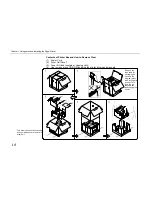
Page 30: ...Unpacking and Inspection 1 9 How to Remove the Paper Feeder...
Page 88: ...Chapter 2 Operating the Page Printer 2 20 Sample Status Page 4 5 6 2 3 7 8 9 1...
Page 137: ...Chapter 3 Fonts 3 4 Resident Scalable Fonts 1...
Page 138: ...List of Fonts 3 5 Resident Scalable Fonts 2...
Page 139: ...Chapter 3 Fonts 3 6 KPDL Fonts 1...
Page 140: ...List of Fonts 3 7 KPDL Fonts 2...
Page 153: ...Toner Container Replacement 4 9 11 Close the top cover...
Page 164: ...Chapter 4 Maintenance 4 20 8 Close the printer s front cover...
Page 194: ...HP LaserJet 5M Symbol Sets 6 5 LaserJet 5M ISO Latin 6 6N LaserJet 5M PS Math 5M...
Page 195: ...Chapter 6 Symbol Set Tables 6 6 LaserJet 5M PS Text 10J LaserJet 5M Math8 8M...
Page 196: ...HP LaserJet 5M Symbol Sets 6 7 LaserJet 5M Pi font 15U LaserJet 5M MS publishing 6J...
Page 197: ...Chapter 6 Symbol Set Tables 6 8 LaserJet 5M Windows 9U LaserJet 5M Desktop 7J...
Page 198: ...HP LaserJet 5M Symbol Sets 6 9 LaserJet 5M ISO Latin 2 2N LaserJet 5M ISO Latin 5 5N...
Page 199: ...Chapter 6 Symbol Set Tables 6 10 LaserJet 5M WinBalt 19L LaserJet 5M PC775 26U...
Page 200: ...HP LaserJet 5M Symbol Sets 6 11 LaserJet 5M PC 1004 9J LaserJet 5M Windows Latin 1 19U...
Page 201: ...Chapter 6 Symbol Set Tables 6 12 LaserJet 5M Windows Latin 2 9E LaserJet 5M Windows Latin 5 5T...
Page 202: ...HP LaserJet 5M Symbol Sets 6 13 LaserJet 5M PC 852 Latin 2 17U LaserJet 5M PC Turkish 9T...
Page 203: ...Chapter 6 Symbol Set Tables 6 14 Macintosh 12J...
Page 204: ...HP LaserJet 5M Symbol Sets 6 15 LaserJet 5M International Characters...
Page 205: ...A 1 Appendix A Printer Specifications...
Page 208: ...B 1 Appendix B Paper Selection...
Page 248: ...This machine has passed all quality controls and final inspection...


