background image

CHAPTER 7  MANAGEMENT AND SETTING

7-12

3

5

4

6

(Inch)

(Metric)

2

1

(Inch)

(Metric)

2

1

(Inch)

(Metric)

2

1

(Inch)

(Metric)

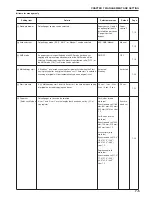
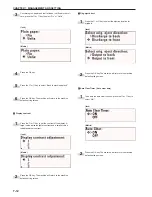
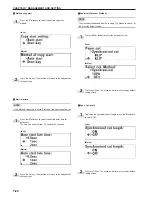
Concerning the paper end that is fixed or not fixed to the roll
core, press the

 ▼ 

or

 ▲ 

key to select “Fix” or “Unfix”.

Press the OK key.

Press the

 ▼ 

or

 ▲ 

key to select “Back to machine default”.

Press the OK key. The machine will return to the machine
default setting screen.

5

5

5

5

5

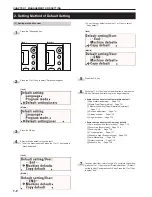
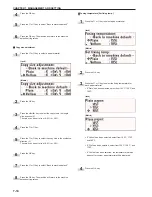
 Display contrast

Press the

 ▼ 

or

 ▲ 

key to set the contrast of the display. A

larger value indicates lighter contrast and a smaller value
indicates darker contrast.

Press the OK key. The machine will return to the machine
default setting screen.

6

6

6

6

6

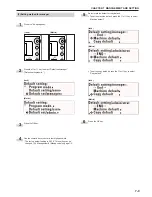
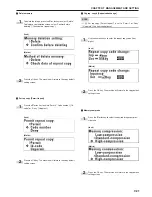
 Orig.eject direct

Press the

 ▼ 

or

 ▲ 

key to select the ejection location for

originals.

Press the OK key. The machine will return to the machine
default setting screen.

7

7

7

7

7

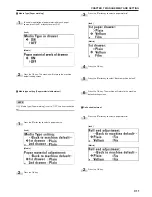
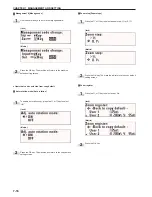
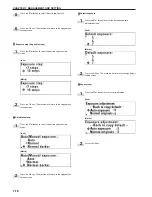
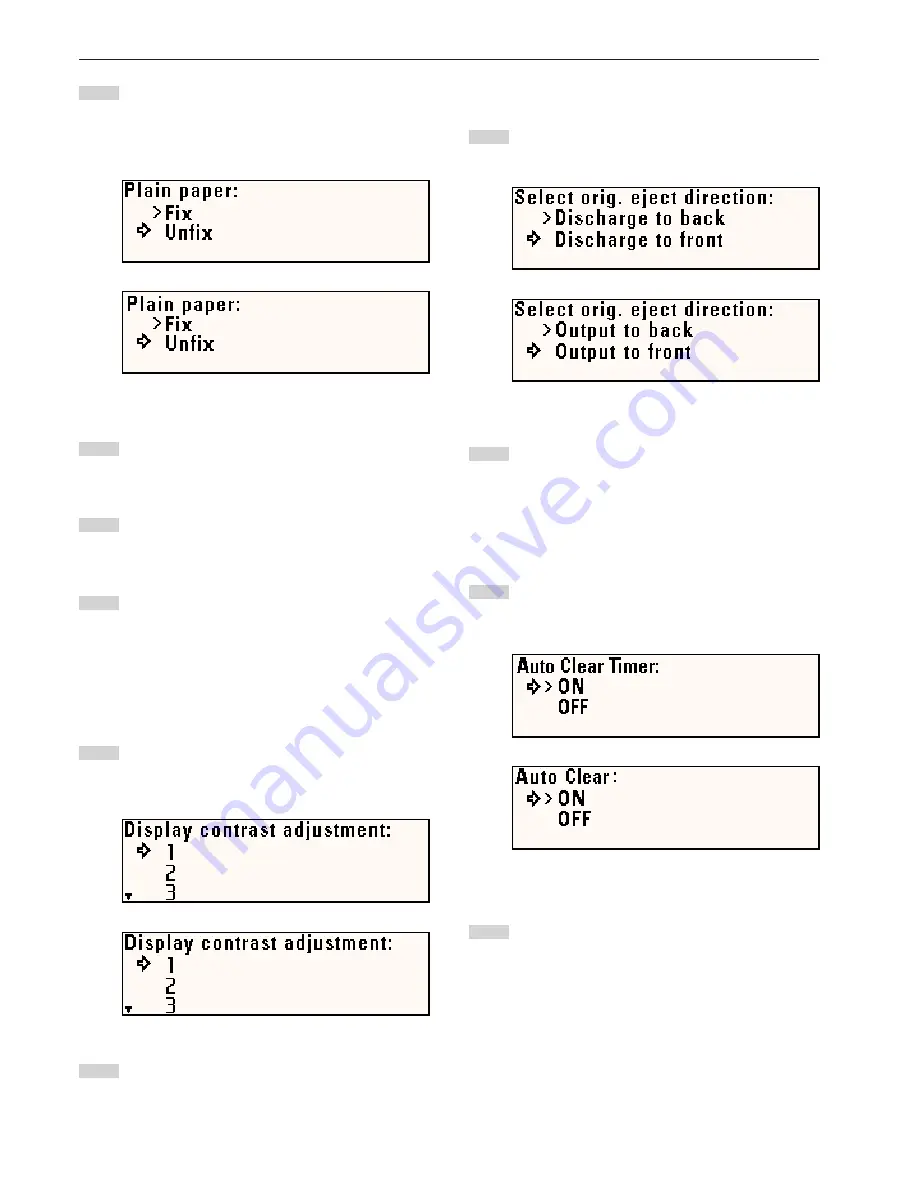
 Auto Clear Timer  [Auto clear time]

To enable the auto clear function, press the

 ▼ 

or

 ▲ 

key to

select “ON”.

Press the OK key. The machine will return to the machine
default setting screen.

Summary of Contents for 4850w

Page 1: ...Please read the Operation Guide before using the copier Keep it in the designated location for easy reference Operation Guide...

Page 2: ...ion by promoting the manufacture and sale of products that fulfill program standards International Energy Star Program standards require that copies come equipped with a Low Power Mode where energy co...

Page 3: ...atten tion to or incorrect compliance with the related points Symbols The m symbol indicates that the related section includes safety warnings Specific points of attention are indicated inside the sy...

Page 4: ...print 5 7 3 Border Erase mode 5 9 4 Mirror mode 5 10 5 Rotation mode 5 11 3 Sort Group copy 5 12 1 Sort copy 5 12 2 Group copy 5 13 i Contents CHAPTER 6 CONVENIENT FUNCTIONS 6 1 1 Adjustment Functions...

Page 5: ...to a specified paper size Numeric key zoom key input Page 5 4 To enlarge reduce copies in 1 or 0 1 increments Preset R E mode Page 5 1 To enlarge reduce copies to preset ratios Independent Zoom mode P...

Page 6: ...blemishes around edges Mirror mode Page 5 10 To make mirror image copies Rotation mode Page 5 11 To rotate images by 90 Preview Copy mode Page 6 6 To make a sample copy to verify the contrast Repeat...

Page 7: ...al and the installation environment of the machine Copy size fine adjustment Page 6 2 To make temporarily fine adjustments for copy size Inclination adjustment Page 6 1 To correct the inclination betw...

Page 8: ...APTER 1 IMPORTANT PLEASE READ FIRST 1 1 NOTE DO NOT remove these labels Label 1 High temperature inside Do not touch parts in this area because there is a danger of getting burned Label 4 5 High volta...

Page 9: ...plug to avoid the danger of fire or electrical shock Avoid locations near radiators heaters or other heat sources or locations near flammable items to avoid the danger of fire To keep the copier cool...

Page 10: ...ged period of time remove all paper from the roll unit and seal in its original packaging Cautions when using the copier WARNING DO NOT place metallic objects or containers with water flower vases flo...

Page 11: ...8 Main body release lever Operate this lever in the case of a paper jam 9 Original table 0 Original holders A long rolled original can be set Bypass table Bypass guide Front cover Open to set paper r...

Page 12: ...oll unit paper source 3 fl Instruction handbook box Keep the instruction handbook here Waste toner tank Paper transport knob Operate this knob in the case of a paper jam Dew prevention heater switches...

Page 13: ...CHAPTER 2 NAMES OF PARTS 2 3...

Page 14: ...CHAPTER 2 NAMES OF PARTS 2 4 Inch Metric 2 Operation panel...

Page 15: ...es the status of use of image memory Lit Image has been stored in memory Off No image is stored in memory Blinking Image is being stored in memory Repeat copy key indicator Press this key to make repe...

Page 16: ...ial settings This function can be enabled or disabled by using 7 Auto Clear Timer Auto clear time Page 7 2 The time for this function can be set by using 9 Timer set Page 7 2 3 Message display 1 Indic...

Page 17: ...Original sizes in standard sizes are 8 1 2 x 11 to 36 x 48 A4 portrait to A0 Original thickness is 64 to 80 g m2 Original length is 11 to 237 279 to 6000 mm Original width is 8 1 2 to 36 210 to 920 m...

Page 18: ...6 Orig eject direct of the default setting is set to Discharge to front Output to front remove the original loop guide 3 Setting the Original Holders When copying a long rolled original open the orig...

Page 19: ...r sheet option use this carrier sheet Page 3 1 Carrier sheet sizes 36 x 48 24 x 36 A0 A1 A2 Open the carrier sheet by lifting up the transparent side and place the original face up between the two she...

Page 20: ...to back Output to back If Discharge to front Output to front is set the original may be damaged If synchronized cut is used in 100 copying paper will be cut in length of the carrier sheet 6 How to Use...

Page 21: ...sizes B1 728 mm B2 515 mm B3 364 mm B4 257 mm Inch machine Architecture 36 30 24 18 15 12 Engineering 34 30 22 17 15 11 NOTE Automatic detection will not function for the bypass Paper width of non sta...

Page 22: ...on indicated by the arrow to align the inside and outside m marks on the flange The flange will be secured to the paper roll Secure the other flange to the paper roll similarly Set the paper roll in t...

Page 23: ...ely Insert the roll unit securely into the main body of the machine Close the front cover To align the leading edge of the paper roll press the Paper Cut key The leading edge of the paper roll will be...

Page 24: ...n on the size label of the copy tray After setting the copy tray support plate to the desired size return it to a horizontal state Set the other copy tray support plate to the same height in the same...

Page 25: ...basic screen The machine also enters the initial state when the auto clear function is activated or the Reset key is pressed Be sure to ensure that the machine is in the initial state before copying W...

Page 26: ...r indicating a paper source will be displayed in the message display When the bypass is selected the margin copy border erase APS and AMS functions cannot be used 4 Select the paper material Page 4 5...

Page 27: ...functions Set the desired functions referring to the description of each function 9 Set the number of copies to be made Use the numeric keys to enter the desired number of copies from 1 to 99 The init...

Page 28: ...t to ON when the orientation of the original is different from that of the paper the image will be automatically rotated counterclockwise by 90 degrees and copied 2 AMS mode When an original is set th...

Page 29: ...Paper working of the default setting is set to ON the paper material installed in each paper source can be registered If the Paper Source key is pressed to select a paper source the paper material se...

Page 30: ...asic screen 2 Standard cut Paper is cut in length of standard size or in a length that has been registered The following lengths can be selected Cut size inch machine Architecture Engineering 48 44 42...

Page 31: ...3 Numeric key input Enter the desired cut size using the numeric keys For paper in the bypass table cut cannot be selected Press the Cut Size key Press the or key to select keys Use the numeric keys t...

Page 32: ...Adjust the bypass guides to the paper size indications on both sides of the bypass table Set the paper face down all the way into the feed slot aligning with the paper size indication When placing pap...

Page 33: ...l in the sort copy mode Press the Stop Clear key To stop immediately output of paper while the copy is being output to cut the paper at some midpoint Press the Roll Cut key To stop output of paper whi...

Page 34: ...12 4...

Page 35: ...11 279 mm If reduction and synchronized cut are set and the calculated paper length is less than 11 279 mm paper will be cut in length of 11 279 mm and a blank area will be added in the trailing edge...

Page 36: ...1 B4RB1 200 0 200 A2RA0 A3RA1 A4RA2 B3RB1 B4RB2 141 4 141 A1RA0 A2RA1 A3RA2 B2RB1 B3RB2 B4RB3 70 6 70 A0RA1 A1RA2 A2RA3 B1RB2 B2RB3 B3RB4 50 0 50 A0RA2 A1RA3 A2RA4 B1RB3 B2RB4 35 2 35 A0RA3 A1RA4 B1RB...

Page 37: ...e default setting to register any magnification ratio Page 7 4 Press the Preset R E key Press the or key to select User Setting Zoom Press the OK key Press the or key to select the desired magnificati...

Page 38: ...tios can be changed by using the O P and keys 4 Zoom The magnification ratio can be entered by using the O or P key or the numeric keys Press the Preset R E key Press the or key to select Zoom keys Us...

Page 39: ...shift up Image shift down Image shift to left Image shift to right NOTE The default value for shift up shift down shift to left and shift to right can be set respectively by using Edit Function defaul...

Page 40: ...e the setting ensure that End is selected and press the OK key The machine will return to the basic screen Press the OK key The shift direction and the shift amount will be displayed in the top line o...

Page 41: ...in 100 copying and a trailing margin is added the paper length will be longer than the original length by the amount of the margin If the margin of the trailing edge is cut the paper length will be s...

Page 42: ...proceed to step 10 Press the or key to select or and use the numeric keys to enter the amount of margin Press the OK key Setting a margin at the trailing edge To set a margin at the trailing edge pres...

Page 43: ...selected and press the OK key The machine will return to the basic screen Canceling all margin copy settings To cancel all margin copy settings press the or key to select Cancel and press the OK key...

Page 44: ...out change ensure that ON is selected Press the OK key If Change has been selected proceed to the next step If ON has been selected the machine will return to the basic screen Use the numeric keys to...

Page 45: ...or key to select ON Press the OK key The machine will return to the basic screen 5 Rotation mode This mode rotates original images by 90 degrees Press the Editing key Press the or key to select Rotat...

Page 46: ...ings for the next original Set the next original Scanning of the original will start Only one copy of the scanned original will be output Repeat steps 4 and 5 for remaining originals NOTE The maximum...

Page 47: ...nal Scanning of the original will start and copies will be output When the message Insert next original appears make copy settings for the next original Set the next original Scanning of the original...

Page 48: ...12 4...

Page 49: ...itial state 1 Inclination adjustment Use this function when the original image is inclined Press the Output Adj key Press the or key to select Adj incline Press the OK key Press the O or P key to set...

Page 50: ...the or key to select Fuse size Fusing size Press the OK key To adjust the copy size in the widthwise X direction press the O or P key To adjust the copy size in the lengthwise Y direction press the or...

Page 51: ...rature upward for thick paper and downward for thin paper Press the Output Adj key Press the or key to select Fuse temp Fixing temp Press the OK key Press the or key to adjust the fixing temperature T...

Page 52: ...irst copying by more than 10 1 How to make a repeat copy After a copy run is complete the message Repeat Copy Repeat Key will appear Press the Repeat Copy key The Repeat Copy indicator will light up a...

Page 53: ...the Reset key is pressed when repeat copy has been set the image data in memory will be deleted To prevent image data from being deleted by mistake a confirmation screen for image deletion can be dis...

Page 54: ...y contrast setting NOTE Preview image and preview contrast can be changed by using Adj preview copy of the default setting Page 7 7 Set the copy settings such as copy functions and copy contrast as ne...

Page 55: ...erflow Once a document scan exceeding 60 pages has been initiated the job reserve function will not be available until the preceding copy operation completes 1 Reserving a job Press the Add Job key Th...

Page 56: ...ey to turn off the Add Job indicator before executing this step Press the or key to select a job number to be deleted Press the OK key A confirmation screen for canceling job reserve will appear Press...

Page 57: ...he Language key Press the or key to select Program mode Program mode Press the OK key Press the or key to select a program number to which the copy conditions selected in step 1 are to be registered f...

Page 58: ...key The program will be recalled and the machine will return to the basic screen Press the OK key Registered copy conditions will be displayed To check the details of registered copy conditions proce...

Page 59: ...ng copy operation completes When a scan copy operation exceeding 60 pages is complete and an interrupt copy is initiated the memory of scanned originals of the previous copy job will be cleared and so...

Page 60: ...g state when the auto energy saver time elapses The factory default setting of the auto energy saver time is 15 minutes The auto energy saver time can be set to from 5 minutes to 45 minutes in 5 minut...

Page 61: ...be used For each paper source Auto Input width 8 5 to 36 2 210 mm to 920 mm Auto 2 Media Type Paper working If this item is set to ON a paper material can be registered for each paper source Fixing te...

Page 62: ...time it is recommended that the time be shorter Auto clear time 10 to 300 seconds in 10 second increments 90 seconds Auto energy saver time 5 minutes to 45 minutes in 5 minute increments 60 minutes 9...

Page 63: ...e standard cut length and paper width and original width to be detected automati cally by this machine Architecture engineer ing A sizes B sizes Architec ture A sizes Auto roll over If paper of the sa...

Page 64: ...on 25 0 to 400 0 Y lengthwise direction 25 0 to 400 0 Zoom 100 0 4 Cut size register Any length can be registered to user 1 and user 2 as choice of standard cut User 1 user 2 11 to 237 279 mm to 6000...

Page 65: ...art when the Start key is pressed after an original has been set If Auto start is selected scanning of original will start automatically when an original is set Auto start Start key Auto start Start l...

Page 66: ...et to Code number ID code can be changed 0000 to 9999 4850 Memory compress The compression ratio of image data stored in memory can be set If compression ratio is set to a higher level the allowable n...

Page 67: ...to 8 0 200 to 200 mm 2 0 50 mm Border Erase 0 0 to 8 0 0 to 200 mm 0 4 10 mm Adj preview copy Sample copy type for the preview copy function can be selected Preview image Preview contrast Preview con...

Page 68: ...tems that can be selected from machine default 1 Paper width adjustment Page 7 10 2 Media Type Paper working Page 7 11 3 Media type setting Paper material adjustment Page 7 11 4 Roll end adjustment Pa...

Page 69: ...manager Default setting admin Press the OK key Use the numeric keys to enter a four digit password The factory default setting is 4850 This setting can be changed Management Manag code on page 7 3 Se...

Page 70: ...re adj Page 7 18 9 Standard drawer Page 7 19 0 Auto select set Page 7 19 AMS mode Page 7 19 Method copy start Page 7 20 Start late time Page 7 20 Paper cut Selec cut Method Page 7 20 Sync Cut length P...

Page 71: ...efault setting screen 3 3 3 3 3 Media type setting Paper material adjustment NOTE If 2 Media Type Paper working is set to OFF this item cannot be set Press the or key to select a paper source Press th...

Page 72: ...ntrast Press the or key to set the contrast of the display A larger value indicates lighter contrast and a smaller value indicates darker contrast Press the OK key The machine will return to the machi...

Page 73: ...is set to OFF the auto shut off time cannot be set When setting the auto preheat time do not set a longer time than the auto shut off time Press the or key to select the function for which the timer...

Page 74: ...y size in the widthwise direction Y The value can be set to from 3 0 to 3 0 Press the OK key Press the or key to select Back to machine default Press the OK key The machine will return to the machine...

Page 75: ...terial Press the OK key Press the O and P keys to set the copy size For the method of setting see 0 Copy size adjustment on page 7 2 Press the OK key The machine will return to the machine default set...

Page 76: ...Items that can be selected from copy default 1 1 1 1 1 Auto rotation mode Auto rotation To enable auto ration copy press the or key to select ON Press the OK key The machine will return to the copy d...

Page 77: ...the numeric keys to select the desired magnification ratio in paper lengthwise direction X The ratio can be set to from 25 0 to 400 0 Press the or key Press the or key or the numeric keys to select t...

Page 78: ...copy contrast mode Press the OK key The machine will return to the copy default setting screen 6 6 6 6 6 Auto Manual exp Press the or key to select the desired copy contrast mode Press the OK key The...

Page 79: ...9 9 9 9 9 Standard drawer Press the or key to select the desired paper source Press the OK key The machine will return to the copy default setting screen 0 0 0 0 0 Auto select set Press the or key to...

Page 80: ...esired delay time for auto start The time can be set to from 0 5 second to 5 seconds Press the OK key The machine will return to the copy default setting screen Paper cut Selec cut Method NOTE The siz...

Page 81: ...ress the or key to select Permit Code number Id code or Deny Unpermit Press the OK key The machine will return to the copy default setting screen Chg rep copy Repeat codechange NOTE If Per rep copy Pe...

Page 82: ...to step 6 If Border erase has been selected proceed to step 7 Press the or key to select the desired image shift direction and use the numeric keys to enter the shift amount Set the shift amount to fr...

Page 83: ...tting screen Adj preview copy Press the or key to select the desired preview copy type Press the OK key The machine will return to the copy default setting screen Reduce length Ldt Use the numeric key...

Page 84: ...tching The messages of this machine can be displayed in Japanese American English British English French Spanish German and Italian Press the Language key Press the or key to select Language Press the...

Page 85: ...ose the toner tank cover securely Close right cover The right cover is open Close the right cover securely Close original holder Close the cover of orig holder An original holder or the original leadi...

Page 86: ...5 Countermeasures against Call for service Message Memory full Memory overflow has occurred See 4 Countermeasures against Memory Overflow Could not be saved Original images cannot be saved in memory...

Page 87: ...al and copy it again Exceeded zoom range Cannot modify copy The maximum enlargement ratio for repeat copying is ex ceeded Perform copying operation again to continue copying Cannot repeat copy this zo...

Page 88: ...tle into the opening as shown in the illustration While pressing the toner bottle down turn it clockwise by 90 degrees Toner will be replenished Tap the side of the toner bottle 7 or 8 times to drop t...

Page 89: ...chine Close the right cover Toner in the waste toner tank cannot be reused CAUTION DO NOT attempt to incinerate the toner bottles or the waste toner tank Dangerous sparks may cause burns CAUTION DO NO...

Page 90: ...opying is performed while the original is being scanned in normal copying The overall image data could not be saved in memory If the number of copies is more than 1 only one copy will be output Repeat...

Page 91: ...or output of scanned originals will appear Press the or key to select Yes or No If No is selected output will be canceled Press the OK key If Yes has been selected proceed to the next step A screen fo...

Page 92: ...ns Stop use of this machine and follow the procedure below Pull the main body release lever to open the main body and then close the main body If the same message remains make a note of the displayed...

Page 93: ...tions Do not reuse any paper that has jammed If the jammed paper tears during removal make sure not to leave any pieces inside the machine as this would cause another jam After removal of jammed paper...

Page 94: ...tion release lever toward you The ejection cover will be opened Remove the jammed paper IMPORTANT When opening the ejection cover be sure to pull out the original table in advance WARNING High voltage...

Page 95: ...hard but simply proceed to the next step Grasp the main body release lever and pull it toward you The main body will be opened If the paper is seen remove it from inside the machine If the jammed pape...

Page 96: ...p both of the paper roll insertion latches 3 and open the paper roll insertion cover 4 Insert the leading edge of the paper back under the paper roll insertion guide and pull the edge out approximatel...

Page 97: ...The leading edge of the paper will be cut Original jam in the original cover If an original has jammed in the original cover the following message will appear Perform the following procedure to remov...

Page 98: ...ed Pull out the paper roll until the damaged portion comes out and then cut it before using it Copy image is skewed Was the original fed straight Set the original referring to Setting the original wit...

Page 99: ...unit flange properly Is the fixing temperature proper Adjust the fixing temperature to a lower temperature Toner does not adhere well to the copy paper Is the paper material setting correct Press the...

Page 100: ...nish toner Is the paper wet Replace the paper roll with a new one Depending on the operating environment turn the dew prevention heater switch on The copy image is dark Is the copy contrast set to aut...

Page 101: ...ct glass cannot be removed wipe the glass with a cloth moistened with water or weak neutral detergent Never use thinner or other solvents Open the original cover so that cleaning can be performed easi...

Page 102: ...DIMM 64 MB 128 MB 256 MB 512 MB Paper feed system Two roll units and bypass Acceptable copy paper Standard paper 64 to 80 g m2 vellum film Multiple copies Up to 99 Reading system Scanning exposure of...

Page 103: ...12 4...

Page 104: ...switches and are not suitable for isolating the equipment from the power source ATTENTION Le d branchement de la fiche secteur est le seul moyen de mettre l appareil hors tension Les interrupteurs su...

Page 105: ...equency energy and if not installed and used in accordance with the instruction manual may cause harmful interference to radio communications Op eration of this equipment in a residential area is like...

Page 106: ...A1...

Page 107: ...For best copy results and machine performance we recommend that you use only KYOCERA MITA original supplies for your KYOCERA MITA copier...

Page 108: ...2001 KYOCERA MITA CORPORATION is a trademark of Kyocera Corporation Rev 8 0 2006 8 302A780027...

Reviews: