background image

Finishing 

User Guide

5-7

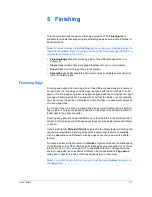
1

With 

Punch

 selected in the 

Finishing

 tab, click the 

Settings

 button.

1

2

In the 

Punch


Position


Settings

 dialog box, select where to place the hole punches 

on the page: 

Left

Right

, or 

Upper

.

2

3

In the 

Punch Position Settings 

dialog box, click 

OK

.

3

4

Click 

OK

 to return to the 

Print

 dialog box.

4

5

Click 

OK

 to start printing.

5

The print job will be punched by the finishing device and delivered to the output tray. 

Note:  

Each sheet will be punched separately. When sheets are stacked, the holes 

may not line up exactly.

You can increase the left or top margin to provide additional space for hole punches 
by using the 

Gutter

 feature. For further details, refer to 

Gutters

 on page 5-3.

Separation

When multiple copies of a print job are printed, they can be difficult to separate in the 
output tray. The 

Separation

 feature stacks copies so that one can be clearly 

distinguished from another. Available options are:

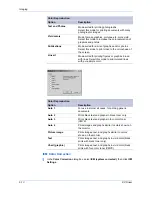
Offset jobs 

physically shifts each print job in the output tray.

Rotate copies

 stacks each copy of a print job at right angles in the output tray.

Note:  Offset jobs 

and 

Rotate copies

 will not be available at the same time. Some 

models do not support both options.

Offset Jobs

Offset jobs physically shifts each print job in the output tray. This feature requires an 
optional finishing device such as a Booklet stitcher or Multi finisher. For further 
details, refer to 

Installing Optional Devices

 on page 2-1.

Note:  

To ensure consistent offset stacking, all users printing to the same printing 

system should select 

Offset jobs

 as the default setting. For further details, refer to 

Printer Properties

 on page 2-1.

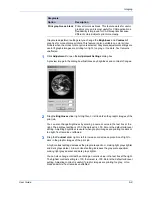
1

From the application’s 

Print

 dialog box, open 

Properties

. (Select 

Print

 from the 

File


menu, and select 

Properties

.)

1

2

In the 

Basic

 tab, under 

Destination

, select a face-down finishing tray, such as 

Finisher (face-down)

 or 

Tray A (face-down)

.

2

Summary of Contents for C220N - EcoPro EP Color Laser Printer

Page 1: ...KX Driver User Guide ...

Page 2: ...8 Me or Windows NT When using this printer driver the items that can be configured will differ depending on the model of your printing system The explanatory screens shown in this guide may differ from your printing system Copyright 2007 KYOCERA Corporation Copyright 2007 Revised Edition KYOCERA MITA Corporation All rights reserved TC Rev 5 7v FS 820 FS 920 FS 1118MFP FS 1030D FS 2000D FS 3900DN F...

Page 3: ...operties Accessing Printer Properties 2 1 Installing Optional Devices 2 1 Device Options 2 2 Punch Settings 2 3 Assigning Virtual Mail Boxes 2 3 RAM Disk 2 4 User Settings 2 4 Identification 2 4 Unit of Measurement 2 5 Language Preference Selection 2 5 Page Description Language PDL 2 5 PDL Settings 2 5 Administrator Settings 2 9 User Login 2 9 Job Accounting 2 11 Operation Panel Message 2 12 Admin...

Page 4: ...ing Finishing Edge 5 1 Gutters 5 3 Staple 5 4 Using the Stapler 5 4 Punch 5 5 Using Hole Punch 5 6 Separation 5 7 Offset Jobs 5 7 Rotate Copies 5 8 Chapter 6 Imaging Print Quality 6 1 Custom Print Quality Settings 6 1 Fonts 6 2 Font Substitution 6 4 Disable Device Fonts 6 4 Graphics 6 4 Pattern Scaling 6 5 Inversion Options 6 5 Optimization 6 6 CIE Option 6 6 Halftone Screen Monochrome Printing Sy...

Page 5: ...on Tandem Print 8 24 Chapter 9 Advanced Prologue Epilogue 9 1 Select Prologue Epilogue File to Insert 9 2 Add 9 2 Edit 9 2 Delete 9 2 Insertion Point 9 2 Watermark 9 3 Select Watermark 9 4 Page selection 9 4 Add Watermark 9 5 Additional Text Options 9 5 Selecting and Creating Custom Colors Color Models Only 9 7 Edit Watermark 9 7 Delete Watermark 9 8 Security Watermark 9 8 Select Security Watermar...

Page 6: ...iv Import and Export Profile 10 2 Available Fonts viii Glossary iv Index x ...

Page 7: ... separately is not recommended 1 Turn the power for the computer and printer off 1 2 Ensure that the printer is ready to print remove packing materials insert paper and any toner or ink cartridges then connect the computer and printer using either USB a parallel cable or a network cable For further details on connecting the printer to the computer refer to the printer s Operation Guide 2 3 Once co...

Page 8: ...ows NT see Custom Installation on page 1 4 Express Installation Express mode is for a USB or network connection only The installer can find the printer if it is turned on and connected by USB or network cable For the simple default installation select Express Mode Installation In the Custom method you are able to choose which software packages to install and specify the port To use the Custom meth...

Page 9: ... the printer lists in applications You can also choose to share this printer with others or set this printer as the default printer Make your selections and then click Next 3 4 Confirm the settings and click Install 4 5 The Printer Installed Successfully page appears Click Finish to exit the Printer Installation Wizard and return to the CD ROM main menu 5 The installation of the printer is now com...

Page 10: ... printer is now complete If prompted restart your system Custom Installation When using the Custom method you can specify the printer port and choose which software packages to install For example if you do not want to overwrite your existing fonts you would choose the Custom mode and then clear Fonts in the Custom Installation page shown in step 10 below Vista Custom Installation 1 Select Custom ...

Page 11: ... find a printing system that is already turned on and is connected to the network click Discover and go to step 5 on page 1 8 OR To manually select your printing system and port select Custom select and then click Next 4 The Printer Port page appears If the port you want to use appears in the Port name list select it and click Next then go to step 5 on page 1 8 4 ...

Page 12: ...tallation 1 6 KX Driver To create a new port click Add Port and then click Next The Add Port wizard will appear Add Port Wizard in Vista 1 Ensure that the printing device is turned on and connected to the network then click Next 1 ...

Page 13: ...stallation User Guide 1 7 2 Type the printer name or IP address and then click Next 2 3 When the port has been created the page shown below appears Click Finish to close the Add Port Wizard and return to the installation wizard 3 ...

Page 14: ...the Printing System to install and click Next 5 6 In Printer Settings you can customize the name of the printing system This is the name that appears in Windows Printers and Faxes and in the printer lists in applications You can also choose to share this printer with others or set this printer as the default printer Make your selections and then click Next 6 ...

Page 15: ...r is now complete If prompted restart your system Windows XP USB Custom 1 Ensure that your printer and computer are connected using the USB cable 1 2 Select Custom Mode 2 3 For Custom Mode select Driver or Utilities or both Later in the installation you can select which driver and utilities to install Choices for Driver include the KX Driver and the mini Driver Choices for Utilities include Fonts ...

Page 16: ...Universal serial bus USB in Connection Type and then click Next 4 5 In Printing System select your printer and then click Next 5 6 In Custom Installation select the software packages you want to install and clear those not intended for installation Click Next 6 ...

Page 17: ...ystem Windows 98 USB Custom 1 Ensure that your printer and computer are connected using the USB cable 1 2 Select Custom Mode 2 3 For Custom Mode select Driver or Utilities or both Later in the installation you can select which driver and utilities to install Choices for Driver include the KX Driver and the mini Driver Choices for Utilities are Fonts the Kyocera Scanner Driver KMnet for Clients and...

Page 18: ...cable to the USB port on the printing system page appears verify that the USB cable is connected and then click Cancel 8 9 The installer will notify you that the software has finished installing Click Finish 9 The installation of the printer is now complete If prompted restart your system Windows 98 and XP Parallel Port LPT 1 Select Custom Mode 1 2 For Custom Mode select Driver or Utilities or bot...

Page 19: ...r Guide 1 13 the mini Driver Choices for Utilities are Fonts the Kyocera Scanner Driver KMnet for Clients and Driver Deleter 2 3 In Connection Type select Parallel Port LPT then click Next 3 4 In Printing System select your printer and then click Next 4 ...

Page 20: ... or set this printer as the default printer Make your selections and then click Next 6 7 In Printer Port select a port and then click Next 7 8 Confirm the settings and then click Install 8 9 In the Printer Installed Successfully dialog select Yes to install more printers or No to end installations Click Finish 9 The installation of the printer is now complete If prompted restart your system Window...

Page 21: ...es not already exist on your computer the KPrint Add Port Wizard will open after step 7 4 Note For Windows 98 NT Standard TCP IP Port is not available Select KPrint Port 5 In Printing System select the model and then click Next 5 6 In Custom Installation select the software packages you want to install and clear those not intended for installation Click Next 6 7 In Printer Settings you can customi...

Page 22: ...enter the IP address or host name and then click Next 9 The Confirm Settings page appears Verify the printer settings are correct then click Install The printer driver installation begins 9 10 Once the installation is complete the Printer Installed Successfully page appears 10 The installation of the printer is now complete If prompted restart your system 11 Create a New Port Add a Raw Port 1 In t...

Page 23: ...ress or Host name field 4 Enter a custom name optional for the port and then click Next 4 5 Check the settings and then click Finish 5 6 The Confirm Settings page appears Verify the printer settings are correct then click Install The printer driver installation begins 6 7 Once the installation is complete the Printer Installed Successfully page appears 7 The installation of the printer is now comp...

Page 24: ...ess or host name of the print server page enter the IP Address or Host Name and click Next 2 If the IP Address or Host Name is not known click Search A list of available network printers appears Select a network printer then click OK If you know the IP address enter it in the IP address or Host name field 3 Confirm the destination printer port name and click Next 3 ...

Page 25: ...tall The printer driver installation begins 5 6 Once the installation is complete the Printer Installed Successfully page appears 6 The installation of the printer is now complete If prompted restart your system 7 Add an IPP Port 1 The KPrint Add Port Wizard appears Select Print using IPP and click Next 1 Note If the KPrint utility is installed the following procedure may differ ...

Page 26: ...lect Connects using a local area network and then click Next 2 3 If your network uses a proxy enter the information here and click Next 3 4 Enter the Printing system URL and then click Next 4 Note that the syntax for the URL is ipp xxx xxx xxx xxx ipp ...

Page 27: ...e components may include Auto Configure Common Profiles and TrueType fonts A plug in is a small computer program that interacts with a larger program to provide additional functionality An example is Security Watermark which is available for Kyocera printer drivers Installing the plug in adds Security Watermark functionality to the printer driver adds a Security Watermark icon to the Advanced tab ...

Page 28: ...Create a New Port 1 22 KX Driver 3 The Optional Components Wizard appears Click Next to install optional components or Cancel to close the wizard 3 4 The Select Printer page appears Select a printer and click Next 4 ...

Page 29: ...ponents page appears Select the components to install and click Next 5 Other pages such as Select Common Profiles and Select Plug In Modules may appear depending on what selections are made here 6 In any Select pages that appear make your selections and click Next ...

Page 30: ...installing printers and optional components if prompted restart your system Installing using the Add Printer Wizard This section describes how to install a printer driver using the Add Printer Wizard 1 Click Start in the Windows taskbar and click Printers and Faxes to open the Printers and Faxes window 1 Note Windows 95 98 2000 Click Start in the Windows taskbar click Settings Printers in sequence...

Page 31: ...er in the File menu 3 The Add Printer Wizard appears Click Next and follow the instructions 3 4 When the Completing the Add Printer Wizard page appears click Finish 4 Note If the Found New Hardware Wizard appears click Cancel If the Hardware Installation warning dialog box appears click Continue Anyway Installation of the printer driver is now complete If prompted restart your system ...

Page 32: ...rinting from Windows based applications Accessing Printer Properties 1 Click Start in the Quick Launch toolbar and click Printers and Faxes The Printers and Faxes window appears 1 Windows 98 Me 2000 Open the Start menu and click Settings and Printers in sequence to open the Printers window 2 Right click the printer icon in the Printers and Faxes window A list appears 2 3 Click Properties in the li...

Page 33: ... the printing system you have Device Options 1 Click the Device Settings tab 1 2 Under Device options in the Device Settings tab select the check boxes for devices installed in your printing system 2 Note Some devices cannot be installed simultaneously For example a finisher and a booklet stitcher cannot be used at the same time After you have selected a device other devices will be marked with a ...

Page 34: ...the Punch Unit Settings dialog box Select 2 Hole 2 3 Hole for inches or 2 4 Hole for millimeters punch option depending on the optional Punch Unit attached to your finisher Assigning Virtual Mail Boxes If you select the Hard disk check box the Hard Disk Settings dialog box appears and virtual mail boxes can be created For further details see Virtual Mail Box on page 8 8 If the device listing is al...

Page 35: ...y may vary depending on your printing system model and installed memory Matching the memory setting in the driver with the memory installed in the printing system allows font downloads to be better managed by the driver For further details consult the printing system s Operation Guide User Settings The following user information can be configured by selecting User in the Device Settings tab Identi...

Page 36: ...r Properties and all tabs of Printing Preferences Available languages will vary depending on your locale and your computer settings Select the preferred language from the Language preferences list To activate the new language click OK in User Settings and then in the Properties dialog box Page Description Language PDL You have the option to change the Page Description Language PDL by selecting PDL...

Page 37: ...ows applications Allows more options for utilizing PRESCRIBE commands within applications Complex graphics might not print as well PCL 5e monochrome printing systems Specifies PCL 5e as the PDL Fully compatible with earlier PCL versions Bidirectional communication support Wide selection of fonts for use with Microsoft Windows applications Allows more options for utilizing PRESCRIBE commands within...

Page 38: ...bout installing the Output to PDF plug in see Installing Optional Components on page 1 21 Use as an alternative to existing commercial applications for creating PDF documents Documents saved as PDF retain their original appearance and can be viewed and printed with the free Adobe Reader on Windows Mac OS and UNIX platforms Note With PDF selected as the Page description language only a limited set ...

Page 39: ...DF file To access the Security Settings dialog follow these steps 1 Open Printer Properties Device Settings 2 Click on the PDL button 3 For Select PDL choose PDF then click on the Settings 4 Place a checkmark next to Security then click on Settings The following security options are available Encryption Encryption provides password protection so that a document cannot be easily opened or altered b...

Page 40: ...ted by each user can be tracked by the printer See your printing system s Operation Manual for information about tracking usage at the printer User login provides job restriction by user in contrast to the Job accounting feature which assigns privileges by division or department A maximum of 1000 login user names and passwords can be registered at the printing system One hundred user names and pas...

Page 41: ...rint only when verifying that the selected Login User Name is saved in the driver Verify login user name for each login user When this option is selected the driver will ask for a Login User Name and password the first time the a job is sent to the printer The Login User Name must be one that is not yet registered on the Login User Name List The name entered is added to the list and thereafter the...

Page 42: ...ific ID or limit the number of copies for individual IDs IDs for newer models must be 8 digits or less and for older models they must be 4 or 7 digits Copy management must be set to ON at the printing system to use this feature Depending on the printing system model a maximum of 100 to 1000 account IDs can be assigned at the printing system and stored in the printer driver For complete information...

Page 43: ...t as a text file CSV To import an account ID list browse for an existing list and save it in your printer driver Operation Panel Message You can specify settings to display the job name user name or department for the current job on the printing system s operation panel The available settings may vary depending on the features of your printing system 1 In the Device Settings tab click Administrato...

Page 44: ...tings tab click Administrator 1 2 The Enter Password dialog box appears Enter the password and click OK 2 3 The Administrator Settings dialog box appears Clear the Password protect administrator settings check box A Password message appears 3 4 Click OK 4 Color Page Count Color page count automatically tallies the number of color and monochrome pages in each print job This feature is used by billi...

Page 45: ...ompatibility Settings This feature supports compatibility for media source values unique to the printer driver such as those for cassettes or feeders so your newly installed KX driver maintains identical media source support with the driver it replaces whether for this driver or one from another manufacturer If media source macros exist for the older driver then the alignment of media source value...

Page 46: ...using Manual Duplex see page 3 9 Disable face up reverse page order This option prevents reverse order printing if face up output is selected Ignore application collation Use this option to bypass the Collate setting in the application and give priority to the printer driver setting Auto Configure Auto Configure detects the installed device options on the printing system if it is connected over a ...

Page 47: ...o Configure is not supported for Microsoft Windows 95 To use this feature click Auto Configure An in progress message will appear The check box settings in the Device options list will be changed and the 3D image will be updated according to the device options installed Memory and RAM Disk information will also change based on the setting information returned Under the following conditions the Aut...

Page 48: ...tem and your computer The default setting for Windows XP Service Pack 2 is for the Windows Firewall to be set to On When the Windows Security alert shown above appears click Unblock to allow communication between the printing system and your computer When you click Unblock Auto Configure is added to the Windows Firewall exception list as shown in the example below The Windows Firewall is accessed ...

Page 49: ...plication Basic Printing 1 Insert the proper paper size such as A4 into the printing system s paper cassette or MP tray 1 2 From the application s File menu select Print The Print dialog box appears 2 3 Select the desired printing system from the list of available printing systems 3 4 Specify the number of copies to print in the Number of copies box You can print up to 999 copies When printing two...

Page 50: ...Printing Basics 3 2 KX Driver When using Microsoft Word we recommend that you click Options and for default tray select Use printer settings 5 Click Properties to open the Properties dialog box 5 ...

Page 51: ...he size specified above A message appears requesting you to load paper into the MP tray if the proper paper size is not available 8 Click the Source list to specify the paper cassette for printing 9 Choose either Portrait or Landscape to match the document page orientation You can rotate the document 180 degrees by selecting the Rotated check box 8 10 Click OK to return to the Print dialog box 9 1...

Page 52: ...o fit the output paper size Media Types The printing system automatically selects the paper size specified in the Page Sizes setting in the Basic tab by default when you are printing on regular paper However the printing system supports a wide variety of printing media depending on your printing system model You can specify the media type in the Media type setting for auto media selection when usi...

Page 53: ...go to Device settings and then Compatibility Settings and then clear the Combine source and media type lists selection When paper is properly loaded in the paper cassette the printing system can automatically detect the paper size However it is necessary to use the operation panel on the printing system to assign the media type of the paper cassette so that the printing system can recognize it The...

Page 54: ...printing system For further details refer to the printing system s Operation Guide 1 2 Click Start in the Windows taskbar and then select Printers and Faxes The Printers and Faxes window appears 2 Note Windows 95 98 2000 Click Start in the Windows taskbar click Settings Printers in sequence to open the Printers dialog box In Vista Click Start in the Windows taskbar select Control Panel and then in...

Page 55: ...Width boxes in millimeters or inches The unit inches or millimeters is selected in the User Settings dialog box accessed from the Device Settings tab For further details on changing the unit refer to User Settings on page 2 4 7 Size limits for custom paper are listed in the table below 8 Size Cassette MP tray Duplex unit Minimum A4 printing systems 148 210 mm 5 8 x 8 3 inches 70 148 mm Portrait 14...

Page 56: ...x Printing This section describes how to enable the duplex printing option In order to activate this printing option a duplex unit must be installed and additional memory may be required depending on the printing system model For further details refer to your printing system s Operation Guide For information on Booklet printing see Booklet Printing on page 4 2 The paper sizes and media types liste...

Page 57: ...log box 3 4 Click OK to start printing 4 Manual Duplex Manual duplex enables printing on both sides of a sheet for some models that do not have a duplex unit You must order the print job so that after the first half of the print job has been printed the job can be flipped over and fed from the cassette for the second side printing Manual Duplex is not available when any of the options in the Publi...

Page 58: ...ted and then a message shown below appears telling the user to flip the printed pages over and re insert them in the cassette or tray of the printing system Some printing systems have a manual duplex setting in Printing Properties in the Basic tab Instructions for using this method for manual duplex printing are below If the Properties or Preferences dialog boxes for your printing system don t hav...

Page 59: ...structions on changing compatibility settings The Source selection must be Cassette 1 or Cassette 2 Print on Both Sides 1 In the Basic tab select Cassette 1 or Cassette 2 from the Source list 1 2 Select the Print on both sides manual duplex check box 2 3 Select Flip on Long Edge or Flip on Short Edge 3 4 Select Print manual duplex instructions to print an instruction sheet Follow the printed instr...

Page 60: ...te With Flip on Short Edge selected turn the stack over on the short edge and put the pages into the cassette 7 Click OK in the Manual Duplex Instruction dialog box 7 The odd numbered pages will be printed Reverse Order Printing You can print document pages in reverse order from the last page to the first The reverse order printing function places the order of pages into reverse numerical order as...

Page 61: ...attaching a sorter to your printing system you can specify how printed documents are stacked in the output trays after printing The number of output trays and their receiving capacity the number of sheets varies depending on the sorter model Refer to your sorter s Operation Guide Frequently the application settings are given priority causing a change in the sorter output method depending on the ap...

Page 62: ...0 copies of page 2 in tray 2 and so on The number of document copies must not exceed the sheet capacity of any tray When a tray reaches capacity the printing system pauses and shows a message to remove the paper from the tray In addition the maximum document page length must not exceed the number of sorter trays When a tray reaches capacity the printing system pauses and shows a message to remove ...

Page 63: ... page length must not exceed the tray capacity for example 200 sheets 4 5 Click OK to return to the Print dialog box and click OK to begin printing The specified number of copies is produced in separate trays 5 Non Collating Clearing the Collate check box produces page 1 in tray 1 and page 2 in tray 2 1 Open the Properties dialog box 1 2 From the Destination list select Finisher face down or Top T...

Page 64: ...e see Gutters on page 5 3 Booklet Use the Booklet option to print a two page layout on both sides of each sheet of paper You can then fold and bind the booklet in the center Booklet printing is available for printing system models equipped with a duplex unit For further details refer to Installing Optional Devices on page 2 1 You can use optional document finishers to fold and staple the booklet F...

Page 65: ...lect Left edge binding for languages that read left to right Select Right edge binding for languages that read right to left Booklet Printing 1 In your application select Print from the File menu and open Print Properties 1 2 Click the Layout tab 2 Left Edge Binding Outside Inside Outside Outside Inside Outside Inside Outside Outside Inside Right Edge Binding ...

Page 66: ...settings click Restore Defaults Restore Defaults is available when accessing the printer driver from the application s Print dialog box 6 Select the number of copies to print 6 7 Click the Finishing tab and select the Staple check box Booklet fold is selected automatically 7 For models using an optional folding unit in the Basic tab select Folding tray as the output Destination The Finishing tab w...

Page 67: ... print a border around each document page 15 Poster You can print a document in a larger size than the paper supported for the printing system The Poster feature allows you to increase the print size print portions of the document on several sheets of paper then assemble the sheets into a large banner up to 25 times larger than the original document Sheets Per Page In the Sheets per page list sele...

Page 68: ...to Basic Printing Tasks on page 3 1 The unit inches or millimeters is selected in the User Settings dialog box accessed from the Device Settings tab For further details on changing the unit refer to User Settings on page 2 4 Print Format If you are new to poster printing you may want to print a proof sheet in addition to the poster to guide you in assembling the printed poster sheets The proof she...

Page 69: ...sheets Poster appearance is improved when the edges overlap slightly Select the check box then type or select a value between 0 00 and 1 20 inches 0 0 and 30 4 mm This option will reduce the final poster size slightly Print crop marks Select this option to print a border at the edges of each poster sheet You can crop each sheet on the border before assembling the sheets This option ensures that da...

Page 70: ...ginal size or increase the top or left margin before printing Click the Layout tab in the Properties dialog box and enter the scale percentage into the Scaling 20 500 box or click the up or down arrow buttons to adjust the value Note Some printer models also have a button labeled Gutter on this tab For details on using this feature see Gutters on page 5 3 ...

Page 71: ...ut the staple or punch features You can choose the position of staples and hole punches in a document composed of mixed page sizes In contrast if you are printing a mixed page size document without using Finishing edge staple or hole punch positions depend on the paper size settings portrait or landscape in the paper cassettes Finishing edge should be selected before any other features in the Fini...

Page 72: ...th sizes feed the 8 5 inch edge 6 7 Click OK in the application s Print dialog box 7 If the printer driver determines the specified paper size or direction short or long edge is not available in the printing system the front panel message will request that you load the correct paper size into the cassette with the correct orientation Positioning Options for Finishing Edge Select from available opt...

Page 73: ...o 25 4 mm 0 20 to 1 00 inch The left and or top margins can be adjusted This is useful when you want to add extra margin space to the page for staples or hole punches When used with duplex printing the enlarged gutter lines up evenly on both sides of the sheet For further details on duplex printing refer to Duplex Printing on page 3 8 To increase outside margins on the left side of the page enter ...

Page 74: ...ngs tab For further details refer to Installing Optional Devices on page 2 1 Note Staple and Separation features cannot be used together If Printer default is selected as the Destination in the Basic tab the selection of an option in the Finishing tab results in the automatic selection of a destination compatible with that finishing option The destination is automatically updated to the first avai...

Page 75: ...cument sheets then a 58 sheet document will not be stapled After every sheets Select this option to divide the document into sets with a specified number of sheets in each set then staple each set separately You can designate from 2 sheets up to the limit displayed under All sheets If the final set has fewer sheets than the limit it will be stapled For example if stapling has been specified after ...

Page 76: ...led on the device and selected For further details refer to Installing Optional Devices on page 2 1 For information on positioning the hole punches refer to Position the Hole Punch below 4 For metric specification use 2 hole and 4 hole punch options For inches specification use 2 hole and 3 hole punch options 5 Click OK to return to the Print dialog box 5 6 Click OK to start printing 6 The print j...

Page 77: ...ature stacks copies so that one can be clearly distinguished from another Available options are Offset jobs physically shifts each print job in the output tray Rotate copies stacks each copy of a print job at right angles in the output tray Note Offset jobs and Rotate copies will not be available at the same time Some models do not support both options Offset Jobs Offset jobs physically shifts eac...

Page 78: ...ling Optional Devices on page 2 1 Paper size selections are limited to Letter A4 16K or B5 JIS The selected paper size must be loaded into two paper sources one horizontally and one vertically The print job must contain multiple pages and be specified to print multiple copies 1 From the application s Print dialog box open Properties Select Print from the File menu and select Properties 1 2 In the ...

Page 79: ...Finishing User Guide 5 9 6 Click OK to start printing 6 Your print job will be stacked in the output tray with each copy alternating horizontally and vertically ...

Page 80: ... select Custom as the Print quality next to the list click Custom Quality to open the Custom Quality Settings dialog box 4 Custom Print Quality Settings You can select one or more Custom Quality Settings Resolution Kyocera Image Refinement KIR EcoPrint Print Quality Option Description High quality Uses the highest printing system resolution Proof monochrome printers only Uses the second highest pr...

Page 81: ...ality of the print job Note All of device fonts are TrueType fonts do not disable them in the driver Custom Option Description Resolution monochrome printers only The number of dots printed in one inch At higher resolutions more detail appears in the print job Select Fast 1200 mode 600 dpi or 300 dpi Kyocera Image Refinement KIR Smoothes the outlines of text and vector graphics For color printers ...

Page 82: ... format This feature is available when KPDL is selected in the PDL Settings dialog For further details on changing the page description language refer to PDL Settings on page 2 5 Download as bitmaps Bitmap downloading provides more detail however it creates large file sizes Select under these circumstances For print jobs with very small fonts point size 1 4 user defined fonts or Asian fonts For op...

Page 83: ... fonts as outline fonts or bitmap images Select Disable device fonts to prevent substitution of device fonts for TrueType fonts When printing with Autodesk or Adobe applications and Microsoft Office versions older than Office 2000 select Disable device fonts to overcome device font limitations with these applications Device fonts are normally visible in application font lists as printer icons next...

Page 84: ... box Pattern Scaling Option Description Auto default setting In most cases this option prints patterns and fills to match the on screen appearance Coarse Prints patterns and fills with the fewest number of lines patterns or dots Coarse is the same as Auto when PCL XL or PCL 5e c is selected in the PDL Settings dialog box Medium Prints patterns and fills with a greater number of lines patterns or d...

Page 85: ...nt jobs that do not use CIE data CIE optimization should be selected for speed not accuracy so printed output may be different from appearance on the screen Halftone Screen Monochrome Printing Systems Only An experienced user can adjust Halftone Screen settings to create shades of gray in graphic images The Halftone Screen process breaks down the image into dots Larger dots spaced close together c...

Page 86: ...sts optical jump which is when areas of an image that should be smooth suddenly become darker An ellipse shape provides a smoother gradation of tones Choose for images with dark areas Round Resists moiré formation and dot gain Moiré formation is an unintended pattern that occurs when two or more colors are printed at the wrong angles The correct angles depend on the number of colors being printed ...

Page 87: ...ness is useful when graphic images are printing too dark or too light Text remains unaffected 3 Drag the Contrast slider right or left to increase or decrease proportion of light to dark in the graphic images of the print job 3 A high contrast setting decreases the grayscale spectrum making light grays lighter and dark grays darker A low contrast setting increases the grayscale spectrum making lig...

Page 88: ...on to Print text as black and Print graphics as black Continuous tone available when Custom is selected under Color mode Custom Color Mode Adjustment To specify custom color settings 1 Select Custom from the Color mode list 1 2 To open the Adjustment Settings dialog box click Adjustment A preview image in the dialog box illustrates color changes 2 3 From the Custom color adjustment list select Cus...

Page 89: ...he value between 180 and 180 For specific hue adjustment select Red Yellow Green Cyan Blue or Magenta from the Modify list Drag the Hue slider to the right or left to increase or decrease the value between 10 and 10 The upper color bar indicates the adjustment made when the slider is dragged or a value is typed in the box The horizontal bracket above the upper color bar shows the part of the color...

Page 90: ...ifferent color spaces of color printing systems Selecting and applying a set of profiles is called a color profile Color Correction is unavailable when Monochrome is selected under Color Mode Click Correction to open the Color Correction dialog box Select one of the color correction options Options for ICM Image Color Management are available by selecting ICM Settings For more information see the ...

Page 91: ...An ICM Profile for a printing system contains information about rendering accurate color information for that device The settings for ICM must be set in the Color Management tab in the printing system Properties In Windows 2000 XP and Vista additional ICM rendering intent options are available under ICM Settings Note ICM technology is not supported in Windows 95 98 Me or Windows NT None applicatio...

Page 92: ...rt Mode suited for printing figures or graphics drawn with lines Select this mode to print colored lines with pure simple color Color Reproduction Option Description Color Reproduction Option Description Auto 1 For use in almost all cases for printing generic documents Auto 2 Prints black text and graphs in black toner only Auto 3 Prints black text and graphs in four color toner CMYK Auto 4 Prints...

Page 93: ...obs such as colors in a corporate logo Optimize for color contrast best for images Select for images or scanned photographs containing many colors or shades of color Optimizes for color contrast by adjusting contrast to preserve detail throughout the tonal range Optimize for color saturation best for graphs Select for graphs or charts containing solid colors Optimizes for color saturation by adjus...

Page 94: ...an the paper for the body of the document You can also specify cover printing when completing booklet printing settings The paper used for printing the document body is specified in the Paper settings in the Basic tab of the Properties dialog box The source of the cover paper is specified by adjusting the Media for cover settings in the Publishing dialog box You can also print on the covers A dupl...

Page 95: ...tside Prints on the outside surface of the front cover Front 5Front Inside Prints on the inside surface of the front cover Front 5Front Outside 5Front Inside Prints on the outside and inside surfaces of the front cover Front and Back Inserts blank front and back covers Front cover Front cover Front cover Front cover Front cover Back cover ...

Page 96: ... Outside 5Front Inside Prints on both sides of the front cover and inserts a blank back cover Front and Back 5Back Inside Prints on the inside surface of the back cover and inserts a blank front cover Front and Back 5Back Outside Prints on the outside surface of the back cover and inserts a blank front cover Check Box Selection Cover Insertion Type Front cover Back cover Front cover Back cover Fro...

Page 97: ... also print on the inserted paper If a duplex unit is installed you can also print on the reverse of the inserted paper Although the Page insert and Cover mode may be used simultaneously they cannot be combined with Transparency interleaving described in Transparency Interleaving on page 7 6 Insert Page Printing 1 From the application s Print dialog box open the Properties Select Print from the Fi...

Page 98: ... without printing on the cover you can designate for pages to be inserted starting with page 2 and ending on page 255 For duplex printing and if you check print cover front and back then the range is 3 to 255 If simplex printing the range is from 2 to 511 Check Box Options Page Insertion Types 5Page insert Inserts a blank page before the second page 5Page insert 5Print onto Front Prints on the fro...

Page 99: ...s you can print the same content as for the transparencies Transparency interleaving cannot be used together with Cover mode or Page insert Transparency Interleaving Method 1 From the application s Print dialog box open the Properties Select Print from the File menu and select Properties 1 2 If the Source and Media type lists have been combined in the Compatibility Settings dialog box select Auto ...

Page 100: ...re available on all printing systems The Job tab will only show the features that are available on your particular printing system Printer Driver Menu Options Function Job Deletion after Printing Access Code Panel Message Category Default number of copies printed Temporary and Permanent Jobs Stores print jobs for printing later using for Clients See page 8 3 No Menu e MPS Same as for original job ...

Page 101: ...r than original job adjustable Private Print Saves print jobs without printing them for printing later using the printing system s operation panel Printing with this function requires an access code Deleted after printing Yes Menu e MPS Private Stored Same as for original job adjustable Job Storage Saves print jobs to print later as needed You can print the required number of copies later from the...

Page 102: ...ter saving by an application KM NET for Clients Job Manager Barcode print output is supported and facilitates future printing with an optional barcode reader Both types of jobs are saved on the hard disk up to the user defined capacity However temporary jobs are automatically deleted if the defined capacity is reached Permanent jobs remain saved until removed by the user Print and Save Temporary a...

Page 103: ...ake a local connection with your computer the KX printer driver must be installed on it During the installation process you must select KM NET for Clients from the list of available Software Packages to install this feature You can re install if you want to add this feature See Chapter 1 for instructions After installation follow these steps to launch the KM NET for Clients Job Manager utility 1 C...

Page 104: ...aved job You can also select multiple jobs for printing simultaneously 6 To select multiple jobs click the jobs while holding down the Ctrl key Saved jobs are stored on the hard disk Note To delete jobs manually right click on the job name and select Delete from the list For further details refer to the KM NET for Clients Operation Guide Print Additional Copies of Saved Jobs You can reprint saved ...

Page 105: ...g box and click the Job tab 2 3 Select the Job storage e MPS check box 3 4 Select Temporary or Permanent 4 5 Click Options to open the Barcode Options dialog box 5 6 Select the Barcode check box Select Print on first page only or Print on all sheets 6 7 If you want to print the job ID as characters with the barcode as shown in the diagram below select the Print Barcode ID check box 7 Note Some mod...

Page 106: ...ystem outputs that page If the barcode on the first page is read all pages are printed If pages are read individually only the pages that are read are printed Note This feature requires switching the serial interface mode to work with the barcode reader For further details refer to the barcode reader s Operation Guide Orientations Position Upper Right Lower Right Upper Left Lower Left Horizontal V...

Page 107: ...cription Language PDL on page 2 5 Create a virtual mail box by specifying a mail box name and number The figure below illustrates the virtual mail box option For further details refer to Create Virtual Mail Boxes on page 8 9 You can group multiple mail boxes and identify the group with a unique name You can save jobs into multiple mail boxes or save it into all the mail boxes at the same time Up t...

Page 108: ...to organize multiple mail boxes for the same user In the following example when the numbers 1 3 6 8 12 are entered mail boxes 1 3 6 8 9 10 11 and 12 will be assigned to the name specified in Mailbox Name Print jobs are saved in those boxes simultaneously To assign multiple mail boxes repeat the above steps When finished click OK to close the Hard Disk Settings dialog box It is also possible to ass...

Page 109: ...list The Properties dialog box appears Click the Device Settings tab 3 4 Select the Hard Disk check box The Hard Disk Settings dialog box appears 4 5 Click Export 5 6 The Export VMB List dialog box appears Select a save location from the Save in list 6 7 Enter a name in the File name box and click Save Close the Properties dialog box 7 Import 1 Click Start in the Windows taskbar and click Printers...

Page 110: ...st dialog box appears Select the virtual mail box data file to read from the Look in list 6 7 Click the virtual mail box list name and click Open 7 8 The virtual mail box list is opened in the Defined names area Click OK to save the list The imported list will replace all the defined names that were already in the list 8 Save Jobs in Virtual Mail Boxes 1 From the application s Print dialog box ope...

Page 111: ...elect the virtual mail box for saving the job and click OK 5 6 Close the Properties dialog box The job is saved to the virtual mail box on the hard disk and held for printing 6 Printing the list Refer to the next section Print Virtual Mail Box Job Lists Printing saved jobs Refer to Print Jobs in Virtual Mail Boxes on page 8 13 Print Virtual Mail Box Job Lists Follow these steps to print the jobs l...

Page 112: ...g question mark appears 5 6 Press the ENTER key again The list will be printed 6 The job list information shows the number of saved jobs number of pages size and other specific details for each virtual mail box The mailbox symbol to the left of a virtual mail box indicates that there are jobs in the virtual mail box Print Jobs in Virtual Mail Boxes Jobs are printed from the printing system s opera...

Page 113: ...l mail boxes Quick Copy After using the quick copy feature a document can be reprinted from the operation panel 1 In the Properties dialog box click the Job tab 1 2 Select the Job storage e MPS check box and then select Quick copy 2 3 You can name the job for later reference when printing from the printing system s operation panel Under Job name select Application defined for automatic naming by t...

Page 114: ...Identification on page 2 4 5 6 If the user name is correct press the ENTER key Otherwise press the S or T key until the correct name appears 6 7 Press the ENTER key 7 8 The job name appears with a blinking question mark If this is the correct job for printing press the ENTER key 8 9 Otherwise press the T or S key until the correct name appears Then press the ENTER key 9 10 Press theT or S key to s...

Page 115: ...When using the Proof and hold option the number of copies shown will be one less than the total due to the existing proof copy The printed jobs will remain saved on the hard disk until the printing system is turned off To delete jobs manually use the same key sequences as explained in Delete Quick Copy Jobs on page 8 15 Private Print Private print jobs are saved to the hard disk for printing until...

Page 116: ...Otherwise press the S or T key until the correct job name appears then press the ENTER key 9 10 Enter the four digit access code created in Private Print on page 8 16 10 11 Press the S or T key to increase or decrease the number 11 12 Press the W or X key to move the cursor right and left 12 13 Press the ENTER key Use the S or T key to specify the number of copies for printing 13 14 Press the ENTE...

Page 117: ...d disk without printing 4 Print Jobs Saved Using Job Storage To print forms and other documents saved using Job Storage follow the same steps as for Print Private Print Jobs on page 8 16 The stored jobs will remain saved even after the printing system is switched off To delete them manually follow the same steps as for Delete Quick Copy Jobs on page 8 15 When deleting jobs you must type in the sam...

Page 118: ...he page and register it in the print box Then use the operation panel to put the documents in the order you would like and combine them into one print job Send a Document to a Print Box 1 Open the document and from the File menu select Print 1 2 From the Print dialog box open Properties and then select the Job tab 2 3 In the Job tab select Job storage e MPS then select Synergy print box 3 4 In the...

Page 119: ...nfirm the new name and return to the Document registration menu 4 5 Place the original document on the document feeder or on the glass 5 6 Press the Start key 6 The document is now stored in the print box Documents stored by this method are treated as single sided documents Print the Documents in a Print Box 1 At the printing system s operation panel press the Document Management key 1 2 The Docum...

Page 120: ...t name To change the sequence touch the Select Cancel button and then re select the print order 5 Touch Finish selecting At this point you can choose the paper 2 sided printing and other available options such as punch and staple 5 6 Select Print from list 6 All the documents in the box will print in the order you specified Print One Document from a Print Box 1 At the printing system s operation p...

Page 121: ...ently used forms or images in the printing system s memory for easy access and retrieval a Hard disk or setting up a RAM disk is not required To store an image send it from your computer or scan it at the printing system You can also print out a list of stored images check and modify image information or delete images A stored form can be combined with an image scanned in at the printing system Th...

Page 122: ...anel press the Copier key 1 2 Select User choice and then Forms Overlay 2 3 Select On 3 4 Press the Form Selected key and then the Loading Form key 4 5 The list of forms in the form box will appear Select the form that you want to overlay 5 6 Select Close 6 7 The overlay screen appears Here you can adjust the exposure of the selected form by pressing the and keys 7 8 Place the other document or im...

Page 123: ... only when printing from Microsoft Word or PowerPoint Job Option Tandem Print Distributes a large print job between two printing systems effectively doubling print speed and providing backup printing support Requires installation of the Tandem unit The Tandem unit can be installed in the Device Settings tab of Printer Properties ...

Page 124: ...e Epilogue Prologue Epilogue lets an experienced PRESCRIBE user insert one or more printing system language command files into specific locations of a print job For example a command file may contain a macro series of commands called to accomplish a specific task settings for printing system emulation an electronic form or a graphic object such as a logo or signature You can add or delete command ...

Page 125: ...o refuse the deletion click No Note The file name only is removed from the Prologue Epilogue list The original file itself is not deleted it remains in the computer or network directory Insertion Point Each file in the list can be assigned only one insertion point Choose one of the following insertion point options Unassigned The selected command file is not inserted into the print job This is use...

Page 126: ...ecific pages type individual page numbers separated by commas in the text box or a page range separated by a hyphen For example if you type 2 in the text box the command file is inserted only into page 2 If you type 1 3 5 12 the command file is inserted into page 1 page 3 and pages 5 through 12 If the Pages option is selected and you click OK without entering any numbers you will be prompted to sp...

Page 127: ... pages To print the watermark only on specific pages type individual page numbers separated by commas in the text box or a page range separated by a hyphen For example if you type 2 in the text box the watermark prints only on page 2 If you type 1 3 5 12 the watermark prints on page 1 page 3 and pages 5 through 12 If the Only on specified pages option is selected and you click OK without entering ...

Page 128: ...watermark is added the name appears in the Select watermark list 2 3 Type the text you want to print as a watermark in the Watermark text box Your text will appear in the preview area at the left of the dialog box 3 4 To add the new custom watermark click OK To exit the dialog box without saving the watermark click Cancel 4 Additional Text Options Fonts Select a font for the new watermark from the...

Page 129: ...itive y value moves the watermark text down A negative y value moves the watermark text up Angle Click the angle button to change the angle of the watermark Position the cursor anywhere in the preview area Click and hold as you move the mouse rotating the watermark image to as you want it to appear on the printed page The method of rotation is determined by selecting or clearing the Rotate around ...

Page 130: ...RGB text boxes 4 5 You can also create a specific color by typing numbers in the Hue Sat Lum or RGB text boxes 5 6 Click Add to Custom Colors to save the new color to the Custom colors at the bottom left of the Color dialog box 6 7 Click OK to save any new custom colors and close the Color dialog box To close the dialog box without saving any new colors click Cancel 7 Edit Watermark The Edit Water...

Page 131: ...atermark is available for your printing system the installation program will offer the opportunity to install it during installation of the printer driver If you have already installed the printer driver you can install Security Watermark using the installation CD ROM that came with your printing system The Security Watermark feature is accessed from the Advanced tab To enable the button that open...

Page 132: ... of these settings are changed The reverse also applies if Security Watermark is set to anything other than None the settings are constrained by the driver to the following values Scaling set to 100 Print size set to the same size as Page size Gutter Reduce Image to Fit set to Off Multiple pages per sheet set to Off pages per sheet is set to 1 Booklet set to Off Watermark set to Off Poster set to ...

Page 133: ...cified pages To print the security watermark on specific pages type individual page numbers separated by commas in the text box or a page range separated by a hyphen For example if you type 2 in the text box the security watermark prints only on page 2 If you type 1 3 5 12 the security watermark prints on page 1 page 3 and pages 5 through 12 If the Only on specified pages option is selected and yo...

Page 134: ... one or click No to cancel the Add action If you do not type a name and the name text box is left blank the driver will prompt you to type a name A security watermark cannot be saved with a blank name 3 Up to three lines of text can be printed as a security watermark Though the text lines Line 1 Line 2 Line 3 are all optional at least one of the lines must contain text 3 To leave a text line blank...

Page 135: ...bly in an inconspicuous place at the bottom of the page Outline Text This option produces an effect on the photocopied page that is the reverse of the standard result If the check box for Outline text is cleared the standard printing option the text is the darkest most visible part of the photocopy If selected the background is the most visible part creating an outline around the text which makes ...

Page 136: ...f the printed and photocopied security watermark is dependent on the particular printing system and the settings used Before printing a security watermark it is necessary to adjust the calibration and then print calibration pages Calibration should be adjusted and calibration pages printed under these circumstances Before using the Security Watermark feature the first time for each standard or cus...

Page 137: ...ges using each of the Pattern shading selections Light Normal and Dark This will provide the best range of choices for Pattern shading and Text contrast settings 5 6 To ensure the security watermark will print and photocopy correctly select the combination of Pattern shading and Text contrast settings where the text is the most nearly invisible 6 7 To save your calibration adjustments click OK To ...

Page 138: ...st select a watermark to delete 1 2 Click Delete 2 3 In the message box click Yes to confirm the deletion To refuse the deletion click No 3 Client Profile In a client server environment you can use a profile saved on the server or a client profile created and saved in your driver locally A profile contains selected driver settings as a group This feature is available in the Advanced tab only in a ...

Page 139: ...n be saved in one driver including the default profile A set of common profiles can be installed as optional components from the Printer Installation Wizard Note The Device Settings tab options cannot be saved to a profile Add Profile Follow these steps to create a new profile 1 Select the options you want in each Printing Preferences tab 1 2 Click Profile 2 3 Click Add to open the Add Profile dia...

Page 140: ... can edit the Name Icon and Description 3 4 Click OK to save the profile 4 Delete Profile 1 Click Profile in the Printing Preferences dialog box 1 2 Select profiles and click Delete 2 3 Click Yes to delete the profiles 3 Import and Export Profile You can export and save a profile on your computer and transfer it to other computers then use it with other printing systems Only one profile can be exp...

Page 141: ...port Profile dialog box appears Name and save the profile 3 Import 1 Click Import in the Profile dialog box The Import Profile dialog box appears 1 2 Select a profile and click Open 2 3 The profile appears in the Select profile list 3 ...

Page 142: ...CG Times Bold KYCW1_29 TTF Letter Gothic Bold KYCW1_21 TTF CG Times Italic KYCW1_28 TTF Letter Gothic Italic KYCW1_20 TTF CG Times Bold Italic KYCW1_30 TTF Marigold KYCW1_22 TTF CG Omega KYCW1_23 TTF New Century Schoolbook Roman KYCW1_67 TTF CG Omega Bold KYCW1_25 TTF New Century Schoolbook Bold KYCW1_69 TTF CG Omega Italic KYCW1_24 TTF New Century Schoolbook Italic KYCW1_68 TTF CG Omega Bold Ital...

Page 143: ...old KYCW1_37 TTF Helvetica Bold KYCW1_61 TTF Univers Bold Condensed KYCW1_41 TTF Helvetica Oblique KYCW1_60 TTF Univers Bold Italic KYCW1_38 TTF Helvetica Bold Oblique KYCW1_62 TTF Univers Bold Condensed Italic KYCW1_42 TTF Helvetica Narrow KYCW1_63 TTF Univers Medium KYCW1_35 TTF Helvetica Narrow Bold KYCW1_64 TTF Univers Medium Condensed KYCW1_39 TTF Helvetica Narrow Oblique KYCW1_65 TTF Univers...

Page 144: ...unit Optional accessory that supports two sided document printing E EcoPrint Printing mode that reduces the amount of toner placed on the printed page It extends the life of the toner cartridge Because toner saturation is reduced the entire image text and graphics will appear lighter in the printed job EcoPrint does not increase print speed EcoPrint is also called Draft mode in some models e MPS J...

Page 145: ...Access code Secure print jobs cannot be printed until requested using the Access code at the print ing system s operation panel K KM NET Software that provides network wide management of printers and copiers Kyocera image refinement KIR Imaging feature that smoothes the edges of text and vector graphics M Mailbox Print job destination option that distributes print jobs to output trays when an op t...

Page 146: ...t a macro into specific lo cations in the print job An advanced user may choose to use this feature to embed a PRE SCRIBE command that will call a macro to overlay PRESCRIBE form data or a graphic object such as a logo or a signature at a specific point in the print job Proof and hold Job feature that prints one copy of a multiple copy job and then stores the remaining copies in RAM disk memory or...

Page 147: ...rinting media Transparency interleaving A Publishing feature that inserts a backing sheet between printed transparencies The backing sheet also known as an interleaf helps keep transpar encies clean and prevents the transparencies from clinging together U User login Registers users with a user name and password User login provides job re striction by user in contrast to the Job accounting feature ...

Page 148: ...us tone 6 9 correction 6 11 custom 6 9 hue 6 10 ICM correction 6 13 in Watermark text 9 7 lightness 6 10 reproduction 6 12 Color Page Count 2 13 Command files 9 1 Common Profiles installing 1 23 Compatibility settings 2 14 Components installing 1 21 Continuous Tone 6 9 Contrast 6 8 Cover 7 1 printing 7 2 printing options 7 2 7 4 printing with 7 1 Cover Mode 7 1 Crop marks 4 6 Custom Color 6 9 in W...

Page 149: ...printing with KM NET 8 4 private print 8 16 proof and hold 8 16 quick copy 8 14 synergy print box 8 18 temporary 8 3 temporary and permanent 8 3 using barcodes 8 7 virtual mail box 8 8 K KIR 6 2 KM NET for Clients using to print saved jobs 8 4 KPDL 2 5 2 7 6 6 settings 2 6 Kyocera Image Refinement 6 1 L Language Preference Selection 2 5 Layout 4 1 Left edge binding 4 2 License Agreement 1 1 Lightn...

Page 150: ...ault settings 2 1 Printer Properties accessing 2 1 Printing basic tasks 3 1 covers 7 2 duplex 3 8 Job ID using the barcode reader 8 6 on paper of non standard sizes 3 6 remaining copies of proof and hold jobs 8 16 reverse order 3 12 with Custom Paper Sizes 3 8 Private Print 8 2 8 16 Profile 10 1 Prologue Epilogue 9 1 Proof and Hold 8 2 8 16 Punch positioning 5 6 5 7 using 5 5 Punch Settings 2 3 Pu...

Page 151: ...ing 7 1 7 6 U Unit of Measurement 2 5 USB 1 1 1 2 User login 2 9 User Settings 2 4 Identification 2 4 language preference 2 5 measurement 2 5 V Virtual Mail Box 8 8 assigning 2 3 Vista 1 2 1 4 W Watermark 9 3 add watermark 9 5 additional text options 9 5 custom colors 9 7 delete watermark 9 8 edit watermark 9 7 page selection 9 4 Windows 2000 1 1 Windows 98 1 11 Windows Vista 1 2 1 4 Windows XP 1 ...

Page 152: ......

Page 153: ... 2007 KYOCERA MITA Corporation is a trademark of Kyocera Corporation ...

Page 154: ...2007 07 ...

Reviews: