Document Box
5-10
2
Press
[Change]
(
[Right Select]
). The
Del. afterPrint
screen
appears.
3
Press
U
or
V
to select
On
or
Off
.
4
Press
[OK]
. The
Detail
menu screen reappears.
Editing and Deleting Custom Boxes
It is possible to change the detailed settings of the Custom Boxes and to delete Boxes.
1
In the
Custom Box
list screen, press
U
or
V
to select the Box to edit
or delete.
2
Press
[OK]
. The file list screen for the Box selected is displayed.
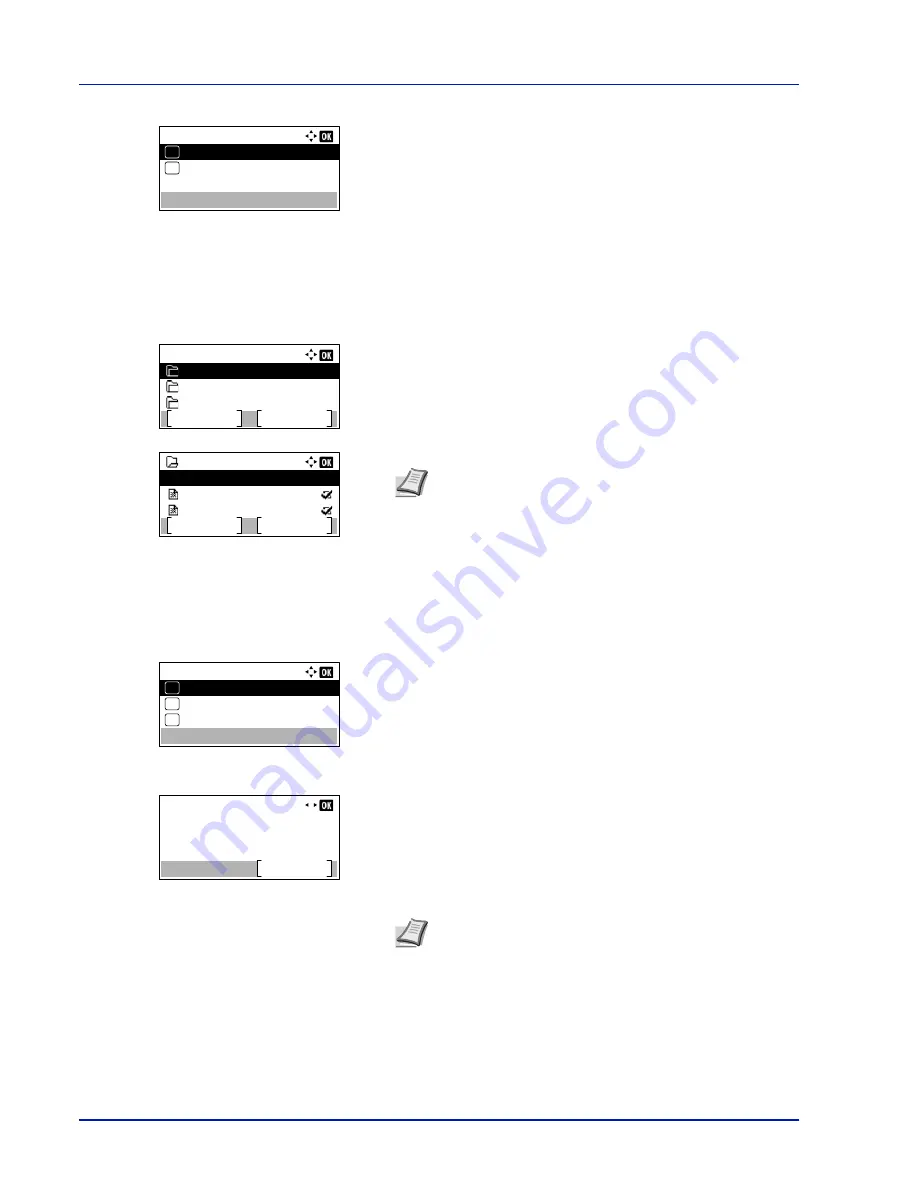
The following operations are possible:
• Editing Custom Boxes...5-10
• Deleting Custom Boxes...5-11
Editing Custom Boxes
1
In the file list screen, press
[Menu]
(
[Left Select]
). The
Menu
screen
appears.
2
Press
U
or
V
to select
Box Detail/Edit
.
3
Press
[OK]
. The
Detail
screen appears.
4
Press
Y
or
Z
to check each of the settings and make changes.
5
When the editing is completed press
[OK]
. The file list screen
reappears.
Del. after Print:
Off
01
On
02
*
Custom Box:
Menu
Add
0002 Box 02
0001 Box 01
0003 Box 03
0001 Box 01
Menu
Select
Data 01
All Files
Data 02
Note
If the screen for entering a password is displayed then
enter the password using the numeric keys and then press
[OK]
.
Refer to
Character Entry Method on page A-2
for details on
entering characters.
Menu:
Search(Name)
01
Box Detail/Edit
02
Delete
03
Detail:
1/ 9
Box Name:
Edit
Box 01
Note
For the method for making changes, refer to
Detailed
box settings on page 5-5
.
Summary of Contents for ECOSYS P4040dn
Page 1: ...ECOSYS P4040dn PRINT OPERATION GUIDE ...
Page 16: ...xii ...
Page 22: ...Machine Parts 1 6 ...
Page 58: ...Preparation before Use 2 36 ...
Page 66: ...Printing 3 8 ...
Page 202: ...Operation Panel 4 136 ...
Page 250: ...Maintenance 7 12 ...
Page 273: ...8 23 Troubleshooting 3 Close the rear cover 4 Open and close the top cover to clear the error ...
Page 274: ...Troubleshooting 8 24 ...
Page 306: ...Appendix A 32 ...
Page 315: ......
Page 318: ...Rev 1 2014 12 2P7KDEN001 ...


