background image

28

Check your Account Balance

5

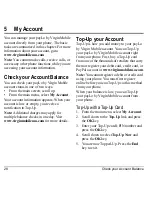
My Account

You can manage your payLo by Virgin Mobile 
account directly from your phone. The basic 
tasks are summarized in this chapter. For more 
information about your account, go to 

www.virginmobileusa.com

.

Note: 

You cannot make calls, receive calls, or 

access any other phone functions while you are 
accessing your account information.

Check your Account Balance

You can check your payLo by Virgin Mobile 
account status in one of two ways.

From the main screen, scroll up.

From the main menu, select 

My Account

.

Your account information appears. When your 
account is low or empty, you receive a 
notification to Top-Up.

Note: 

Additional charges may apply for 

multiple balance checks in one day. Visit 

www.virginmobileusa.com

 for more details.

Top-Up your Account

Top-Up is how you add money to your payLo 
by Virgin Mobile account. You can Top-Up 
your payLo by Virgin Mobile account right 
from your phone. First, buy a Top-Up card 
from one of the thousands of retailers that carry 
them or register your debit card, credit card, or 
PayPal account at 

www.virginmobileusa.com

.

Note: 

You cannot register a debit or credit card 

using your phone. You must first register 
online before you can Top-Up via this method 
from your phone.
When your balance is low, you can Top-Up 
your payLo by Virgin Mobile account from 
your phone.

Top-Up with a Top-Up Card

1. From the main menu, select 

My Account

.

2. Scroll down to the 

Top-Up

 link and press 

the 

OK

 key.

3. Enter your Top-Up card's PIN number and 

press the 

OK

 key.

4. Scroll down to select 

Top-Up Now

 and 

press the 

OK

 key.

5. You are now Topped-Up. Press the 

End


key to exit.

Summary of Contents for Luno S2100

Page 1: ...by KYOCERA S2100 User Guide ...

Page 2: ...cera Corporation 82 A6226 1EN Rev 002 FCC Notice This device complies with part 15 of the FCC rules Operation is subject to the following two conditions 1 This device may not cause harmful interference and 2 This device must accept any interference received including interference that may cause undesired operation To maintain compliance with FCC RF exposure guidelines if you wear a phone on your b...

Page 3: ...tification visit the Bluetooth Qualification Program Web site at www bluetooth org tpg listings cfm Caution The user is cautioned that changes or modifications not expressly approved by the party responsible for compliance could void the warranty and user s authority to operate the equipment Optimize your Phone s Performance Use the instructions in this guide to learn how to optimize the performan...

Page 4: ...rn off your vehicle engine Use with Care Use only in normal position to ear Avoid dropping hitting bending or sitting on the phone Avoid Magnetic Environments Keep the phone away from magnets which can cause improper functioning of the phone Keep Your Phone Dry Keep the phone dry Damage can result if the phone gets wet Water damage is not covered under warranty Resetting the Phone If the screen se...

Page 5: ... s hearing aidcompatibility HAC regulations must receive a minimum rating of M3 for RF emissions under the ANSI C63 19 standard The M rating refers to the phone s RF emissions level for use with hearing aids operating in the microphone setting The higher the phone s M rating the more likely the phone is compatible with a hearing aid operating in the microphone setting Hearing aids also have rating...

Page 6: ...6 ...

Page 7: ...aphics 25 Apps 26 Themes 26 Media File Options 26 5 My Account 28 Check your Account Balance 28 Top Up your Account 28 For More Information 29 6 Pictures 30 Camera Tips 30 Take a Picture 30 Send a Picture 30 Go to Pictures 30 Other Camera Options 30 7 Downloads 32 Access Downloads 32 Navigate Downloads 32 End a Downloads Session 32 8 Messaging 33 Messaging Menu 33 Send Messages 34 Manage Received ...

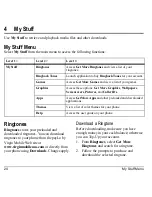
Page 8: ...ecurity 63 Messaging 65 Network 65 Accessories 65 Phone Info 66 12 Launch Connect 67 13 Surf the Web 68 Launch Browser 68 Browse the Web 68 Add a Bookmark 68 14 Recent Calls 69 Recent Calls Menu 69 Work with Call Lists 69 Erase Call List Records 70 Work with Call Timers 70 15 Voice Commands 71 Call a Contact 71 Call a Number 71 Use a Shortcut 71 Find a Contact 72 16 Get Help 73 User Guide 73 Custo...

Page 9: ...y lining up the notches with the openings at the top and on each side of the battery casing 5 Snap the cover into place Charge the Battery 1 Connect the AC adapter to the Micro USB jack on the side of the phone 2 Plug the adapter into a wall outlet The battery icon in the upper right corner of the screen tells you whether the phone is Charging the icon is animated Partially charged Fully charged Y...

Page 10: ...s keys coins or jewelry to contact the battery s terminals Replace the battery only with another qualified battery Use of an unqualified battery may present a risk of fire explosion leakage or other hazard If you are unsure about whether a replacement battery is compatible contact customer support Promptly dispose of used batteries in accordance with local regulations and recycle if possible Do no...

Page 11: ...o dial 6343 from the main screen to display your phone s serial number Program your Phone Once you have activated your account you need to program your payLo by Virgin Mobile phone number into your phone When ready follow these steps 1 Turn on your phone 2 Dial 847446 3 Select Activate 4 When your phone connects to the network select Get Started Now at the prompt 5 When your phone displays your ne...

Page 12: ...mber dialed Press and hold to activate voice commands 7 Keypad for entering numbers letters or symbols 8 Shift key changes the text mode in text entry 9 Right option button selects items that appear on the lower right of the display At the main screen you can select Contacts 10 OK key selects a menu item or option At the main screen you go to the main menu when you press the OK key 11 Back key era...

Page 13: ...ys time and phone status 6 Jack for AC adapter included and Micro USB cable sold separately 7 Speakerphone speaker Warning Inserting an accessory into the incorrect jack will damage the phone Attach the Lanyard 1 Hold the phone face down 2 Find notch directly below the back cover It is square Using your thumbnail lift the cover to remove 3 Thread the lanyard around the notch on the upper left side...

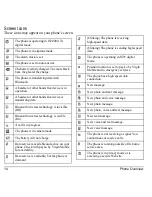
Page 14: ... will not charge Data service is available and active on your phone Check with payLo by Virgin Mobile for availability Data service is available but the phone is dormant blinking The phone is receiving high speed data blinking The phone is sending high speed data The phone is operating in IS95 digital mode Position location is set to payLo by Virgin Mobile and to emergency services The phone has a...

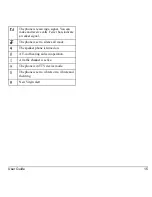
Page 15: ...ls Fewer bars indicate a weaker signal The phone is set to silence all mode The speaker phone is turned on A T coil hearing aid is in operation A traffic channel is active The phone is in TTY device mode The phone is set to vibrate or to vibrate and then ring New Virgin alert ...

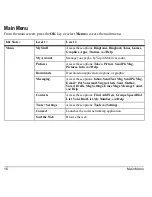
Page 16: ...Take a Picture Send Pic Msg Pictures Info and Help Downloads Download an application ringtone or graphic Messaging Access these options Inbox Send Text Msg Send Pic Msg Email IM Voicemail Virgin Alerts Sent Outbox Saved Drafts Msg Settings Erase Msgs Message Count and Help Contacts Access these options Find Add New Groups Speed Dial List Voice Dial List My Number and Help Tools Settings Access the...

Page 17: ...or example Press the Send key to make a phone call tells you to physically press the Send key on your phone Scroll means to use the Navigation key to move through a list on the display For example Scroll through your contacts list to choose a contact means to physically press the Navigation key up or down to scroll through the list on the display greater than symbol tells you to select an option f...

Page 18: ...sing a Number 1 Enter a phone number 2 Press the Send key Call Using a Contact 1 From Find highlight a contact 2 Press the Send key Call Using Voice Commands You can use voice commands to call a contact from your voice dial list or to dial a phone number For more information see Voice Commands on page 71 Redial a Number 1 Press the Send key to open your call history 2 Highlight a phone number or c...

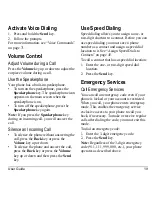
Page 19: ... key or press the Volume key up or down and then press the Send key Use Speed Dialing Speed dialing allows you to assign a one or two digit shortcut to a contact Before you can use speed dialing you must save a phone number as a contact and assign a speed dial location to it See Assign Speed Dials to Contacts on page 45 To call a contact that has a speed dial location 1 Enter the one or two digit ...

Page 20: ...ices Exit Emergency Services When you have completed the emergency call 1 Select Exit 2 Select Exit again to confirm your choice Note To determine who has access to your location see Set Location Information on page 65 ...

Page 21: ...e icon indicates you are in Numbers Only input mode Press and hold the Shift key to switch input modes Enter Letters with Number Keypad From the text entry field select Options Normal Alpha to enter letters You can enter text in the following ways To enter a letter press a key once for the first letter twice for the second letter and so on If your phone is set to Spanish accented letters are avail...

Page 22: ... change case mode press the Shift key To enter a number press and hold a number key until the number appears on the screen The icon indicates you are in Rapid Entry input mode Press and hold the Shift input key to switch input modes Enter Symbols with Number Keypad While entering text in Normal Alpha mode you can enter symbols by pressing the 1 key until you see the symbol you want Using this meth...

Page 23: ...rase a character Press the Back key Erase all characters Press and hold the Back key Move the cursor right or left Scroll left or right Move the cursor up or down Scroll up or down Change input mode Press and hold the Shift key Change case mode Press the Shift key Capitalize any letter In Normal Alpha mode press the Shift key Choose uppercase Lowercase any letter In Normal Alpha mode press the Shi...

Page 24: ...n your cash balance otherwise you can Top Up your account 1 From Ringtones select Get More Ringtones and search for a ringtone 2 Follow the prompts to purchase and download the selected ringtone Level 1 Level 2 Level 3 My Stuff Ringtones Access Get More Ringtones and view a list of your ringtones Ringback Tones Launch application to buy Ringback Tones for your account Games Access Get More Games a...

Page 25: ...count 1 From Games select Get More Games and search for a game 2 Follow the prompts to purchase and download the selected game Play a Game 1 From Games highlight a game 2 Select Play to launch the game Graphics Graphics stores your preloaded and downloaded graphics You can download wallpapers and screensavers to your phone from the payLo by Virgin Mobile Web site at www virginmobileusa com or dire...

Page 26: ...ound headers and highlight bars are changed You can also find this list of color themes in your Display settings Media File Options Rename a File 1 From a media file list highlight a file 2 Select Options Rename 3 Enter a new name and select Save You can only rename unlocked files Preloaded files on your phone are always locked Send a File 1 From a media file list highlight a file 2 Select Send Ms...

Page 27: ...Options Slideshow to play the slideshow of the files contained in the current folder 2 Select Pause to stop Play to resume or Options to access more features With Options selected your phone automatically pauses the slideshow 3 When you are done select Options Exit Erase a Single File 1 From a media file list highlight a file 2 Select Options Erase Yes You can only erase unlocked files Preloaded f...

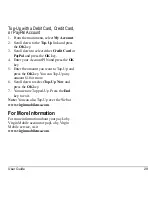
Page 28: ...one day Visit www virginmobileusa com for more details Top Up your Account Top Up is how you add money to your payLo by Virgin Mobile account You can Top Up your payLo by Virgin Mobile account right from your phone First buy a Top Up card from one of the thousands of retailers that carry them or register your debit card credit card or PayPal account at www virginmobileusa com Note You cannot regis...

Page 29: ...r Account PIN and press the OK key 5 Enter the amount you want to Top Up and press the OK key You can Top Up any amount 10 or more 6 Scroll down to select Top Up Now and press the OK key 7 You are now Topped Up Press the End key to exit Note You can also Top Up over the Web at www virginmobileusa com For More Information For more information about your payLo by Virgin Mobile account or payLo by Vi...

Page 30: ... key You can also select Pictures Take a Picture from the main menu 2 Focus on the image using the phone s display as a viewfinder 3 Press the OK key to take a picture saved to Pictures 4 Select Send to create a multimedia message or Erase to delete the picture from your phone 5 Press the End key to exit camera mode Send a Picture From Pictures select Send Pic Msg to create a new multimedia messag...

Page 31: ...ure Set White Balance 1 From camera mode select Options Settings White Balance 2 Scroll left or right to select the white balance setting Look at the display to see how each setting looks Set Color Tone 1 From camera mode select Options Settings Color Tone 2 Scroll left or right to select a color tone Look at the viewfinder to see how each setting looks Set Picture Quality From camera mode select ...

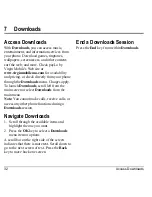
Page 32: ...harges apply To launch Downloads scroll left from the main screen or select Downloads from the main menu Note You cannot make calls receive calls or access any other phone functions during a Downloads session Navigate Downloads 1 Scroll through the available items and highlight the one you want 2 Press the OK key to select a Downloads menu item or options A scroll bar on the right side of the scre...

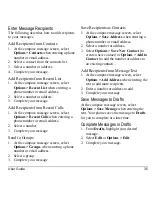
Page 33: ...irgin Alerts Shows a list of received Virgin Alerts Sent Shows a list of messages you have successfully sent Outbox Shows a list of messages you have sent but are pending or failed Saved Shows a list of messages you have saved Drafts Shows a list of messages that have been started but saved to be completed at a later time Msg Settings Access these options Text Tone Msg List View Reminder Chat View...

Page 34: ...access contacts groups or recently used addresses Scroll down to move to the next field when done You can send a single message to up to ten recipients at once Use a comma or space to separate each address 2 Repeat the first step for CC and BCC if needed 3 Enter a subject 4 Enter a message 5 Attach an image file Select Options to access more features 6 Attach a sound file Select Options to access ...

Page 35: ...se message screen select Options Groups when entering a phone number or email address 2 Select a group 3 Complete your message Save Recipients as Contacts 1 At the compose message screen select Options Save Address when entering a phone number or email address 2 Select a number or address 3 Select Options Save New Contact to create a new contact or Options Add to Contact to add the number or addre...

Page 36: ...to add an image select Options Pictures 2 Select a file to add to your message To remove a media file select the applicable option For example to remove a sound select Options Remove Sound 3 Complete your message Take Pictures for Messages 1 At the compose message screen select Options Take a Picture when adding an image 2 Take a picture 3 Select it to add to your message 4 Complete your message R...

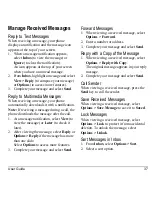
Page 37: ...w the message or Later to check it later 2 After viewing the message select Reply or Options Reply if the message has more than one slide Select Options to access more features 3 Complete your message and select Send Forward Messages 1 When viewing a received message select Options Forward 2 Enter a number or address 3 Complete your message and select Send Reply with a Copy of the Message 1 When v...

Page 38: ...tained from the beginning Manage Voicemail Set Up your Voicemail Before your phone can receive voicemail messages you must set up a 4 10 digit passcode and record a personal voicemail greeting When you have set up your voicemail all unanswered calls to your phone are automatically transferred to voicemail even if your phone is in use or turned off 1 Press and hold the 1 key 2 Follow the system pro...

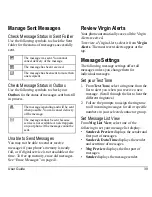
Page 39: ...m for individual messages Set your Text Tone 1 From Text Tone select a ringtone from the list to alert you when you receive a new message Scroll through the list to hear the different ringtones 2 Follow the prompts to assign the ringtone to all incoming messages for all or specific numbers in your selected contact or group Set Message List View From Msg List View select one of the following to set...

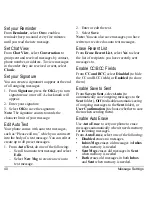
Page 40: ...to an auto text message and select Edit Select New Msg to create a new auto text message 2 Enter or edit the text 3 Select Save Note You can also save messages you have written or received as auto text messages Erase Recent List From Erase Recent List select Yes to clear the list of recipients you have recently sent messages to Enable CC BCC Fields From CC and BCC select Disabled to hide the CC an...

Page 41: ... at a time or erase them all at once Erase a Single Message When viewing a received message select Options Erase Yes Note You can erase a scheduled message but cannot cancel its delivery Erase Messages from a Folder From Erase Msgs select a folder to erase messages from For example to erase received messages select Inbox Yes Note You cannot recover deleted information Erase All Messages From Erase...

Page 42: ...m Find select a contact 2 At the contact details screen highlight a number address or note 3 Select the detail you want to view For example to view a phone number select Options View Number Use Frequent List With Frequent List enabled you can view 15 of your most frequently called contacts See Enable Frequent List on page 61 Level 1 Level 2 Level 3 Contacts Find Access your existing contacts list ...

Page 43: ...ses and other contact details Scroll up or down to move through the contact fields 4 When done select Save Add a Code or Extension When saving the phone number of an automated service you may include a pause for dialing an extension 1 From the main screen enter a phone number 2 Select Options and a type of pause Time Pause causes the phone to stop dialing for two seconds Hard Pause causes the phon...

Page 44: ...or down to move through the contact fields 4 When done select Save Assign Number Types 1 From Find select a contact 2 At the contact details screen select Edit 3 Press down twice to scroll to the number type dropdown and press the OK key 4 Select a number type The appropriate icon appears next to the number in your contacts list 5 Select Save Assign Ringtones to Contacts 1 From Find select a conta...

Page 45: ...ighlight a number 3 Select Options Primary Number Yes Add Contacts to Groups 1 From Find select a contact 2 At the contact details screen highlight a number or email address 3 Select Options Add To Group 4 Select groups from the list provided A checkmark appears next to each selection You can also remove a checkmark 5 When finished select Done Visit Web Addresses 1 From Find select a contact 2 At ...

Page 46: ...ect Options Send Text Msg 3 Complete your text message and select Send Send Multimedia Messages to Groups 1 From Groups list highlight a group 2 Select Options Send Pic Msg 3 Complete your multimedia message and select Send Add or Remove Contacts from Groups 1 From Groups highlight a group 2 Select Options Edit 3 If you are modifying a group you created select Next Otherwise go to the next step 4 ...

Page 47: ...1 From Speed Dial List highlight an assigned number 2 Select Erase Yes Voice Dial List Enable Voice Dial Tags Your phone creates a voice dial tag for each contact that has a name field which is not blank or a name that is more than five syllables You can enable or disable the voice dial tags associated with your contacts 1 From Voice Dial List press the OK key to add or remove checkmarks A checkma...

Page 48: ...oming call screen appears Play Voice Memos 1 From Recorded Memos highlight a memo 2 Select Play to play the memo or Options to access more features Level 2 Level 3 Level 4 Tools Voice Memo Access these options Record New and Recorded Memos Calendar Schedule an appointment Alarm Clock Set an alarm Tip Calculator Calculate a tip Calculator Perform basic calculations World Clock View times from diffe...

Page 49: ... key to change the duration if needed Scroll left or right to move between hour and minute fields Scroll up or down to change hour and minute Press the OK key to save and move to the next field 6 Press the OK key to select a priority from the list 7 Press the OK key to select a reminder from the list 8 Press the OK key to select a reminder sound from the list 9 Press the OK key to select During Ev...

Page 50: ...lect Options Sort by Time to sort events by time Sort Events by Type From View All Events select Options Sort by Type to sort events by their assigned type Sort Events by Priority From View All Events select Options Sort by Priority to sort events by their assigned priority Modify Events Edit an Event 1 From View Day select an event 2 At the event details screen select Options Edit 3 Modify the ev...

Page 51: ...select an option from the list to set when to automatically erase your past events Set Event Priority From Priority select an option to set every event you create with this priority type Set Event Reminder From Reminder select an option to set every event you create with this reminder setting Set Event Reminder Alert From Reminder Sound select an option to set every event you create with this remi...

Page 52: ...es you can hit the snooze Use Tip Calculator 1 From Tip Calculator enter the amount of your bill 2 Select the percentage you want to tip 3 Enter the number of people sharing the bill or enter 1 if paying the entire bill 4 Select Next to view the final bill 5 Select Done when finished Use Calculator 1 From Calculator enter the first number 2 Select a mathematical operation Scroll left to multiply S...

Page 53: ...t 2 Enter the time length Scroll left or right to move between hours minutes or seconds fields Scroll up or down to change hours minutes or seconds 3 Select Sound and choose from the list to modify the sound 4 To work the timer select from the following options Start begins the countdown Stop pauses the countdown Reset clears the timer When the countdown is complete select Off to silence the alarm...

Page 54: ...memo 2 Select Options Use Numbers 3 Select a number and press the Send key Lock a Memo You can lock a memo to prevent it from being edited or erased 1 From View Memos highlight a memo 2 Select Options Lock Memo To unlock a memo select Unlock Memo Erase a Memo 1 From View Memos highlight a memo 2 Select Options Erase Yes Erase All Memos From View Memos select Options Erase All Yes Note Selecting Er...

Page 55: ...Time with Airplane Mode enabled Airplane Mode Fast Find Frequent List Hold Call Message 1 Touch Dialing Customize Keys and Missed Call Alert Call Options Access these options Voice Dialing Open to Answer Auto Answer and Any Key Security Access these options Lock Phone Change Lock Code Special Numbers Erase Contacts Erase Downloads and Reset Phone Messaging Access these options Text Tone Msg List V...

Page 56: ...must enable the Bluetooth feature on your phone 3 At the device list highlight a device and select Add Accept the pairing if prompted 4 If necessary enter the password provided with the Bluetooth device and select OK With the password accepted the device appears in your device list Use Bluetooth Devices Connect to a Device Before you can use Bluetooth you must get your phone ready to communicate w...

Page 57: ... other Bluetooth devices search of your phone From Device Name enter a new name and select Save View Supported Services Select Device Info to view a list of the Bluetooth service profiles your phone supports Display Graphics Graphics stores your preloaded and downloaded graphics You can download wallpapers and screensavers to your phone from the payLo by Virgin Mobile Web site at www virginmobileu...

Page 58: ...acklight select Display Duration and one of the following Always Dim forces the backlight to remain dim before turning off 7 Seconds 10 Seconds 15 Seconds or 30 Seconds turns backlighting on for the set time after your last keypress Always Bright forces the backlight to remain bright before turning off Set Keypad Duration From Backlight select Keypad Duration and one of the following Off forces th...

Page 59: ...siness group contacts with a preloaded or downloaded ringtone See Ringtones on page 24 for more information Set your Personal Ringtone Use Personal Ringtones to set the ringtone for your personal group contacts with a preloaded or downloaded ringtone See Ringtones on page 24 for more information Set Power On Off Sounds From Power On Off Sound select Enabled to have your phone play the sound when t...

Page 60: ...date Scroll left or right to move between the month day and year fields Scroll up or down to change the month day and year 2 Press the OK key to save the date 3 Do the following to change the time Scroll left or right to move between the hour minute and AM PM fields Scroll up or down to change the hour minute and AM PM 4 Press the OK key to save the time 5 Select Done Enable Airplane Mode While in...

Page 61: ...Select Save or Options and one of the following Play to replay your message Re Record to record your message again Exit to exit The next time a call comes in you can place it on hold Place a Call on Hold You can place a call on hold with Hold Call Message enabled Note If you are already on a call and you receive another call you cannot place the incoming call on hold With no call waiting enabled t...

Page 62: ...voice commands Enable Automatic Add From Automatic Add select Enabled to automatically add a contact to your voice dial list when you create a new contact Set Expert Mode Use Expert Mode to speak a command after you hear a tone instead of following the initial voice prompts From Expert Mode select one of the following Normal sets the phone to default voice prompts Expert sets the phone to sound to...

Page 63: ... voice you can train your phone to recognize your specific voice for numbers 1 From Voice Training read the message and select OK Train Numbers OK 2 Follow the prompts for each number until training is complete Note You must read the numbers digit by digit for voice training to work Enable Open to Answer From Open to Answer select Enabled to answer calls by opening the phone Enable Auto Answer Fro...

Page 64: ...our phone locked 1 From Security enter your four digit lock code 2 Select Special Numbers 3 Select an Unassigned slot 4 Enter the number and select Done You can view these numbers only when entering them for the first time To make a call to a special number from a locked phone you must dial the number including area code exactly as stored in Special Numbers Erase All Contacts 1 From Security enter...

Page 65: ...shares your position information in addition to emergency services Accessories Set Headset Sounds With a headset attached to your phone you can play the ringtone through the headset or phone speaker From Headset Sound select Out of Phone ringing from the phone speaker or Out of Headset ringing from the headset Enable Power Backlighting From Power Backlighting select Always On to have the backlight...

Page 66: ... phone number MSID and serial number Activate Phone Select Activation to activate phone service with payLo by Virgin Mobile For more information visit www virginmobileusa com Check your Phone Memory Select Phone Memory to check the memory usage of your phone View Version Information Select Version Info to check your phone s software and hardware information View Phone Icons Select Icon Keys to vie...

Page 67: ...User Guide 67 12 Launch Connect Select Connect to access your social networking chat and dating sites with your phone For more information visit www virginmobileusa com ...

Page 68: ...s Press the Back key to navigate back to the Surf the Web homepage To enter in your own URL simply select Options Go to URL Enter the desired URL and select Go Note Not all sites are optimized for your phone For the best experience visit the sites listed in Surf the Web Add a Bookmark 1 Surf to the Web page you want to bookmark and select Options Bookmark Page 2 Edit the bookmark s details if need...

Page 69: ...g To clear the screen select Dismiss To view the call details select View or press the OK key To return the call select View and press the Send key Return a Received Call 1 From Received Calls highlight a number 2 Press the Send key to call the number or select Options to access more features This list contains all calls received Level 1 Level 2 Level 3 Recent Calls Missed Calls See a list of all ...

Page 70: ...l list highlight a contact 2 Select Options View to see the contact details screen Send Text Message from Call List 1 At a call list highlight a contact 2 Select Options Send Text Msg 3 Complete your text message and select Send Send Multimedia Message from Call List 1 At a call list highlight a contact 2 Select Options Send Picture Msg 3 Complete your multimedia message and select Send Erase Call...

Page 71: ...es You will be asked to verify which name you want to call Say Yes when you hear the correct name Say No when you hear an incorrect name 3 Press the End key to end the call To modify your voice dial list see Enable Voice Dial Tags on page 47 Call a Number 1 From the main screen press and hold the Send key The phone prompts Say a command 2 Say Dial Number and then speak the digits of the number you...

Page 72: ...mpts Say a name The phone prompts Please repeat or Say a name if it does not recognize the name If the name you spoke matches a contact in the voice dial list the phone prompts Name correct Say Yes to display the contact No to select a similar name or Cancel to cancel the search Note You can only search for contacts that are in the voice dial list ...

Page 73: ...vailable to you such as call forwarding or voicemail Go to www virginmobileusa com Dial VM from your payLo by Virgin Mobile phone Dial 888 322 1122 from any phone For questions about the phone features refer to the materials provided with your phone or visit www virginmobileusa com Qualified Service If the problem with your phone persists return the phone with all accessories and packaging to the ...

Page 74: ...74 Phone Accessories ...

Page 75: ... banner 58 battery charging 9 drain 10 installing 9 recharging 9 safety guidelines 10 Bluetooth activating 57 adding devices 56 changing phone name 57 connecting 56 connecting devices 56 deleting devices 56 pairing 56 57 renaming devices 56 visibility 57 bookmarks 68 browser alerts 39 bookmarks 68 launching 68 navigating 68 C calculator 52 calendar 49 alerts 51 auto erase 51 copying events 50 crea...

Page 76: ...r 63 voice commands 71 camera 30 brightness 31 color tone 31 date stamp 31 multishot 31 picture quality 31 resolution 30 self timer 30 shutter sound 31 taking pictures 30 white balance 31 CDMA privacy 65 contact groups 46 contacts 42 adding 43 adding prefixes 45 assigning alerts 44 assigning pictures 44 calling 43 changing primary number 45 editing 44 erasing 45 64 number types 44 sending messages...

Page 77: ...ng 46 groups list 46 H headset sounds 65 headsets auto answer 63 65 voice answer 63 hold calls activating 61 changing message 61 I icons 14 in case of emergency 64 inbox 37 incoming calls 69 Internet 68 K keypad tone length 59 L language 58 lanyard 13 location information 65 lock code 64 M media files assigning 26 details 26 erasing 27 locking 26 modifying 27 renaming 26 sending 26 zoom 27 media g...

Page 78: ...cent list 35 40 replaying 38 replying 37 saving 37 40 saving addresses 35 saving attachments 38 saving auto text 36 saving drafts 35 signature 40 sorting 37 unable to send 39 viewing information 38 web addresses 38 writing language 36 missed calls 69 multimedia 24 multimedia messages 25 34 auto retrieve 37 CC BCC fields 40 my account 28 activating 11 check balance 28 programming phone 11 top up 28...

Page 79: ...ick alarm 52 R ringtones downloading 24 25 S security 63 sent messages folder 39 40 settings accessories 65 alarm clock 52 Bluetooth 57 calendar 51 camera 30 convenience 60 network 65 security 63 sounds 59 voice commands 62 slideshow 27 smart sound 60 social networks 67 sounds power 59 recording 36 speakerphone 18 19 speed dial list adding contact 45 editing 47 using 19 stopwatch 53 symbols 22 T T...

Page 80: ... commands 62 71 display results 62 expert mode 62 finding contacts 72 making calls 71 shortcuts 71 voice training 63 voice dial list automatic add 62 digit lengths 62 editing 47 voice dialing 19 voice memos 48 playing 48 recording 48 voicemail checking 38 configuring 38 volume adjusting 19 earpiece 60 keypad 59 ringtones 59 smart sound 60 speakerphone 60 W web browser 68 world clock 53 ...

Page 81: ...User Guide 81 ...

Page 82: ...Kyocera Communications Inc www kyocera wireless com 82 A6226 1EN Rev 002 ...

Reviews: