2JZ/2JX/2JV/2H7-5
1-3-48
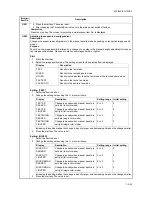
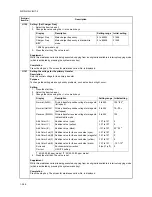
U074
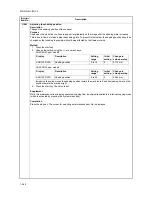
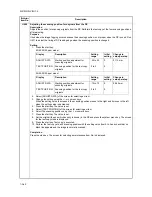
Adjusting the DP input light luminosity
Description
Sets the luminosity correction for scanning originals from the DP.
Purpose
Modify the setting only if a spotted background appears when a bluish original is scanned from the DP.
Setting
1. Press the start key.
2. Change the setting using the +/- or numeric keys.
Settings 0: No correction / 1: Slight correction / 2: Medium correction / 3: Strong correction
3. Press the start key. The value is set.
Supplement
While this maintenance item is being executed, copying from an original is available in interrupt copying mode
(which is activated by pressing the system menu key).
Completion
Press the stop key. The screen for selecting a maintenance item No. is displayed.
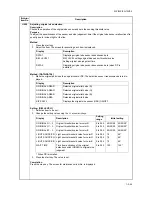
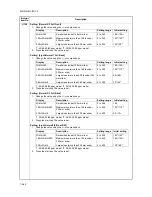
U080
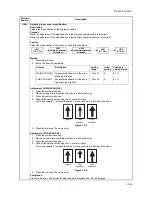
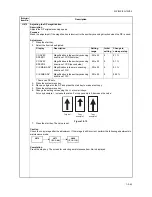
Setting the economy mode
Description
Sets the level in the economy mode.
Purpose
To increase or decrease the image density in the eco-print mode.
Setting
1. Press the start key.
2. Select the item to be set.
3. Change the setting value using the +/- or numeric keys.
Increasing the setting makes the image darker; decreasing it makes the image lighter.
4. Press the start key. The value is set.
Supplement
While this maintenance item is being executed, copying from an original is available in interrupt copying mode
(which is activated by pressing the system menu key).
Completion
Press the stop key. The screen for selecting a maintenance item No. is displayed.
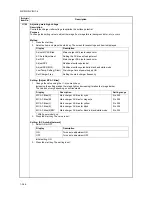
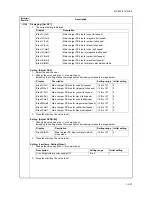
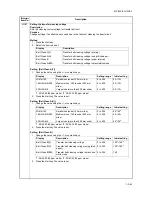
Maintenance
item No.
Description
Display
Description
Setting range
Initial setting
INPUT DATA
DP input light luminosity correction
0 to 3
0
Display
Description
Setting range
Initial setting
ADJUST DATA1
For full color and 2 color copy mode
0 to 100
60
ADJUST DATA2
For black/white and single color mode
0 to 100
60
Summary of Contents for TASKalfa 250ci
Page 4: ...This page is intentionally left blank ...
Page 10: ...This page is intentionally left blank ...
Page 14: ...2JZ 2JX 2JV 2H7 This page is intentionally left blank ...
Page 296: ...2JZ 2JX 2JV 2H7 1 4 78 This page is intentionally left blank ...
Page 348: ...2JZ 2JX 2JV 2H7 1 5 52 This page is intentionally left blank ...
Page 354: ...2JZ 2JX 2JV 2H7 1 6 6 This page is intentionally left blank ...
Page 378: ...2JZ 2JX 2JV 2H7 2 1 24 This page is intentionally left blank ...
Page 388: ...2JZ 2JX 2JV 2H7 2 2 10 This page is intentionally left blank ...
Page 390: ...2JZ 2JX 2JV 2H7 1 2 3 2 Power source PWB ...
Page 395: ...2JZ 2JX 2JV 2H7 1 2 3 7 Engine PWB ...
Page 412: ...2JZ 2JX 2JV 2H7 1 2 3 24 Main PWB ...
Page 430: ...2JZ 2JX 2JV 2H7 1 2 3 42 Feed PWB 40 40 50 40 ppm model Feed PWB 25 25 30 30 ppm model ...
Page 450: ...2JZ 2JX 2JV 2H7 2 4 8 ...
Page 493: ...INSTALLATION GUIDE FOR PAPER FEEDER ...
Page 503: ...INSTALLATION GUIDE FOR 3000 SHEETS PAPER FEEDER ...
Page 558: ...INSTALLATION GUIDE FOR CENTER FOLDING UNIT ...
Page 572: ...INSTALLATION GUIDE FOR MAILBOX ...
Page 580: ...INSTALLATION GUIDE FOR HOLE PUNCH UNIT ...
Page 592: ...INSTALLATION GUIDE FOR JOB SEPARATOR ...
Page 602: ...INSTALLATION GUIDE FOR FAX System ...
Page 619: ...INSTALLATION GUIDE FOR DT 710 ...
Page 622: ...INSTALLATION GUIDE FOR DUCT UNIT ...
Page 625: ......
Page 626: ......


