


2KR/2KS
1-3-116
(12) Applications
Installing Applications
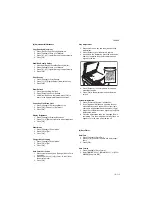
1. Insert the USB memory containing the application
to be installed into the USB memory slot (A1).
2. Press [Add].
3. Select the application to be installed and press
[Install].
You can view detailed information on the selected
application by pressing [Detail].
4. When the confirmation screen appears, press
[Yes].
Installation of the application begins. Depending on
the application being installed, the installation may
take some time. Once the installation ends, the
original screen reappears.
5. To install another application, repeat steps 3 to 4.
6. To remove the USB memory, press [Remove Mem-
ory] and wait until the Removable Memory can be
safely removed message appears. Then remove
the USB memory.
Activating/Deactivating Application Use
1. Select the desired application and press [Activate].
You can view detailed information on the selected
application by pressing [Detail].
2. Enter the license key and press [Official]. Some
applications do not require you to enter an license
key. If the license key entry screen does not
appear, go to Step 3.
To use the application as a trial, press [Trial] without
entering the license key.
3. When the confirmation screen appears, press
[Yes].
Deleting Applications
1. Select the application to be deleted and press
[Delete].
You can view detailed information on the selected
application by pressing [Detail].
2. When the deletion confirmation screen appears,
press [Yes]. The application is deleted.
(13) System Settings
Restarting the System
1. Press [Execute] of Restart.
2. When the confirmation screen appears, press
[Yes]. The system is restarted.
Network Setup
TCP/IP (IPv4) Setup
1. Press [Next] of Network and then [Next] of TCP/IP
Setting.
2. Press [Change] of TCP/IP.
3. Press [On] and then press [OK].
4. Press [Change] of IPv4.
5. Press [DHCP].
6. Press [Off] of DHCP and then press [OK].
7. Press [Bonjour].
8. Press [Off] of Bonjour and then press [OK].
9. Press [IP Address] and enter the address using the
numeric keys.
10. Press [Subnet Mask] and enter the address using
the numeric keys.
11. Press [Default Gateway] and enter the address
using the numeric keys.
12. Check if all the address entries are correct and
press [OK].
13. After changing the setting, restart the system or
turn the machine OFF and then ON again.
TCP/IP (IPv6) Setup
1. Press [Next] of Network and then [Next] of TCP/IP
Setting.
2. Press [Change] of TCP/IP.
3. Press [On] and then press [OK].
4. Press [Next] of IPv6.
5. Press [Change] of IPv6.
6. Press [On].
7. Press [OK].
8. After changing the setting, restart the system or
turn the machine OFF and then ON again.
Manual Setting (IPv6)
1. Press [Next] of Network and then [Next] of TCP/IP
Setting.
2. Press [Next] of IPv6.
3. Press [Next] of Manual Setting.
4. Press [IP Address (Manual)] to enter IP address.
5. Press [OK].
Press [# Keys] of Prefix Length (0 - 128) to enter
the prefix length using the numeric keys.
6. Press [Default Gateway] to enter the default gate-
way.
7. Check that all the entries are correct and Press
[OK].
8. After changing the setting, restart the system or
turn the machine OFF and then ON again.
Summary of Contents for TASKalfa 420i
Page 1: ...SERVICE MANUAL Published in May 2010 842KS113 2KSSM063 Rev 3 TASKalfa 420i TASKalfa 520i ...
Page 4: ...This page is intentionally left blank ...
Page 10: ...This page is intentionally left blank ...
Page 14: ...2KR 2KS This page is intentionally left blank ...
Page 224: ...2KR 2KS 1 4 66 This page is intentionally left blank ...
Page 328: ...2KR 2KS 2 3 30 This page is intentionally left blank ...
Page 371: ...INSTALLATION GUIDE FOR PAPER FEEDER ...
Page 381: ...INSTALLATION GUIDE FOR 3000 SHEETS PAPER FEEDER ...
Page 436: ...INSTALLATION GUIDE FOR CENTER FOLDING UNIT ...
Page 450: ...INSTALLATION GUIDE FOR MAILBOX ...
Page 458: ...INSTALLATION GUIDE FOR HOLE PUNCH UNIT ...
Page 470: ...INSTALLATION GUIDE FOR BUILT IN FINISHER ...
Page 483: ...INSTALLATION GUIDE FOR JOB SEPARATOR ...
Page 491: ...INSTALLATION GUIDE FOR FAX System ...
Page 507: ......
Page 508: ......


