background image

Summary of Contents for TASKalfa 552ci

Page 1: ......

Page 2: ...er Inc PANTONE is the property of Pantone Inc Adobe Acrobat Adobe Reader Photoshop and PostScript are trademarks of Adobe Systems Incorporated All other brand and product names herein are registered trademarks or trademarks of their respective companies Examples of the operations given in this guide support the Windows 7 printing environment Essentially the same operations are used for Microsoft W...

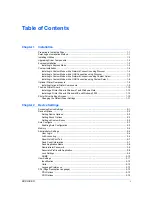
Page 3: ...er Wizard 1 10 Installing a Printer Driver in Windows 7 and Windows Vista 1 10 Installing a Printer Driver in Windows XP and Windows 2000 1 10 Printer Driver Settings Access 1 10 Changing the Default Driver Settings 1 11 Chapter 2 Device Settings Accessing Device Settings 2 1 Device Options 2 2 Setting Device Options 2 2 Setting Punch Options 2 2 Setting up Custom Boxes 2 2 Auto Configure 2 3 Enab...

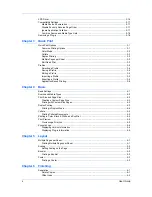
Page 4: ...ased Printing 3 6 Chapter 4 Basic Basic Settings 4 1 Source and Media Types 4 2 Print Size and Page Size 4 2 Creating a Custom Page Size 4 3 Printing with Custom Size Pages 4 3 Duplex Printing 4 3 Printing in Duplex Mode 4 4 Collate 4 4 Printing Collated Documents 4 5 Printing in Color Black White and EcoPrint 4 5 Print Preview 4 5 Previewing a Print Job 4 5 Kyocera Logo 4 6 Displaying Version Inf...

Page 5: ... 7 4 Pattern Scaling 7 4 Inversion Settings 7 5 Optimization Settings 7 5 CIE Optimization 7 5 Image Compression Mode 7 6 CMYK Processing 7 6 Color Mode 7 6 Printer Profile 7 6 Color Correction 7 7 Setting a Default Color Profile 7 8 Adjusting Color 7 9 Adjusting HSL Hue Saturation Lightness 7 10 Adjusting RGB Red Green Blue 7 10 Adjusting Grayscale 7 11 Text and Graphics Effects 7 11 Chapter 8 Pu...

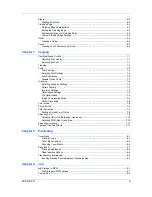
Page 6: ...10 1 Deleting a Prologue Epilogue File 10 2 Assigning a Prologue Epilogue File 10 2 Unassigning a Prologue Epilogue File 10 2 Specifying the Insertion Point 10 2 Watermark 10 3 Adding or Editing a Watermark 10 3 Selecting Pages for Watermark 10 4 Security Watermark 10 5 Adding or Editing a Security Watermark 10 6 Adjusting Security Watermark Calibration 10 7 Selecting Pages for Security Watermark ...

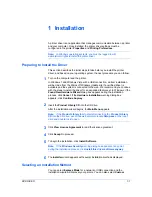
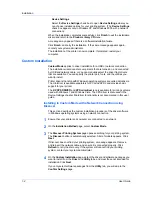
Page 7: ...nded feature set In Windows if the Found New Hardware Wizard dialog box appears during the installation process click Cancel If the Hardware Installation warning dialog box appears click Continue Anyway 2 Insert the Product Library CD into the CD drive After the installation wizard begins the Main Menu appears Note If the Product Library fails to start after inserting the Product Library CD into t...

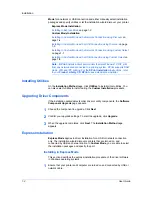
Page 8: ...e installer Installing Utilities On the Installation Method page click Utilities to install printer utilities You can also select utilities to install during the Custom Installation procedure Upgrading Driver Components If the installation wizard detects older driver or utility components the Software Component Upgrade page appears 1 Choose the component to upgrade Click Next 2 Confirm your upgrad...

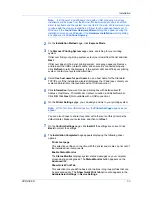
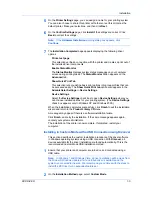
Page 9: ...splays the IP address contact your system administrator Not available with a USB connection 5 Click Information if you want to open a dialog box with details about IP Address Host Name Printer Model Contact Location and Serial Number Click OK Click Next Not available with a USB connection 6 On the Printer Settings page you can assign a name to your printing system Note With a first time USB connec...

Page 10: ... and provides basic support for your printer The KX XPS DRIVER and XPS minidriver is only available for printing systems used with Windows 7 and Windows Vista The XPS driver is discussed in the Device Settings chapter Minidriver functionality is not documented in this user guide Installing in Custom Mode with a Network Connection using Discover This section describes the custom installation proced...

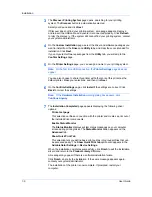
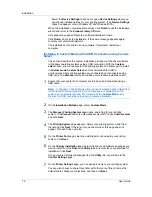
Page 11: ...re you can choose installed options for your printing system The Device Settings check box appears only in Windows XP and Windows 2000 When the installation completes successfully click Finish to exit the installation wizard and return to the Product Library CD menu A message may appear if there is a software installation failure Click Finish and retry the installation If the same message appears ...

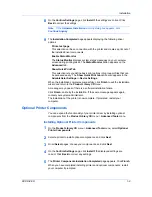
Page 12: ...ick Next 6 On the Confirm Settings page click Install if the settings are correct Click Back to correct the settings Note If the Hardware Installation warning dialog box appears click Continue Anyway 7 The Installation Completed page appears displaying the following driver options Print a test page This selection verifies a connection with the printer and creates a print out of the installed drive...

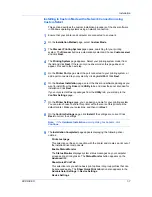
Page 13: ...e not intended for installation Click Next If you only select software packages from the Utility tab you will skip to the Confirm Settings page 7 On the Printer Settings page you can assign a name for your printing system You can also choose to share this printer with others or set this printer as the default printer Make your selections and then click Next 8 On the Confirm Settings page click Ins...

Page 14: ...uter are turned on and connected using a USB cable Note In Windows 7 and Windows Vista a driver installation will be made from the Microsoft Windows Update site if a certified driver is available and the system is connected to the web We recommend the Custom Mode using Discover for USB connections to ensure a reliable installation 2 On the Installation Method page select Custom Mode 3 The Discover...

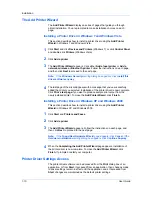
Page 15: ...h to exit the installation wizard and return to the Product Library CD menu A message may appear if there is a software installation failure Click Finish and retry the installation If the same message appears again contact your system administrator The installation of the printer is now complete If prompted restart your computer Optional Printer Components You can expand the functionality of your ...

Page 16: ...ick Print a test page if you want to produce sample print output from the newly installed printer To close the Add Printer Wizard click Finish Installing a Printer Driver in Windows XP and Windows 2000 This section describes how to install a printer driver using the Add Printer Wizard in Windows XP and Windows 2000 1 Click Start and Printers and Faxes 2 Click Add a printer 3 The Add Printer Wizard...

Page 17: ... within each application 1 Click Start and click Devices and Printers Windows 7 or click Control Panel and double click Printers Windows Vista or Printers and Faxes Windows XP 2 Right click on your printing system icon 3 Click Printing Preferences 4 In the Printing Preferences dialog box select the desired features in all tabs 5 Click OK to save the settings KX DRIVER 1 11 ...

Page 18: ...ge and Compatibility settings can also be selected Accessing Device Settings Device Settings can be accessed from Devices and Printers Windows 7 Printers Windows Vista Windows 2000 or Printers and Faxes Windows XP folder 1 Click Start and click Devices and Printers Windows 7 or click Control Panel and double click Printers Windows Vista Windows 2000 or Printers and Faxes Windows XP 2 Right click t...

Page 19: ...t finisher Or if already selected double click the blue text 2 Depending on the punch unit attached select one option None No punch option available in the Finishing tab 2 hole 2 hole option available in the Finishing tab 2 3 hole 2 hole and 3 hole options available in the Finishing tab inches based 2 4 hole 2 hole and 4 hole options available in the Finishing tab metric based 3 Click OK Setting u...

Page 20: ...rk When your computer is connected to the printing system through a TCP IP or WSD port the Auto Configure button appears in Device Settings Auto Configure updates the Device options list Memory and preview images to keep the printer driver consistent with the printing system configuration Not all installed devices are detected by using Auto Configure Before selecting OK in Device Settings check th...

Page 21: ...ttings options In a client server environment this feature is unavailable to a client logged in as a restricted user User Login User login provides job restriction by user in contrast to the Job accounting feature which assigns privileges by division or department A maximum of 1000 login user names and passwords can be registered at the printing system and stored in the printer driver User login a...

Page 22: ... the job The driver searches for a Windows Login user name and adds this name with the Login user name and User login password to the Login user names list in the driver With user permissions the print job is canceled and the user is prompted to contact an administrator to establish printing permissions Login User Name List Click to add delete edit import or export login user names and passwords f...

Page 23: ...istrator Settings dialog box Prompt for account ID Select this option to track the print jobs of a user or group with an account ID as well as prompt for an account ID At the time a print job is sent the user is prompted to enter a Job Accounting ID Prompt for account ID and validate Select this option to prompt for an account ID that is saved in the driver When sending a print job type an account...

Page 24: ...the Printing Preferences dialog box To enable this feature in Device Settings click Administrator Show Quick Print tab With a selected Show Quick Print tab check box the tab appears in the Printing Preferences dialog box When you select the Show Quick Print tab check box you can access additional check boxes Selecting Hide other tabs displays only the Quick Print tab to the user Selecting Set Quic...

Page 25: ...s dialog box 1 In Device Settings Administrator Settings select Password protect administrator settings 2 In the Password dialog box enter a password using at least 4 and no more than 16 characters Reenter the password in Confirm password and click OK Clearing the Administrator Password You can remove the administrator password 1 In Device Settings click Administrator 2 In the Enter Password dialo...

Page 26: ...Flip on short edge options are not locked Clicking the icon in the Quick Print tab or the selection in the Basic tab switches between the flip options Lock Multiple pages per sheet This option locks the current Multiple pages per sheet setting The Pages per sheet option is not locked Lock Profile with Application This option can help standardize print jobs It sets all printing from each installed ...

Page 27: ... a feature and change its settings temporarily click Unlock and type the password SNMP Simple Network Management Protocol SNMP is a set of rules that govern the management of network devices such as printing systems SNMP settings determine the level of security when using the Auto Configure feature and prevent unauthorized printing to the SNMPv3 printing system SNMP settings must be set in the pri...

Page 28: ...s It is more secure than DES Selecting SNMP Settings SNMP settings in the driver must be set to match the settings in the printing system s Command Center 1 In Device Settings Administrator Settings click SNMP Settings 2 Select SNMPv1 v2c or SNMPv3 For SNMPv1 v2c type the Read community name and Write community name to a maximum of 32 characters and click OK For SNMPv3 type a User name to a maximu...

Page 29: ...or the following settings Custom page size setting in the Page Sizes dialog box in the Basic tab Spacing setting in the Watermark Add and Edit dialog boxes in the Advanced tab Poster settings in the Layout tab Gutter settings in the Finishing tab Selecting a Unit of Measurement You can select a unit for displaying measurements in the user interface 1 In Device Settings User Settings select Inches ...

Page 30: ...L Options The PDL options available in the PDL Settings dialog box are accessed in Device Settings PCL XL The most recent version of HP PCL and PCL 6 This PDL includes PCL 5c features PCL XL lacks backward compatibility with earlier PCL versions though it is enhanced over PCL 5c in these areas Reduced file size Better print speed Faster return to application PCL 5c Fully compatible with earlier PC...

Page 31: ...n prevents the printing system from outputting any page that contains no data or that has at most one space character Selecting this option can save paper and result in comparatively faster printing times This feature is for regular printing not for booklet duplex or multiple pages per sheet KPDL Settings Allow data passthrough This option reduces errors when printing complex jobs from application...

Page 32: ...l Print and save settings Security Settings This option lets you select an encryption level and create passwords for the generated PDF file The following security options are available Encryption Encryption provides password protection so that a document cannot be opened or altered by unauthorized users 40 Bit This encryption option provides low level security for a PDF document It is supported fo...

Page 33: ...e This option lets you use the default name and add a date and time stamp each time the document is saved Default file directory This option lets you browse to a location to save your PDF Printing and Saving to PDF You can print a document and save it to Adobe PDF if you have installed the Output to PDF plug in 1 In Device Settings PDL Settings in the Select PDL list select PDF 2 Click Settings 3 ...

Page 34: ...er then the alignment of media source values maintains support without the need to change the macros Setting Media Sources Use the Driver Info utility Utility Driver Info DrvInfo exe to compare the source values for all installed drivers If the values for a given media source differ between printer drivers you can reassign an enumerated value to create a match between the drivers 1 In Device Setti...

Page 35: ...labeled Source In the combined list Media types are listed first followed by cassettes and MP tray Creating a Combined Source List You can combine the Source and Media type lists in the Basic tab to make one Source list 1 In Device Settings Compatibility Settings select Combine source and media type lists 2 Click OK in the Compatibility Settings and Properties dialog boxes You can restore all the ...

Page 36: ...rator Quick Print Options You can set one or more print options on the Quick Print tab You can create your own customized view of print options with Edit Quick Print And you can also select from profiles that have been set with predefined options for frequently run print jobs Common Printing Options The upper section of the Quick Print tab has several icons that represent the most common options f...

Page 37: ...rinting can also be found in the Basic and Imaging tabs and Multiple pages per sheet in the Layout tab The Profiles options are accessed from Printing Preferences Color Mode Color mode lets you choose full color printing CMYK or printing with black toner only When the selection appears in color all color settings in the driver are enabled Color cannot be chosen if Black White mode is selected in t...

Page 38: ... Staple is added to the Quick Print tab but a finishing device is not installed the icon appears as unavailable Once the device is installed and selected in Device Settings the icon becomes active Note An administrator can hide the Edit Quick Print button by selecting Hide Edit Quick Print control in Device Settings Administrator Settings The Edit Quick Print button is unavailable when the driver ...

Page 39: ...gs made in Device Settings cannot be saved to a profile Selecting a Profile You can select and apply a profile from the Quick Print tab or from the Profiles dialog box Quick Print tab 1 From Profiles select a profile 2 Click Apply The side panel displays the options for that profile using an icon and a summary 3 Click OK Profiles dialog box 1 In any of the Printing Preferences tabs click Profiles ...

Page 40: ...elect the profile to be edited and click Edit 3 Any of the three options can be edited name icon and description Click OK to save the edited changes The newly edited profile appears in the Profiles dialog box 4 Click Apply to activate the selected profile to the current print job or click OK to close the dialog box Importing a Profile The Import button lets you import a copy of a profile from othe...

Page 41: ...e feature must be turned on in the Administrator Settings dialog box accessed from Device Settings A maximum of 25 associations can be created in the Application Based Printing dialog box accessed from the Profiles dialog box In a client server environment clients can view details about server associations but cannot change settings or select another profile Adding an Association Once profiles hav...

Page 42: ...x 2 Click Application to open the Application Based Printing dialog box 3 Select an association to edit and click Edit to open the Edit Association dialog box 4 Change desired settings under Association name File name or Profile 5 Click OK in the Edit Association and Application Based Printing dialog boxes to save the revised association User Guide 3 7 ...

Page 43: ...fies the cassette or tray that the printing system draws paper from Unless you are using a custom paper type you can leave it set to Auto source selection Media type This setting selects the Source based on the types of media that are specified in the printing system In general you can leave it set to Unspecified Destination This setting specifies which output tray is used for the print job output...

Page 44: ...job Media type instructs the printer to search for the type of paper or media that is requested by the application or the printer driver The choices shown may change depending on the selection in Source If Auto media selection is selected then the printer searches for another tray or cassette using the same media Transparencies labels and envelopes must be supplied from the MP tray Ensure the pape...

Page 45: ...g and reducing the sizes of prints To delete a custom page size from the Page Sizes dialog box select the name of the custom page size and click Delete Printing with Custom Size Pages You can print on custom sized pages 1 Load custom sized paper into the MP tray 2 In the Basic tab select the name of your custom page size in the Print Size list 3 Click OK to return to the Print dialog box 4 Click O...

Page 46: ... With Collate selected the first time the print job is sent to the printing system the data is rendered as page images in the printing system s memory The remaining job copies are printed from the stored data This avoids the extra processing involved in sending every copy from the computer to the printing system With Collate selected the driver prints the complete job set by set With Collate clear...

Page 47: ...t output appear lighter The following color modes are available Color CMYK This mode prints full four color text and graphics Black White This mode prints with black toner only constraining all color settings EcoPrint makes the entire image text and graphics appear lighter in the printed job EcoPrint does not increase print speed Color Black White and EcoPrint also appear in the Quick Print tab an...

Page 48: ... number and driver plug in information Displaying Version Information In Device Settings or any tab click Kyocera logo Version to view the following driver information File Name Version Description Date Manufacturer Comments To view copyright information click Legal Notices Click OK to close the driver information dialog boxes Displaying Plug in Information A plug in integrates with the printer dr...

Page 49: ... increased You can set the arrangement of the pages from the Layout tab as well as print borders around each of the pages When Multiple pages per sheet is selected Poster and Scaling are unavailable Printing Multiple Pages per Sheet You can print several pages on a single sheet of paper 1 In the Layout tab select Multiple Pages per sheet 2 In Pages per sheet select the number of pages to print on ...

Page 50: ...g box 4 Click OK to start printing Booklet Booklet prints a two page layout on both sides of each sheet of paper You can fold and bind the booklet in the center Folded booklets are half the size of the selected paper For example if you select Letter in Basic Paper Print size the printed output can be folded into a 5 5 x 8 5 inch size booklet When Booklet is selected Multiple pages per sheet Poster...

Page 51: ...cument data on adjoining sheets Poster appearance is improved when the edges overlap slightly Select the check box then type or select a value between 0 00 and 1 20 inches 0 0 and 30 4 mm This option reduces the final poster size slightly Print crop marks This selection prints a border at the edges of each poster sheet You can crop each sheet on the border before assembling the sheets This option ...

Page 52: ...n any combination These options ensure a precise assembly of the pages to create the poster 4 In Print format select one of the options for a finished print format 5 Click OK to return to the Print dialog box 6 Click OK to start printing User Guide 5 4 ...

Page 53: ...a print job at a right angle in the output tray This feature requires the following Paper size selections are limited to Letter A4 16K or B5 JIS The selected paper size must be loaded into two paper sources one horizontally and one vertically The print job must contain multiple pages and be specified to print multiple copies Rotating Copies You can stack each copy of a print job at right angles in...

Page 54: ...ck OK to start printing Staple The Staple feature lets you create stapled document sets You must first select a finisher under Device Settings Device options Selecting the Staple feature makes Separation and Transparency interleaving unavailable The maximum number of sheets depends upon the finisher model and the selected Page size or Media type The Gutter feature lets you increase the top and lef...

Page 55: ... of an A3 page or the short edge of a letter size page is aligned with the short edge of a legal size page Finishing edge can be used with or without the staple and punch feature You can choose the position of staples in a document composed of mixed page sizes In contrast if you are printing a mixed page size document without using Finishing edge staple positions depend on the paper size settings ...

Page 56: ...he current selected Finishing edge with Staple and Punch positions if selected When the Staple option is used the Position selection determines where staples are placed Use this image to verify your selections for Finishing edge and Staple Custom Finishing Edge Settings The illustrations in the Custom Finishing Edge Settings dialog box help you visualize the page alignments Select the one setting ...

Page 57: ...age to fit 4 Click OK to return to the Print dialog box 5 Click OK to start printing Punch The Punch feature places punched holes along the edge of the printed pages so that the pages can be bound together or placed in a binder Punch is enabled when a 3000 sheet finisher is selected in Device options in Device Settings When you select the check box for a finishing device shown in blue in the Devic...

Page 58: ...Finishing 2 hole or 3 hole inches based 2 hole or 4 hole metric based 3 Click OK to return to the Print dialog box 4 Click OK to start printing User Guide 6 6 ...

Page 59: ...ting Print Quality In the Imaging tab select a Print quality from the list High quality Select this setting to print at the highest print quality Custom Custom lets you choose a setting for EcoPrint Selecting Custom without EcoPrint results in a default setting to the highest print quality Selecting EcoPrint EcoPrint changes toner saturation in the printed job making the entire print image includi...

Page 60: ... file containing a set of glyphs visual representations of textual elements characters or symbols Common terms for fonts are Bitmap fonts define each character as a pattern of pixels the smallest resolvable rectangular areas of an image Such fonts are not easily scalable and distort when reduced or enlarged Outline fonts in contrast to bitmap fonts are defined as a set of mathematical lines and cu...

Page 61: ...ypeface name This function increases print speed and efficiency It is useful for changing a font used throughout a large document by replacing the old font with the desired font Note GDI compatible mode does not support Substitute with device fonts Selecting Font Settings You can specify how TrueType fonts are sent to the printing system 1 In Imaging Font Settings select one of the methods for sen...

Page 62: ...TT TrueType icon remains Disabling Device Fonts You can prevent substitution of device fonts for TrueType fonts 1 In Imaging Font Settings select the Disable device fonts check box 2 Click OK to save your settings Graphics Graphics are pictorial representations of information Graphics can be functional charts diagrams or artistic drawings photographs Graphics Settings let you select options for yo...

Page 63: ... white areas of the image Mirror print This setting prints the page content backwards as it would appear in a mirror image Optimization Settings Optimization is a process or methodology of improving a printing system s function or effectiveness In the Imaging tab click Graphics to open the Graphics settings dialog box and access the Optimization settings The settings are available when KPDL is sel...

Page 64: ... received from the application This feature is available if KPDL is selected in the PDL Settings dialog box In Imaging Graphics Settings select from the following CMYK processing options Printer settings Select this option to use the settings currently on the device Printer settings is set as default if Custom box is selected in the Job tab 3 channels Select this option if the driver receives RGB ...

Page 65: ... select a custom color table that was previously downloaded to your printing system All other Printer profile options use the default color table Advanced This option achieves greater consistency in color reproduction among various devices It compensates for the different color spaces of color printing systems Selecting and applying a set of profiles is called a color profile Select to open the Co...

Page 66: ... for color saturation best for graphs This option optimizes for color saturation by adjusting hue to preserve the vividness of pure colors Select for graphs or charts containing solid colors 3 Click OK again to close the Color Correction dialog box Setting a Default Color Profile When using the ICM system corrected feature in the Color Correction dialog box you can set a color profile for your pri...

Page 67: ...lick Add 7 In the Color Management tab select Manual 8 Select the desired color profile from the list and click Set as Default 9 Click OK Adjusting Color Color Adjustment enables you to customize the two color spaces in the driver and save up to three custom groups Color space changes can be made to red green blue RGB levels or to hue saturation and lightness HSL 1 In the Imaging tab in Color mode...

Page 68: ...r to the right or left to increase or decrease the value between 10 and 10 The upper color bar indicates the adjustment made when the slider is dragged or a value is typed in the box The horizontal brackets around the upper color bar show the range of the color bar affected by the adjustment The lower color bar provides a reference point to the color bar above it for Hue Adjustment 3 Drag each sli...

Page 69: ...ht grays lighter and dark grays darker A low contrast setting increases the grayscale spectrum making light grays darker and dark grays lighter You can also change contrast by entering a numeric value in the text box at the right The highest contrast setting is 100 the lowest is 100 Zero is the default mid level setting Adjusting contrast is useful if graphic images are printing too gray or too bl...

Page 70: ...ver settings in the Publishing tab Print on both sides must be selected in the Basic tab or Quick Print tab in order to print using the Front inside or Back outside options Although Cover mode and Page insert can be used simultaneously they cannot be used with Transparency interleaving Printing Covers You can choose cover pages for printing 1 In the Publishing tab select Cover mode 2 Select Front ...

Page 71: ...n Type Front Inserts a blank front cover Front Prints on the outside surface of the front cover Front outside Front Prints on the inside surface of the front cover Front inside Prints on the outside and inside Front surfaces of the front cover Front outside Front inside continued KX DRIVER 8 2 ...

Page 72: ...rface of the Front and back front cover and inserts a blank back cover Front outside Prints on the inside surface of the front Front and back cover and inserts a blank back cover Front inside Prints on both sides of the front cover Front and back and inserts a blank back cover Front outside Front inside continued User Guide 8 3 ...

Page 73: ...urface of the Front and back back cover and inserts a blank front cover Back outside Prints on both sides of the back cover Front and back and inserts a blank front cover Back inside Back outside Prints on both sides of the front and Front and back back covers Front outside Front inside Back inside Back outside Choosing Cover Media You can select media for the cover KX DRIVER 8 4 ...

Page 74: ...e used simultaneously they cannot be used with Transparency interleaving Printing Page Inserts Several ways are available to arrange page inserts you can print on one or both sides or insert a blank sheet 1 In Publishing Page insert select the option corresponding to your desired page arrangement 2 To print on both the front and back of the inserted page select the Print onto front and Print onto ...

Page 75: ...nts on the back side of the inserted page Print onto back Prints on both sides of the inserted Page insert page Print onto front Print onto back Transparency Interleaving Transparency interleaving inserts a backing sheet between printed transparencies The backing sheet also known as an interleaf helps keep transparencies clean and prevents them from clinging together This feature is KX DRIVER 8 6 ...

Page 76: ...ity Settings Media type does not appear Instead in the Source list select Auto Transparency 2 Click Publishing Transparency interleaving 3 To print the transparency content on the inserted pages also select the Print onto backing check box 4 In the Media for backing list select the Media type of the backing sheet or the Source paper cassette When you choose the media type a source cassette matchin...

Page 77: ...system s operation panel and printing of sensitive documents can be restricted to approved users E MPS is a multitier solution that provides advanced print management directly from the desktop By storing a job in the printing system you can print it from the operation panel without sending it again from the computer To use the Job storage e MPS features you must set a user name in the User Setting...

Page 78: ...elect Custom box 2 Click Settings 3 Select a Custom Box Settings option Select Use specific box number and type the box number and password Select Prompt for box number and click OK When the Custom Box dialog box appears type a box number If a password was set type the password Select Display box number list and click OK When the Custom Box dialog box appears select a box from the list If a passwo...

Page 79: ...ame and job name To prevent this select Use job name date and time under Overwrite job name Printing a Quick Copy Job With a hard disk installed Quick copy lets you print a document and save it in the printing system until the job is manually deleted or the printing system is turned off 1 In the Job tab select Job storage e MPS 2 Select Quick copy 3 Click OK in all dialog boxes Proof and Hold Proo...

Page 80: ... the Job storage feature When sending a sensitive document to the printing system a user must type a four digit Access code which is attached to the print job along with the Job name and User name The job is not printed until a user enters the Access code at the printing system s operation panel After the job is printed it is removed from printing system memory The number of Private print jobs tha...

Page 81: ... job name To prevent this select Use job name date and time under Overwrite job name Storing a Job Storage Job Job storage lets you store a document permanently in printing system memory without printing and gives you the option to protect it with an access code This job remains on the hard disk until it is manually deleted 1 In the Job tab click Job storage e MPS 2 Click Job storage 3 In the Acce...

Page 82: ...m Selecting a Job Name You must select a job name to use with Job storage e MPS features so that you can find your job in job lists on the printing system s operation panel The selected job name is saved with the print job when the job is sent to printing system memory 1 In the Job tab select Job storage e MPS 2 Under Job name select a name Application defined This option uses the name of the appl...

Page 83: ...t For example a Prologue Epilogue command file may contain a macro that places a graphic object such as a logo at the top of a letterhead document Selecting a Prologue Epilogue File A Prologue Epilogue file must be available on your computer before it can be added to a print job To create this file use a text editor like Windows Notepad In Advanced Prologue Epilogue select a Prologue Epilogue file...

Page 84: ...ue select a Prologue Epilogue file name from the list 2 Under Insertion Point select a place to insert the Prologue Epilogue file Unassigning a Prologue Epilogue File If you designate a Prologue Epilogue file as unassigned you are removing it from the print job It remains in the list Unassigned selections are useful when the list contains several Prologue Epilogue files and you want to use some bu...

Page 85: ...End of the page is selected this option can be selected to insert the command file into specified pages In the text box type individual page numbers separated by commas or a page range separated by a hyphen For example if you type 2 in the text box the command file is inserted only into page 2 If you type 1 3 5 12 the command file is inserted into page 1 page 3 and pages 5 through 12 If the Pages ...

Page 86: ...n by clicking the position button at the bottom of the preview area Click and hold as you drag the pointer to move the watermark image 8 Select the Angle of the watermark with one of the following options Diagonal default This option places the watermark text at the default angle on the page User defined This option lets you type a degree value for the angle An angle is measured in degrees from 0 ...

Page 87: ...d not be photocopied or to distinguish between original prints and photocopies Six standard security watermarks are available as text or image and you can create custom security watermark text A notable feature of Security Watermark is the Document guard pattern which prevents the document from being photocopied scanned faxed or printed from memory If a scan fax or print from memory is attempted t...

Page 88: ... All other options display date time or other job information that is obtained from the computer or printer driver when the job is printed 5 Select the font size style and angle of the text 6 Select Print as footer also if you want the first available line of security watermark text to be printed at the bottom of the page Select the page position from the list This option is useful because the sec...

Page 89: ...d click Edit 2 After all security watermark options are selected in the Add Security Watermark or Edit Security Watermark dialog box click Adjust Calibration 3 Under Pattern shading and Text contrast select initial options Light Normal Dark Select the shading density of the background pattern Contrast 1 9 Select the level of contrast against the background pattern from lightest to darkest These se...

Page 90: ...ument with multiple colors or photographs In the Color Optimizer dialog box an eyedropper tool can be dragged into the on screen document to select the color or RGB values can be entered if you know them A printed Color Optimizer Table lets you see 121 color variations on paper and select your variation Hue and Lightness settings are adjusted in the driver according to the selected variation You c...

Page 91: ...tion of the custom setting in the Description box to a maximum of 30 characters The description only appears in the Color Optimizer dialog box 9 Click OK or Apply to save the settings Configuring Status Monitor The Status Monitor displays printing system status messages in the lower right corner of the window during printing You can start a status monitor for each supported printing system More th...

Page 92: ...atus Monitor sound notification and appearance choices www kyoceramita com Opens a web browser to the Kyocera Mita home page Exit Closes the Status Monitor Setting Status Monitor Preferences You can configure printing system alerts with accompanying sound or speech in the Status Monitor Preferences dialog box You can also change the appearance of the Status Monitor image 1 Right click the Status M...

Page 93: ...es dialog box click Apply to save your settings click OK to save your settings and close the dialog box or click Cancel to close the dialog box without saving any settings EMF Spooling EMF Enhanced MetaFile is a spool file format used in printing by the Microsoft Windows operating system When a print job is sent from an application it is transferred to the spool file The application writes to and ...

Page 94: ...le client profile check box to select profiles from the server to apply to print jobs created by the driver Server profiles are read only Select the Enable client profile check box for using custom profiles locally in the driver User Guide 10 12 ...

Page 95: ...g feature that lets you choose how to apply color processing to your print job depending on how color data is received from the application Color optimizer Advanced tab plug in feature that accurately matches a single color in a print job The documents for printing can contain only one color besides black such as a letterhead or a company logo Color Optimizer does not work for a document with mult...

Page 96: ...eating a larger printable file Gutter Blank space on the left side or top of a printed page that can be increased by scaling down text and graphics This supports stapling and hole punching When used with Duplex printing the enlarged blank space lines up evenly on both sides of the sheet The larger blank space is created by shifting the printable area to the right or down as much as one inch 25 4 m...

Page 97: ...capabilities Poster Layout feature for printing a document in a larger size than the maximum supported by the printer so the cumulative sheets can be assembled as a poster Use this feature to print a document in a large eye catching poster format up to 25 times larger than the original document size PRESCRIBE An internal printer language that embeds commands into specified locations in a print job...

Page 98: ...rly invisible when printed The security watermark appears only when the printed page is photocopied A security watermark can be used to help protect against unauthorized reproduction of documents or simply to differentiate original documents from photocopies SNMP Simple Network Management Protocol The standard TCP IP protocol for managing IP network devices including printing devices SNMP settings...

Page 99: ......

Page 100: ......

Page 101: ...Rev 2010 10 ...

Reviews: